The making of the
Aircraft Carrier PC
|
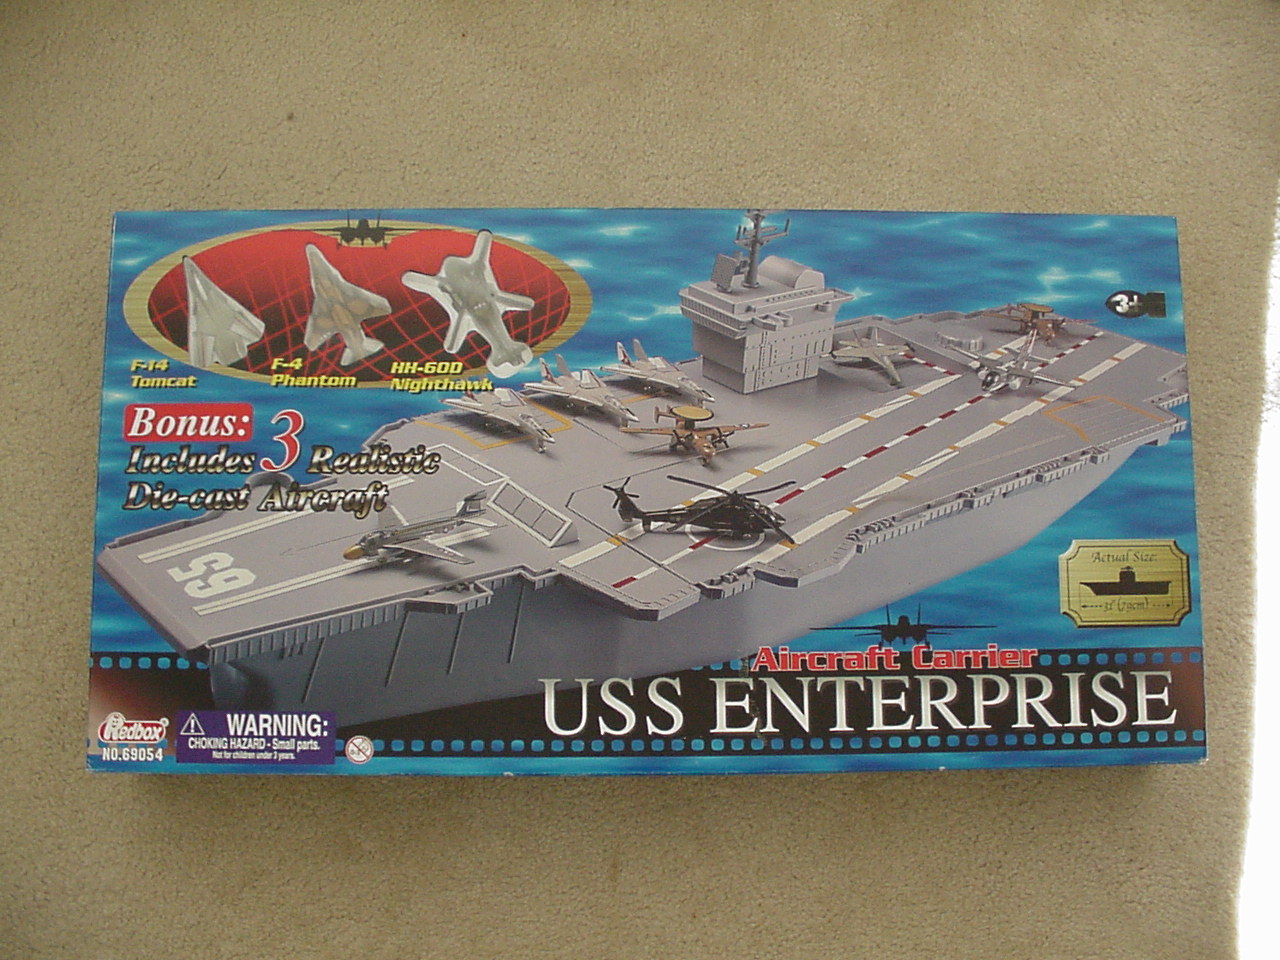
So I was walking around a toy store waiting for my wife to finish looking
at the Barbie toys one day (before anyone asks, yes, she is more than eight
years old and I love the fact that she is still into toys) and I saw this
cool looking toy of the aircraft carrier Enterprise. I looked closer at it,
and thought that it might be big enough to hold one of those great mini-itx
motherboards from VIA. Since the toy was only $19.99, I decided to get it.
Upon getting home, I ripped open the box and confirmed that the width of the toy at it's largest area was a little over 17cm wide. The mini-itx would be a tight fit, but it would work. I could see it all now - runway lights, planes on the deck, control switches on the command center - it looked great. All that was left was the planning, cutting, building, painting, and tweaking. No problem! In reality, it was a 4 month project that was more difficult than many would claim just by looking at the mod. Let's go over the individual pieces and show what it took to create the mod. |
Mouse
|
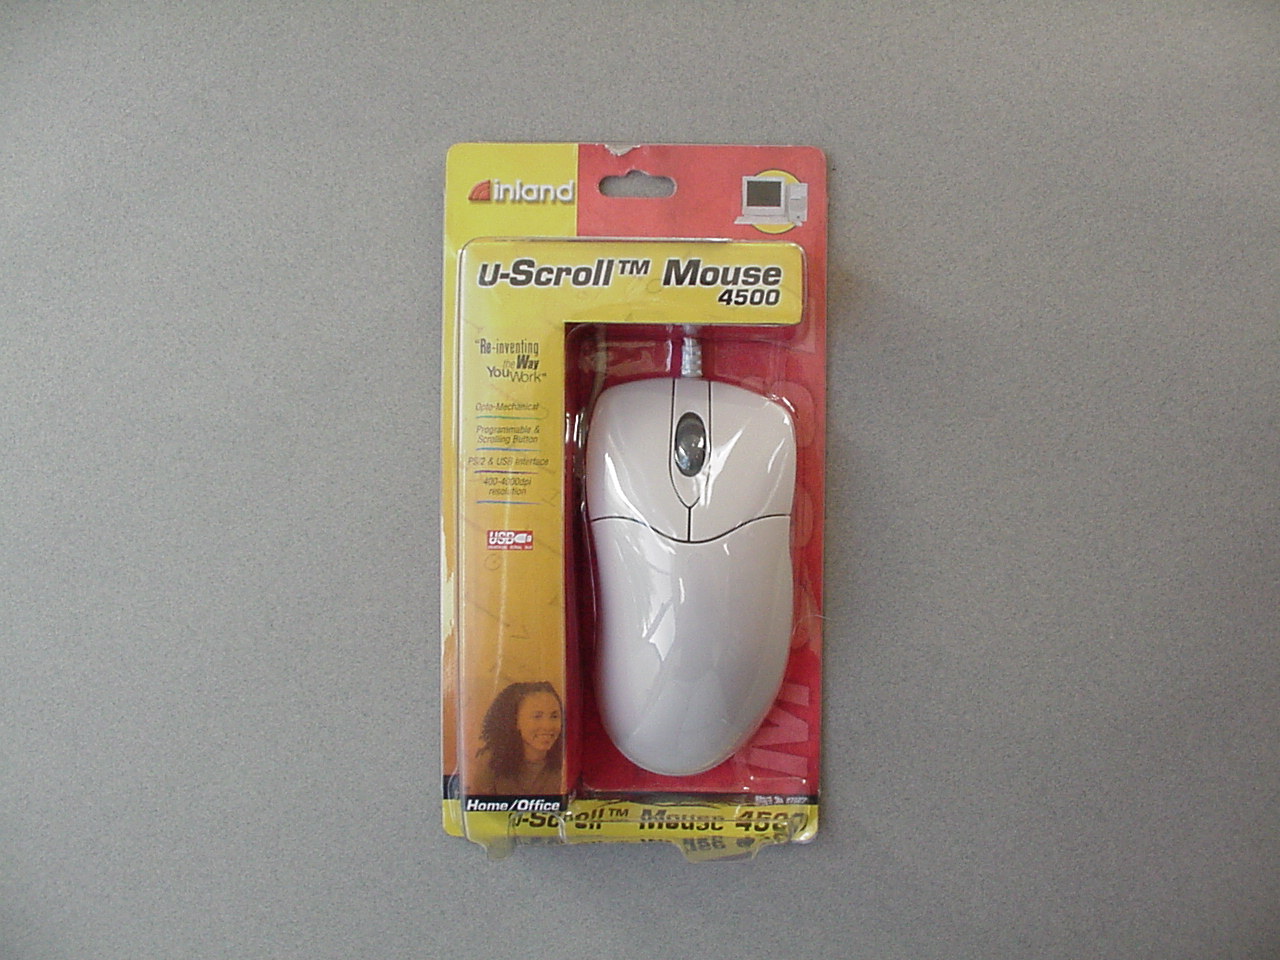
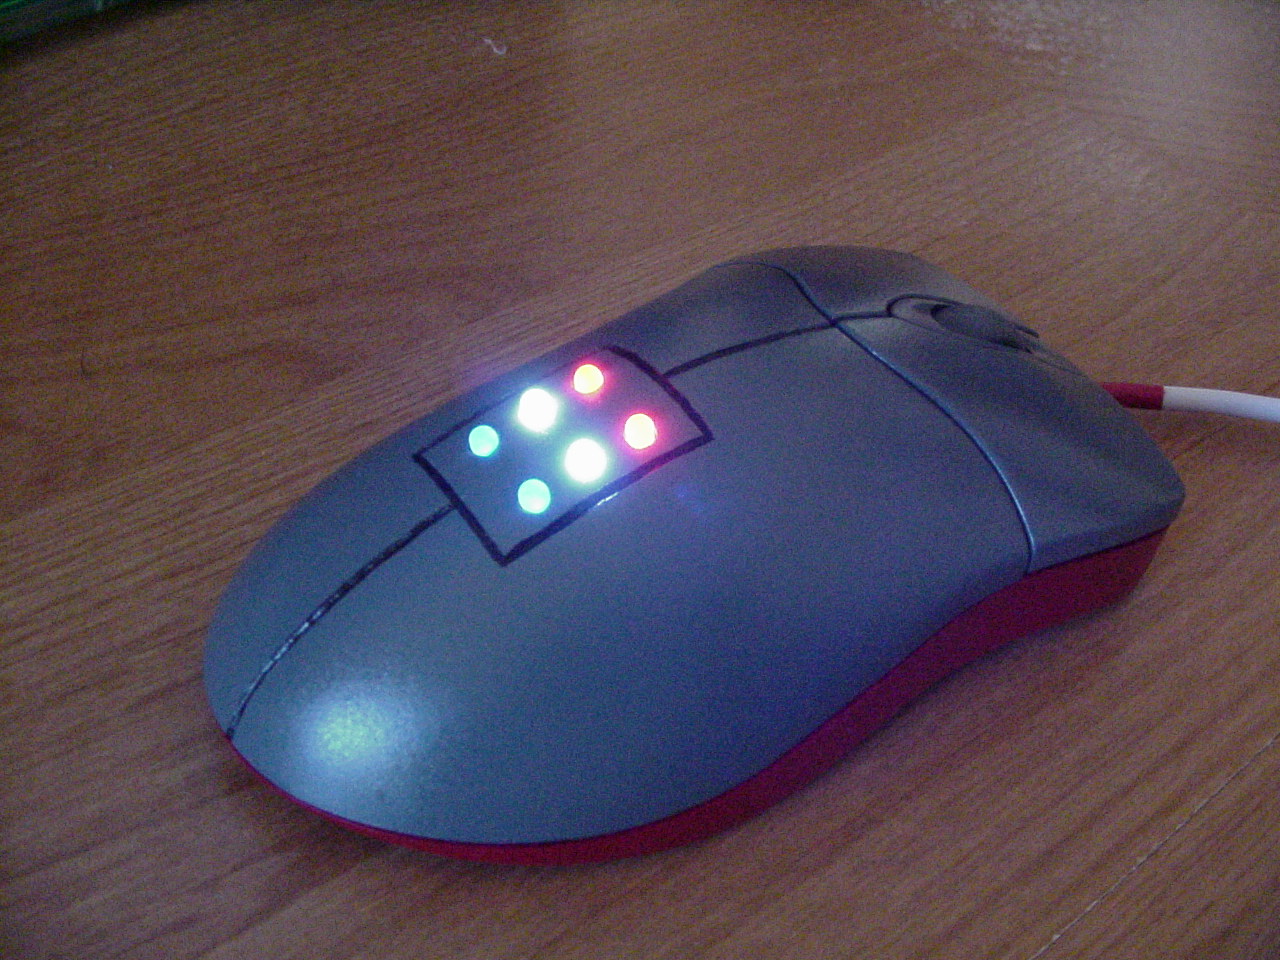
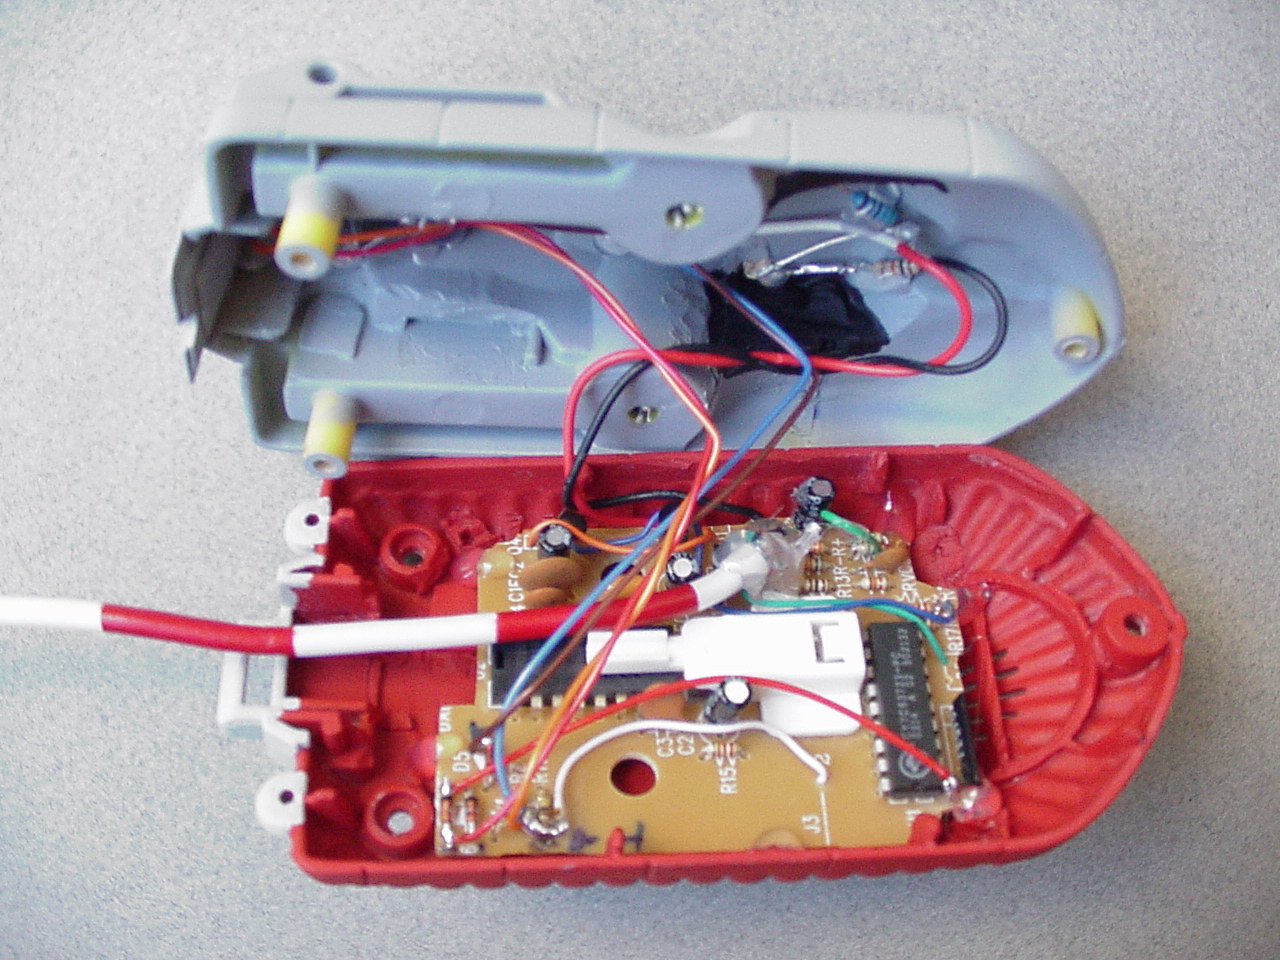
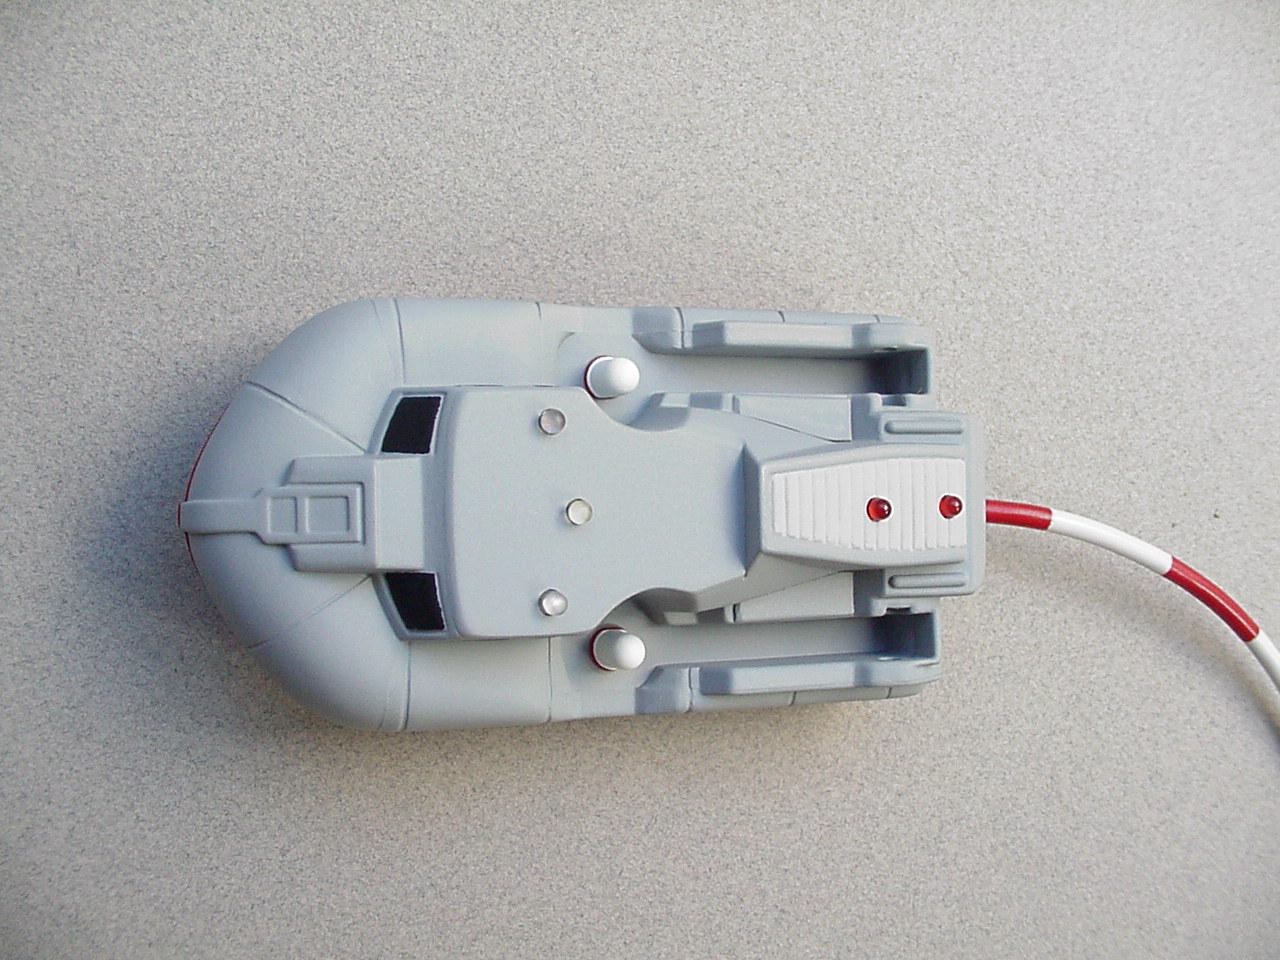
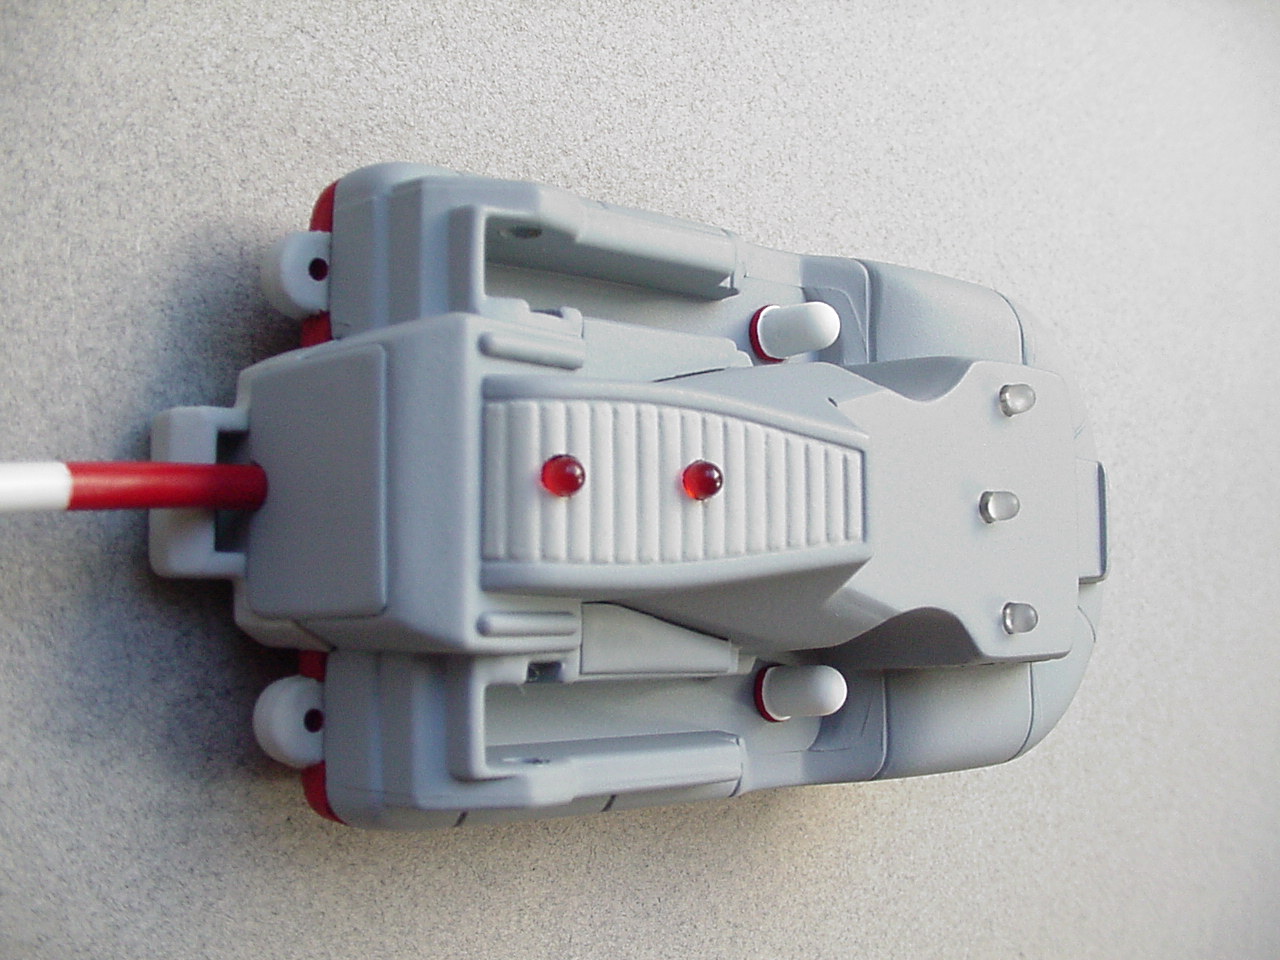
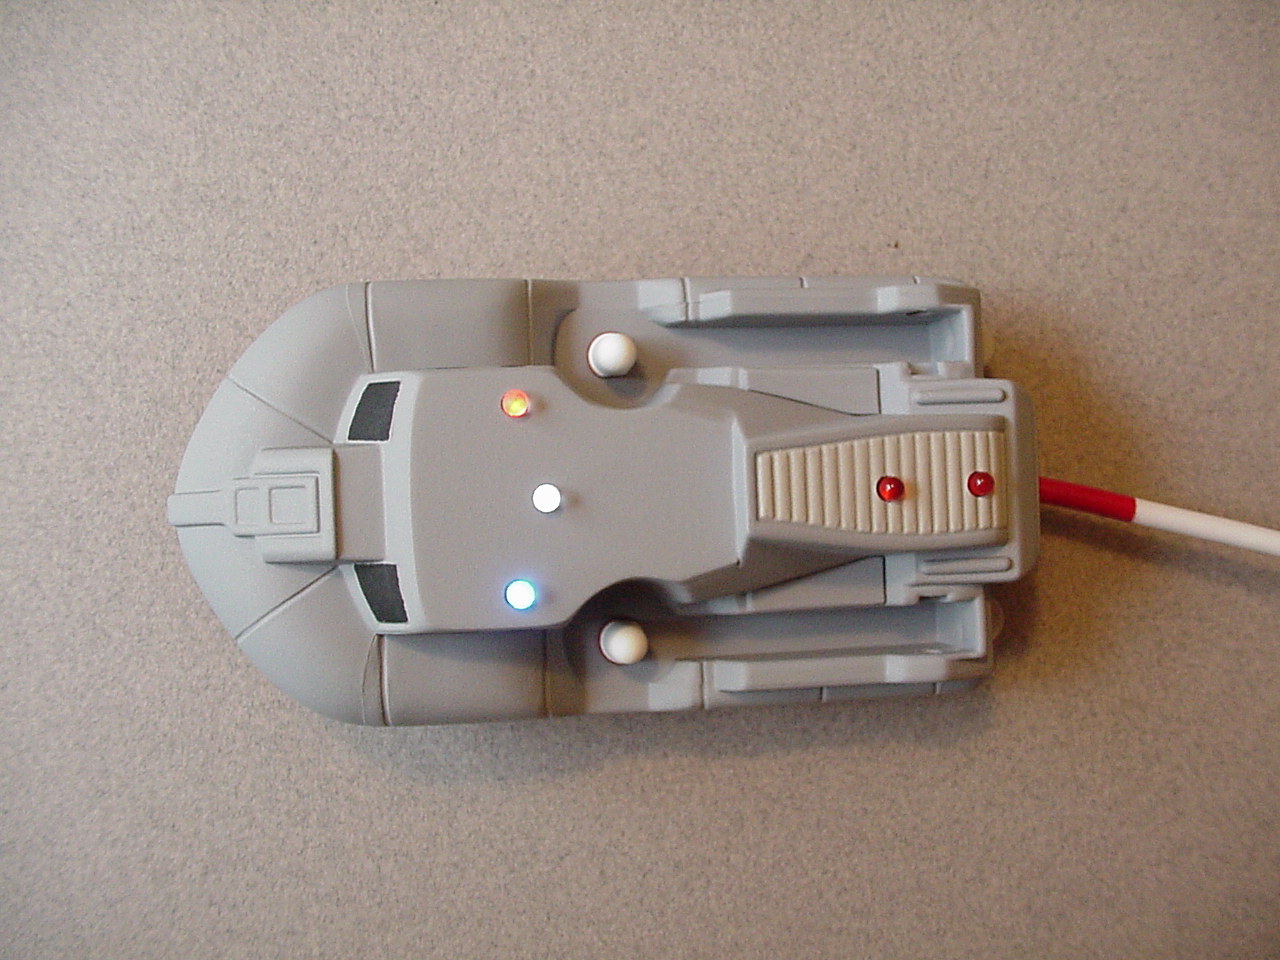
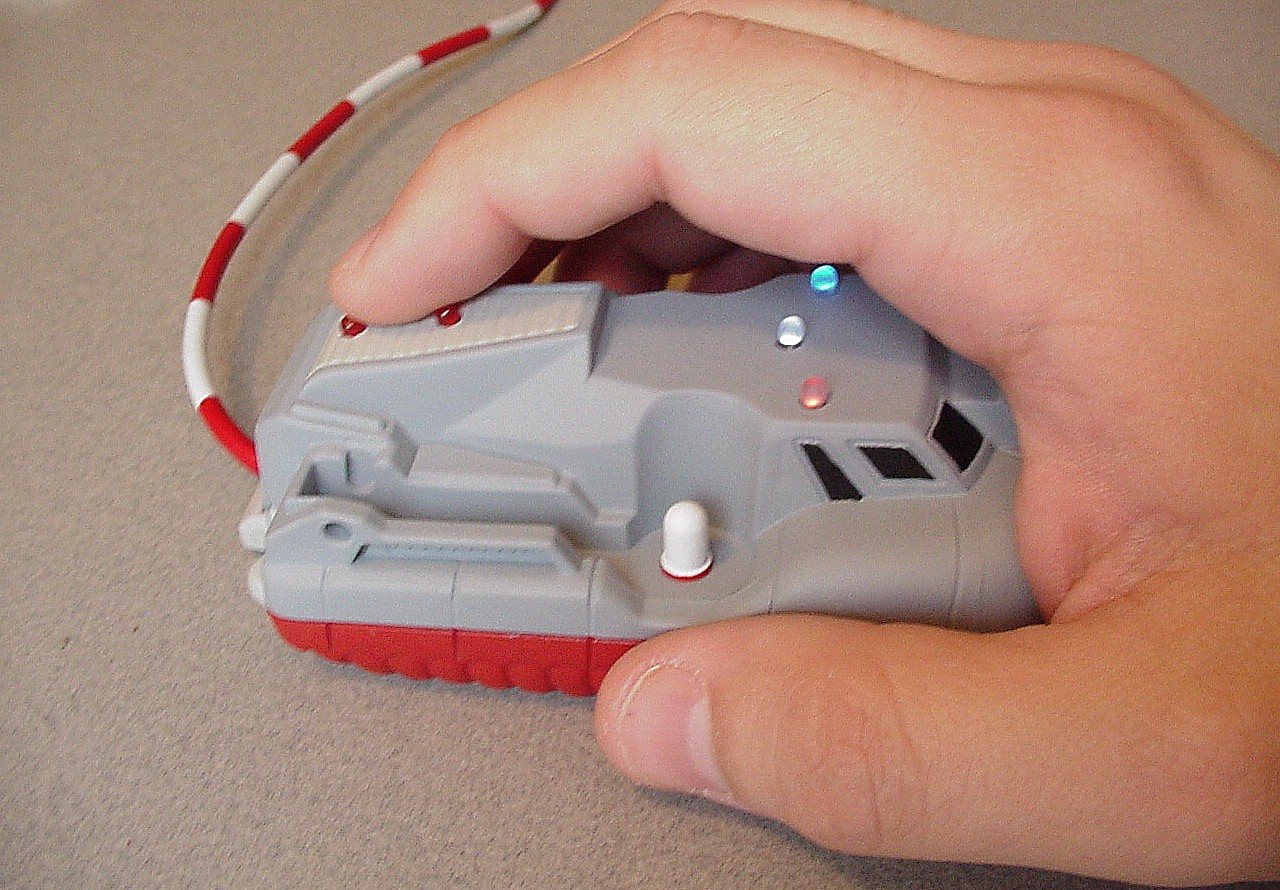
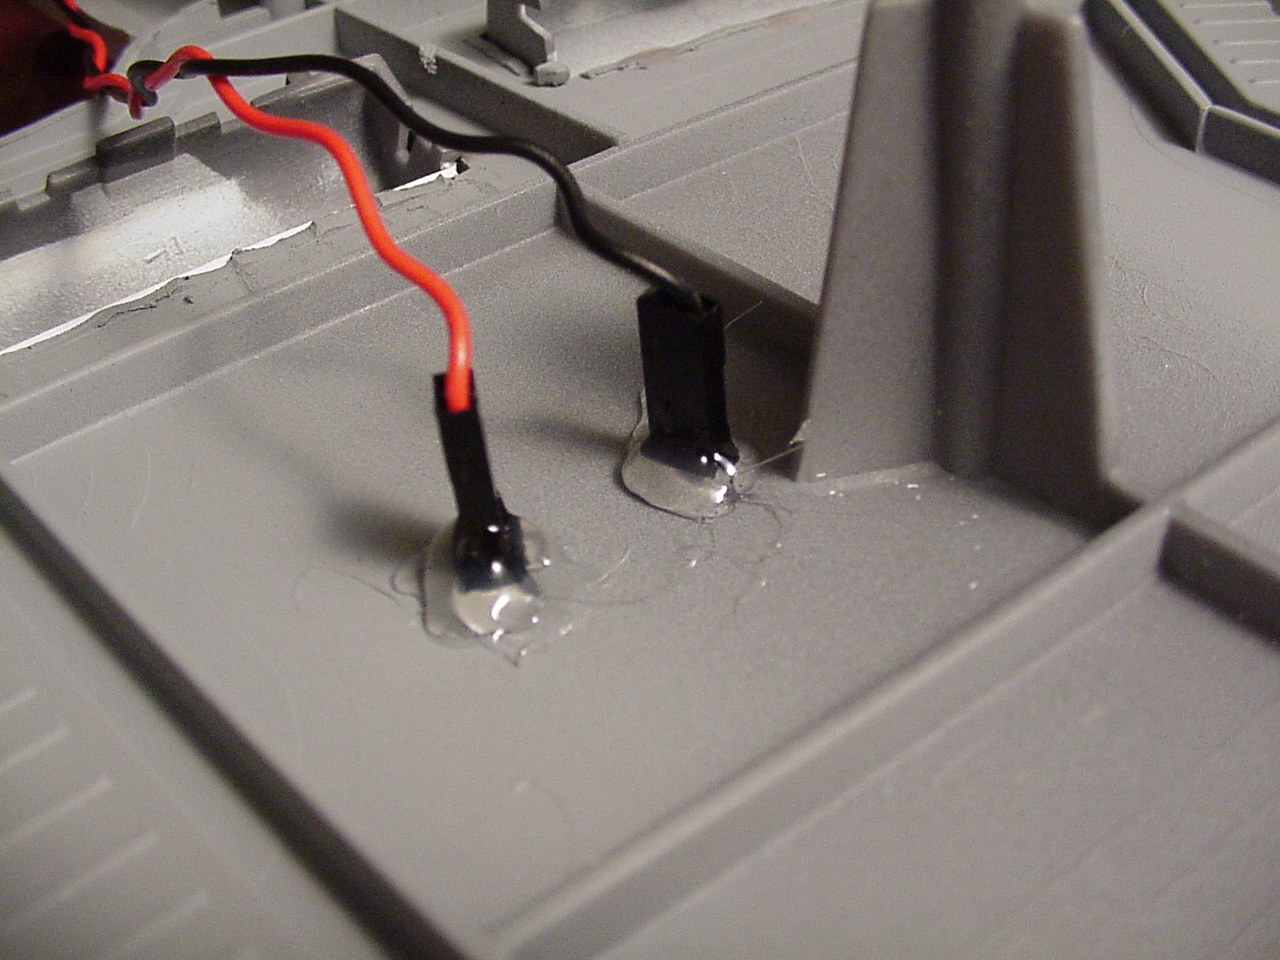
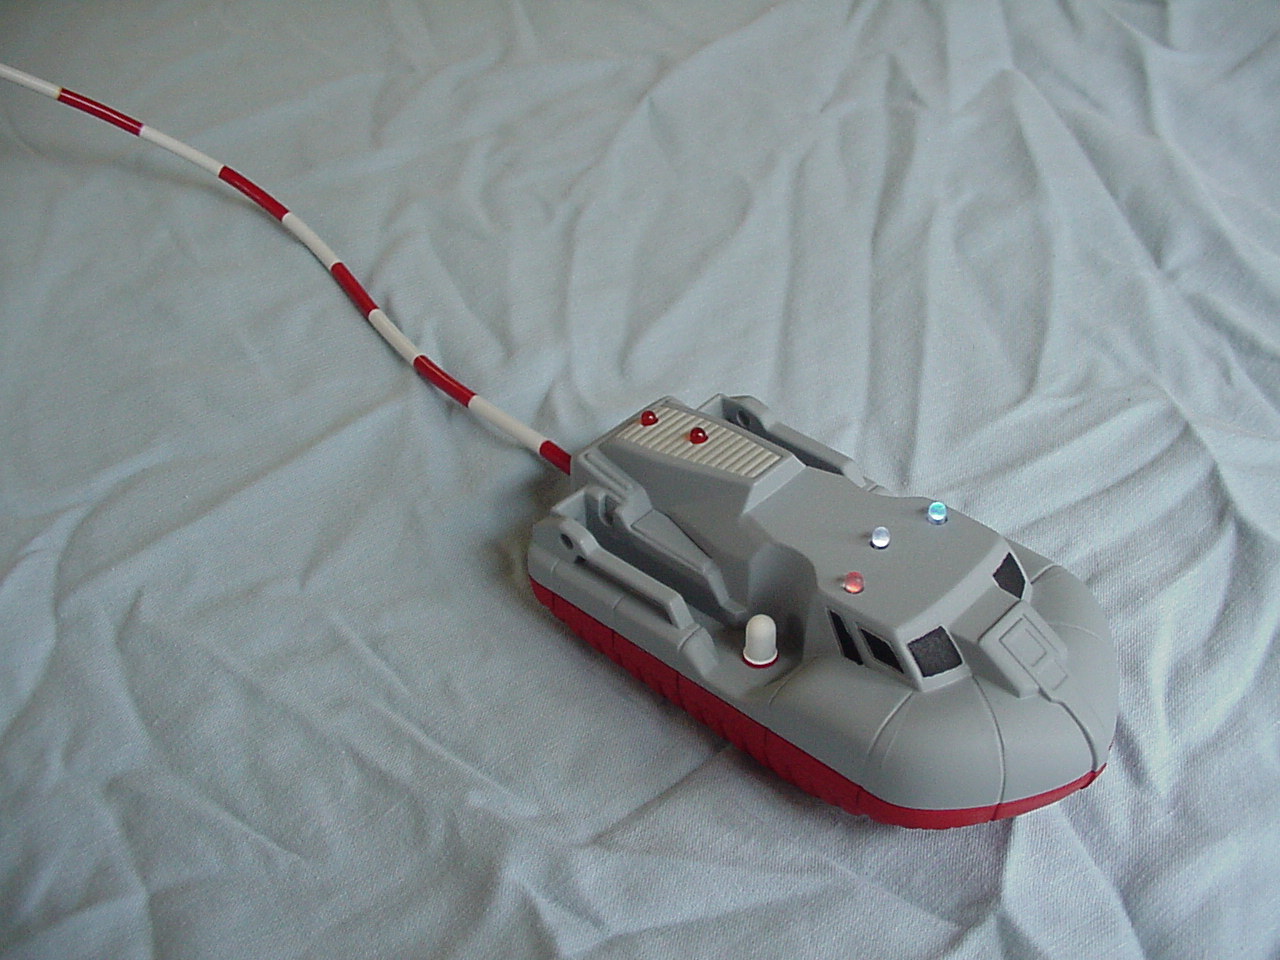
At first, I bought a cheap ball mouse with the idea to paint it like a ship.
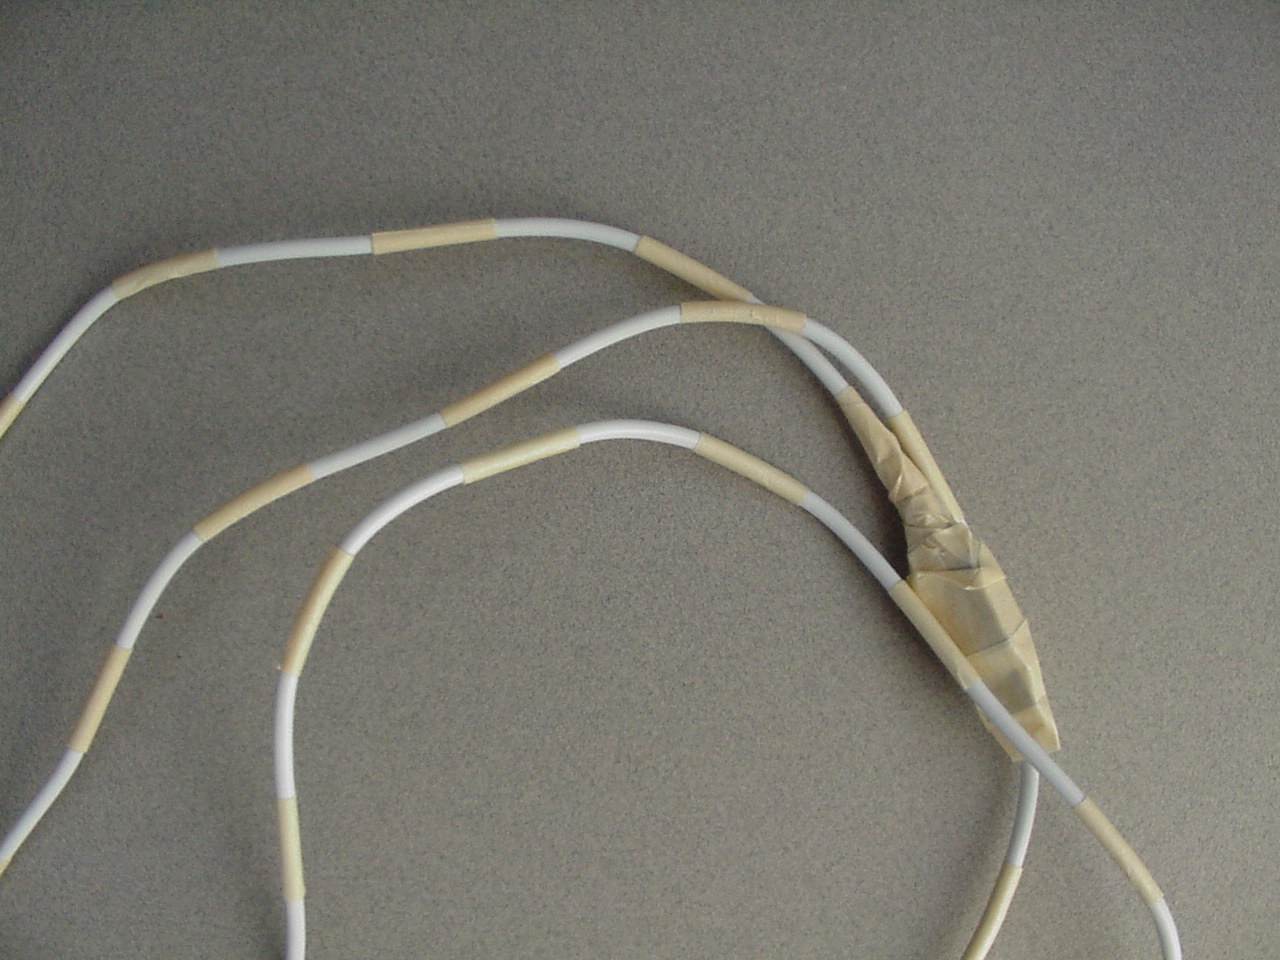
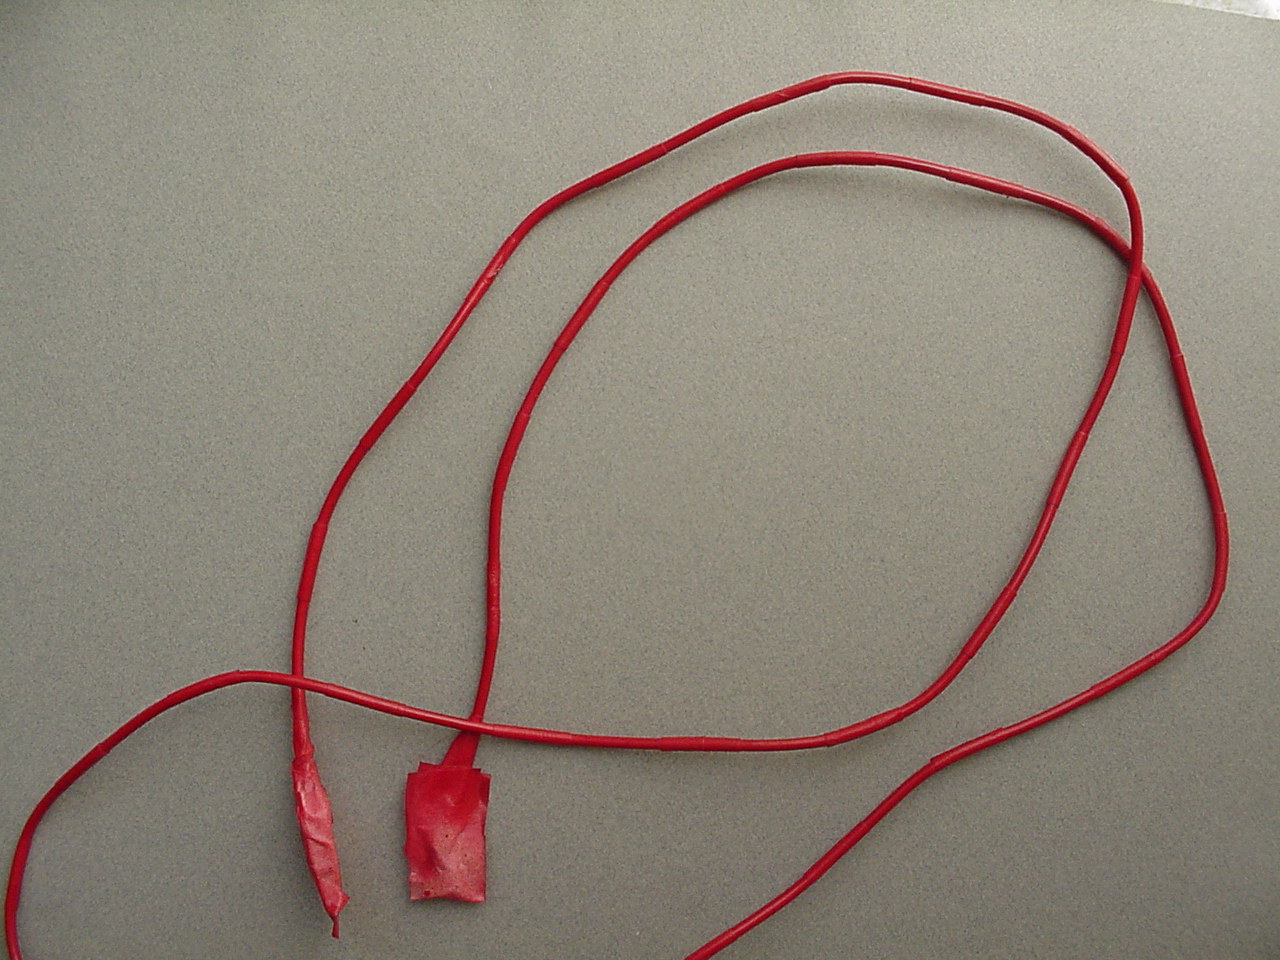
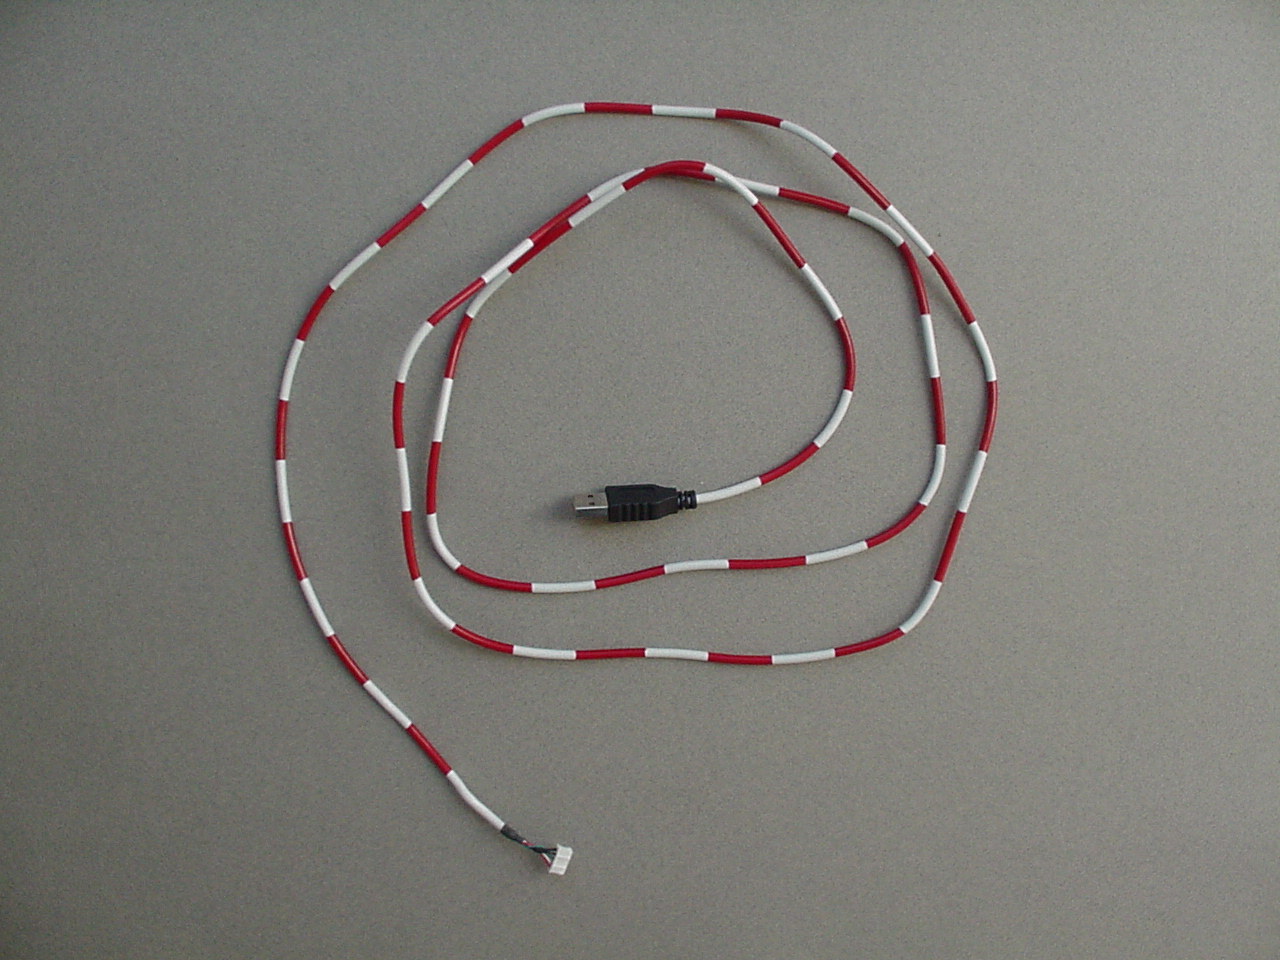
I would have a "missile bay" on the back by placing rows of red/white/blue
LEDs. I also masked off alternating sections of the white mouse cable and
dyed the cable as well, leaving some sort of a warning tether.
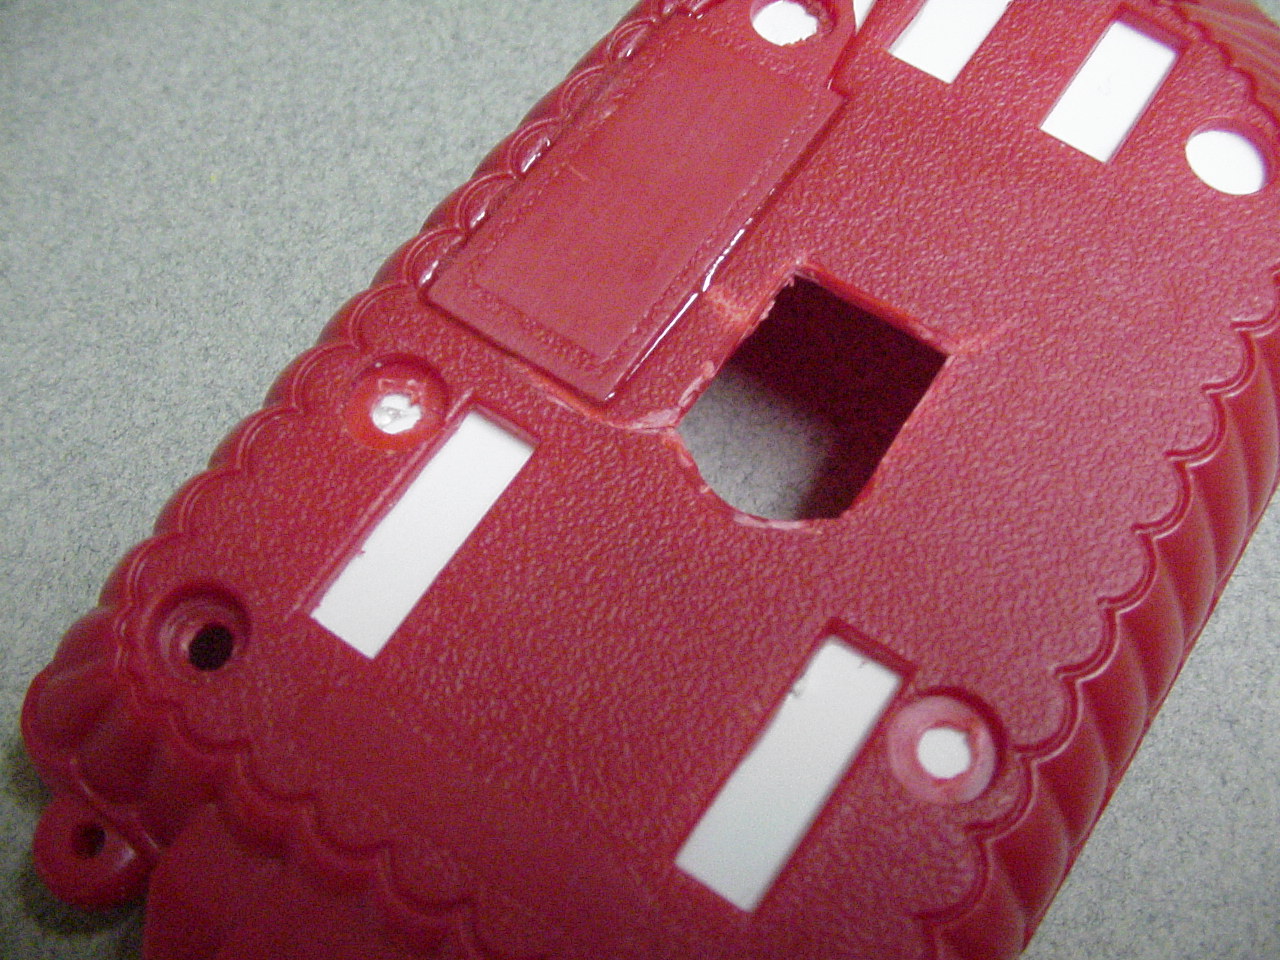
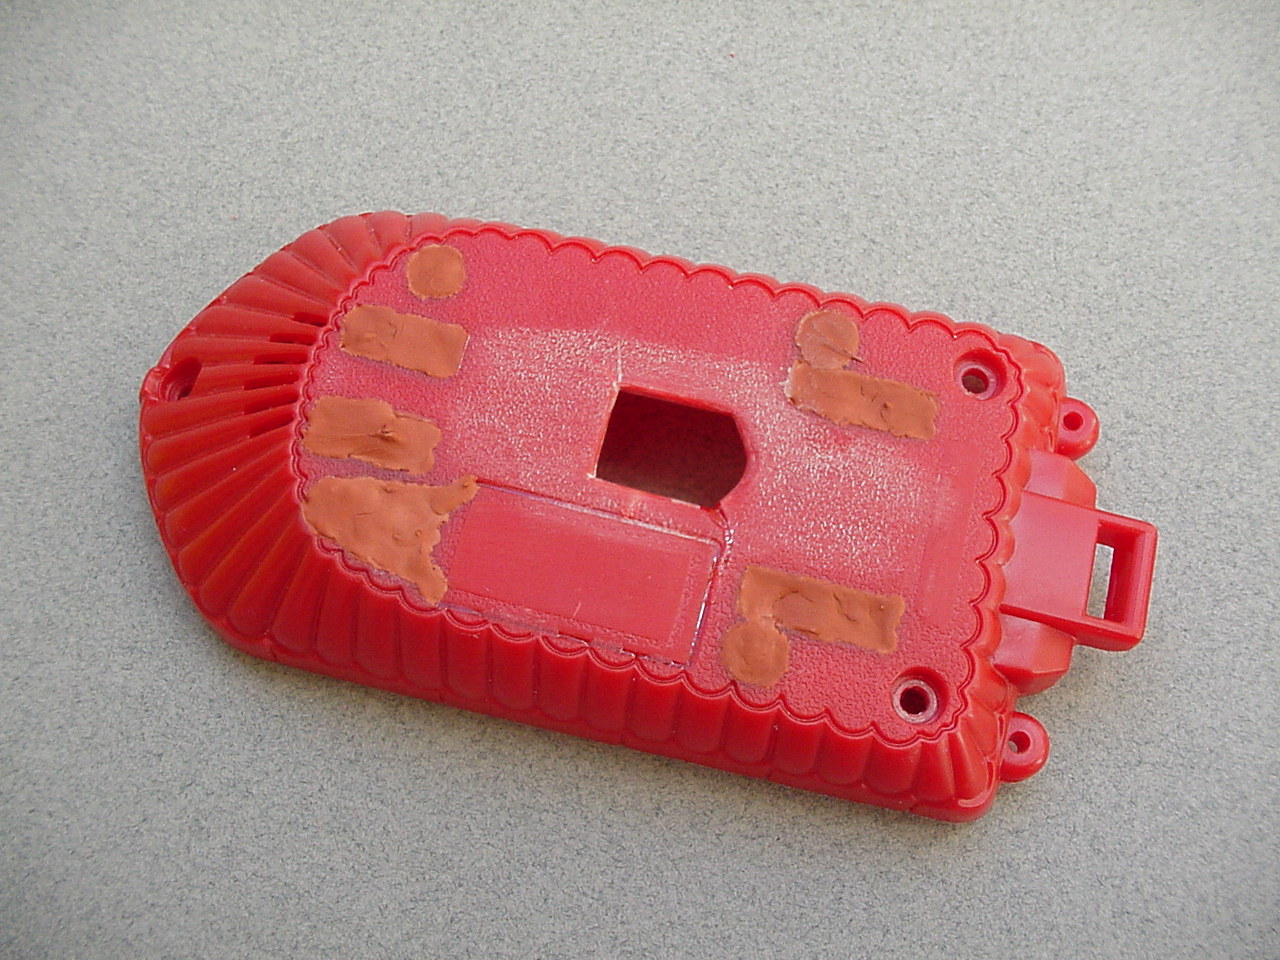
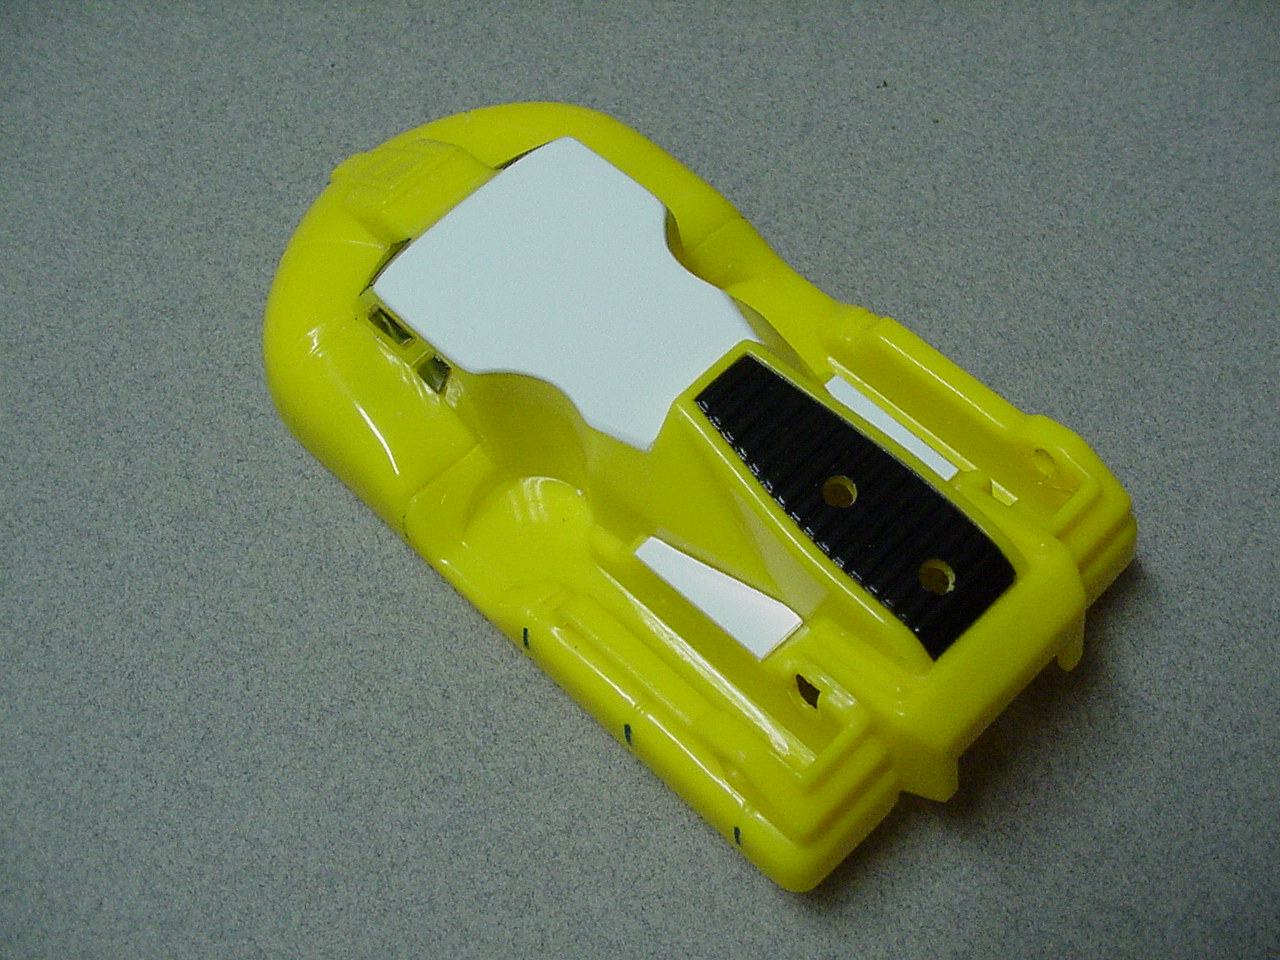
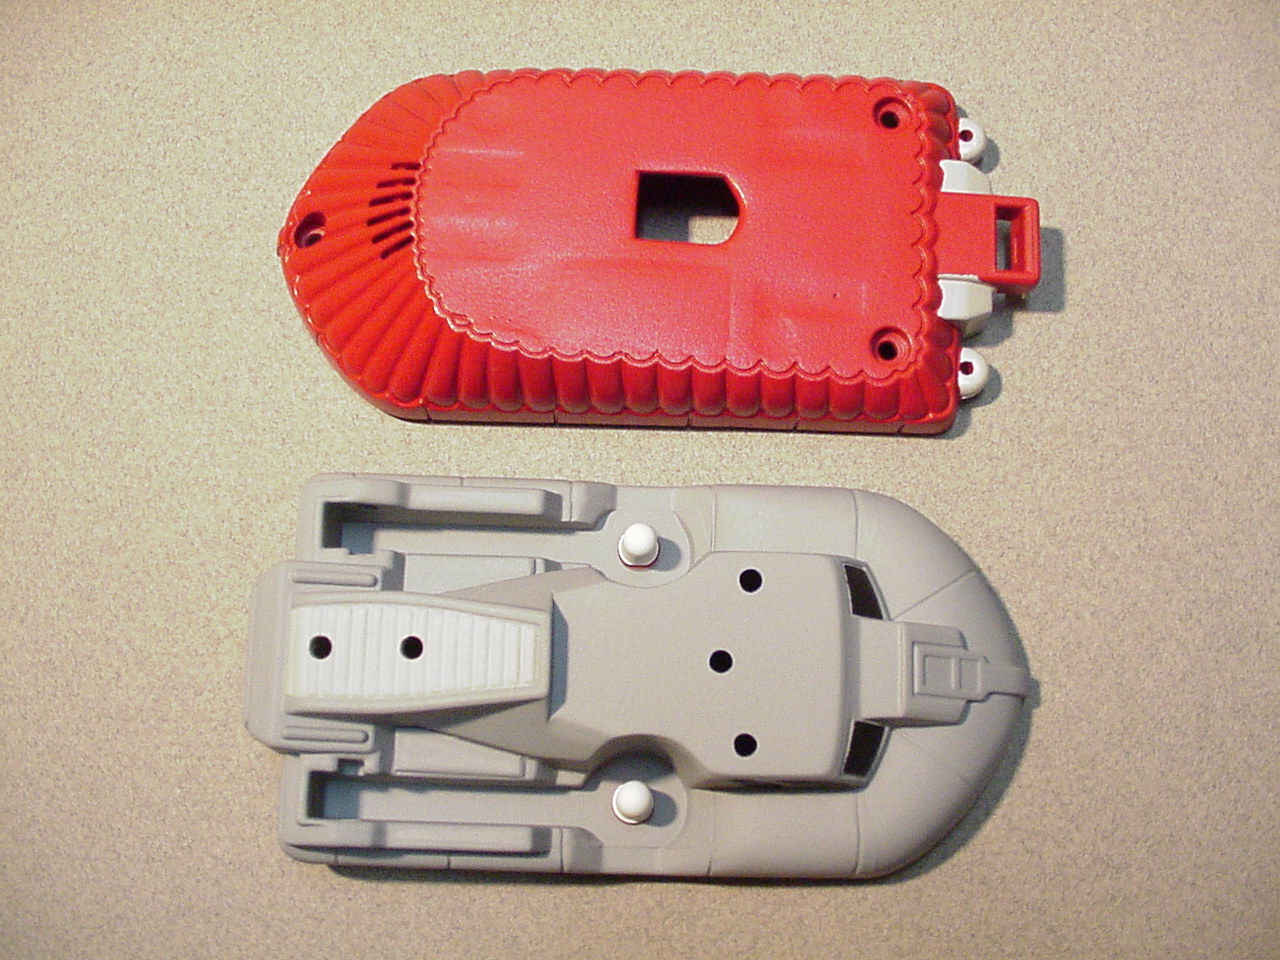
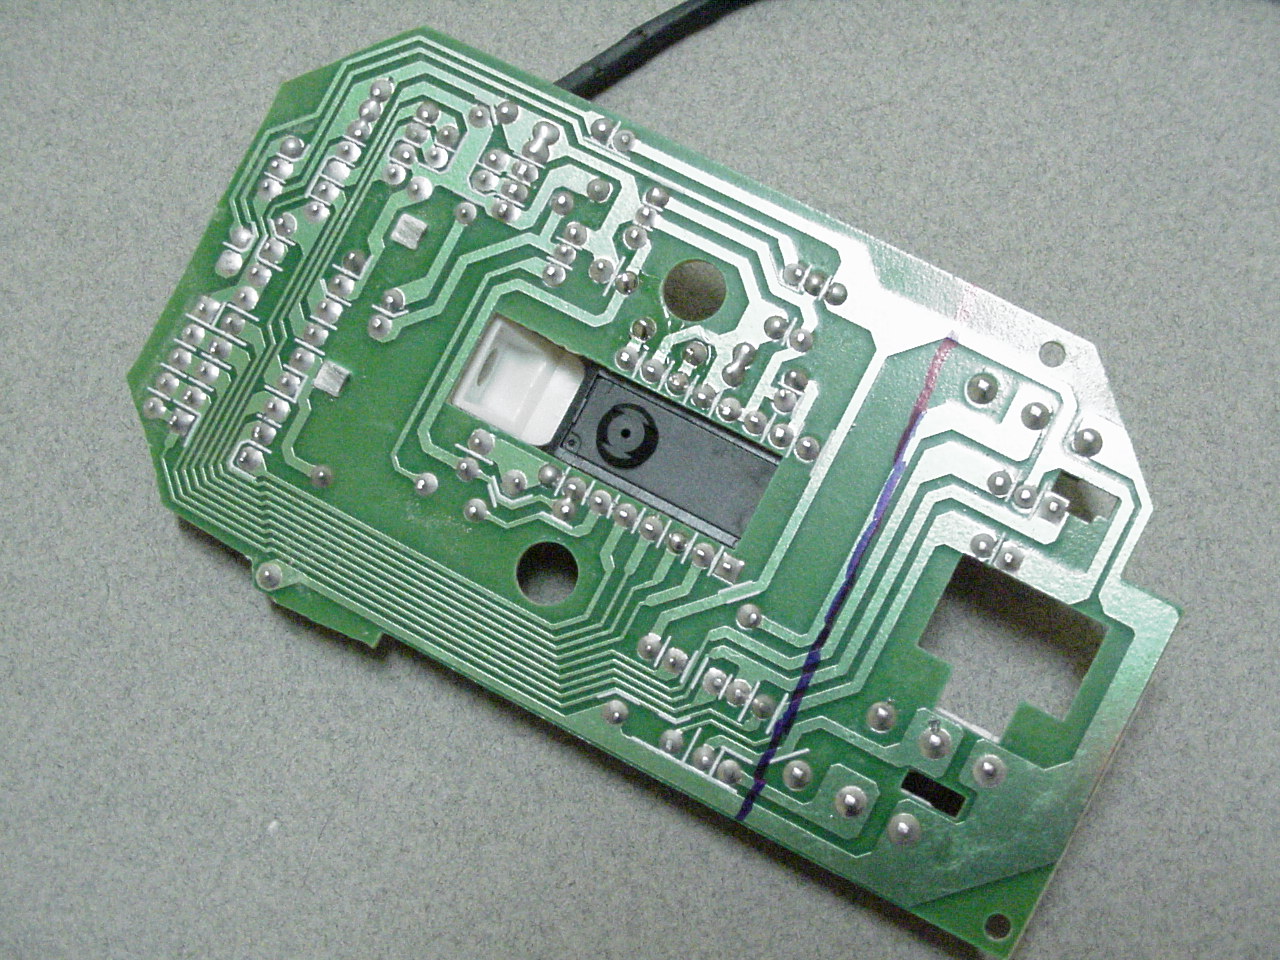
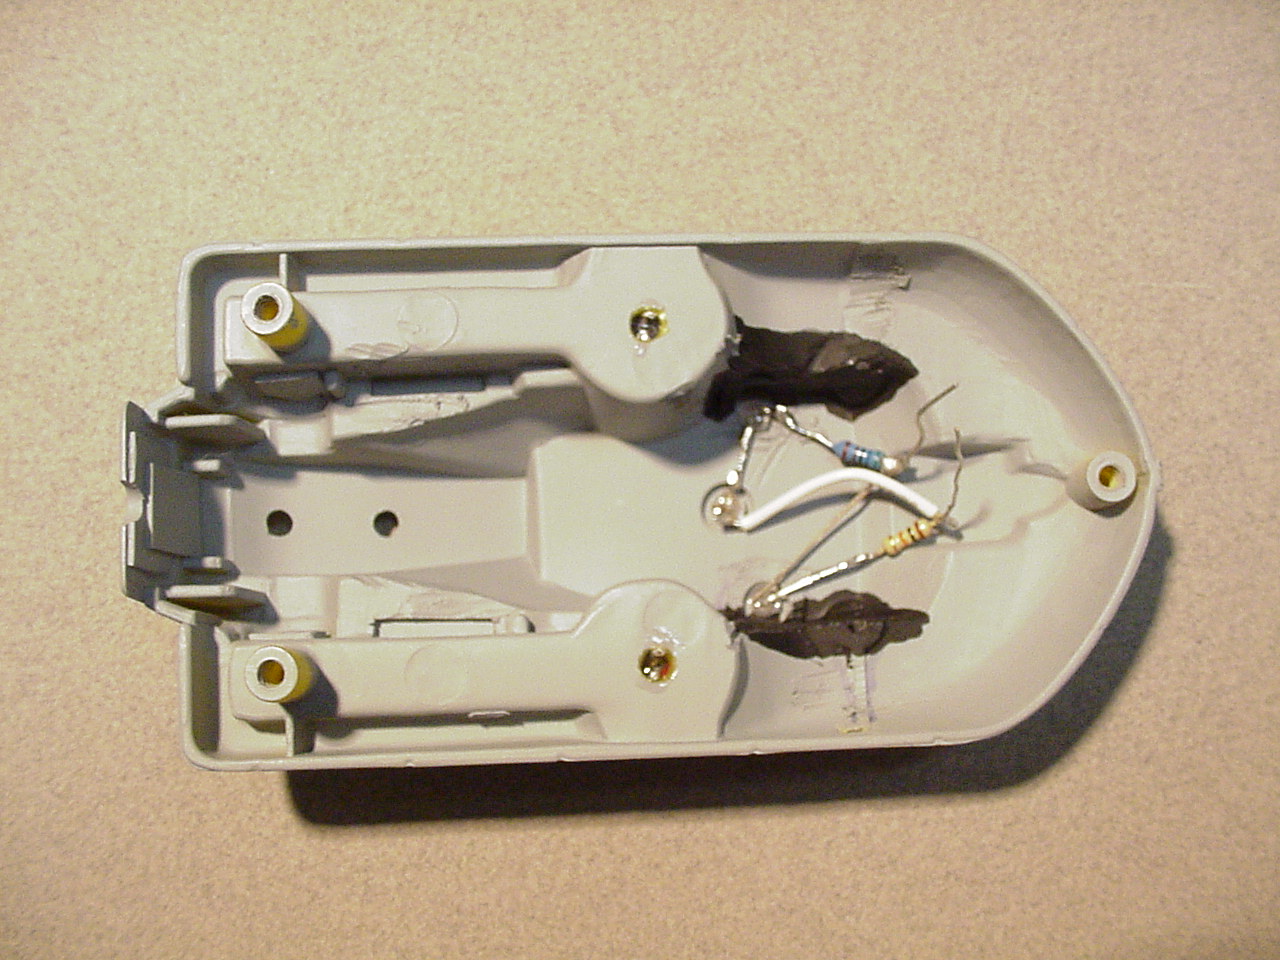
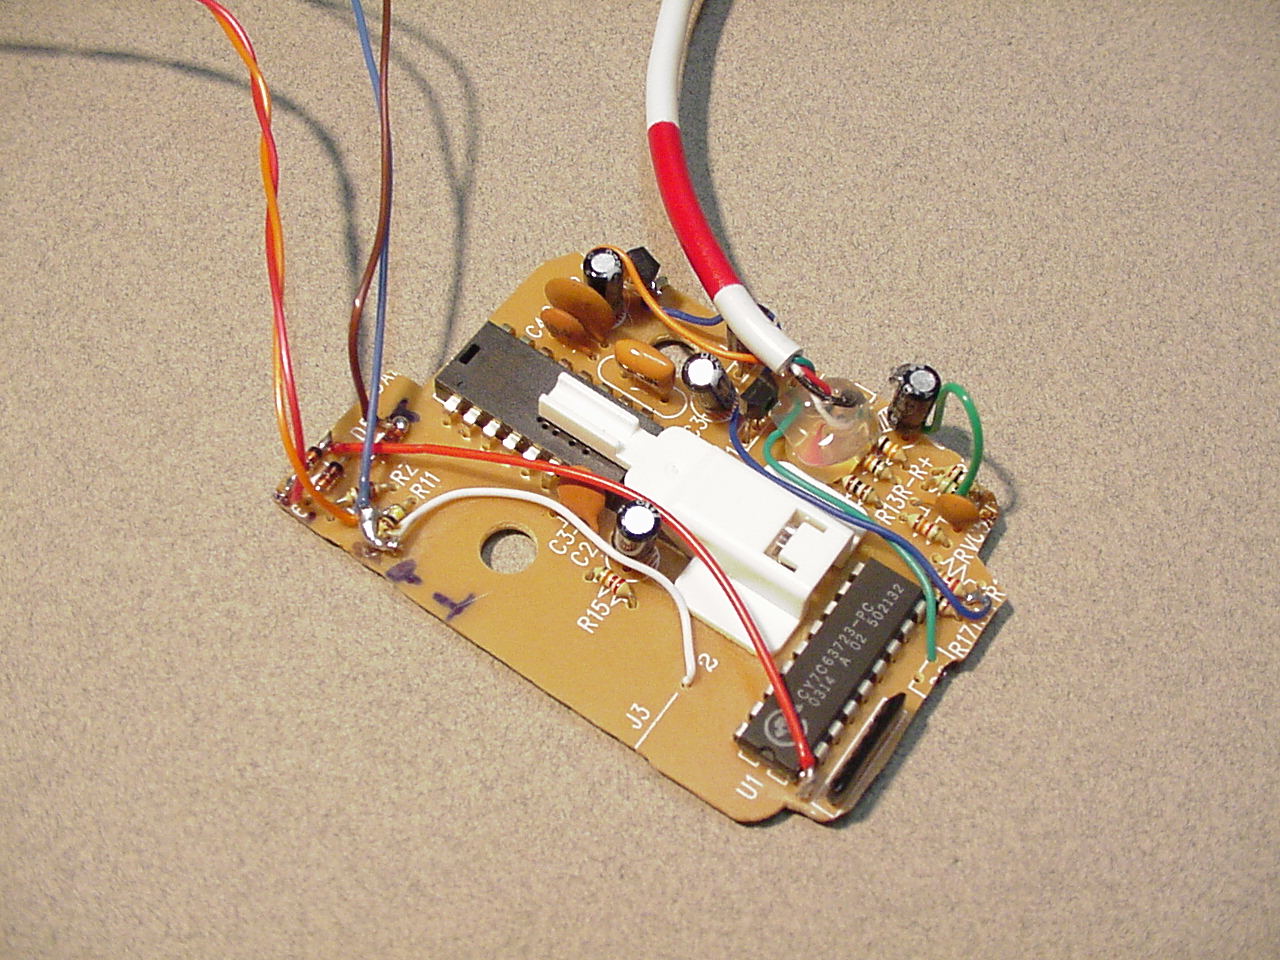
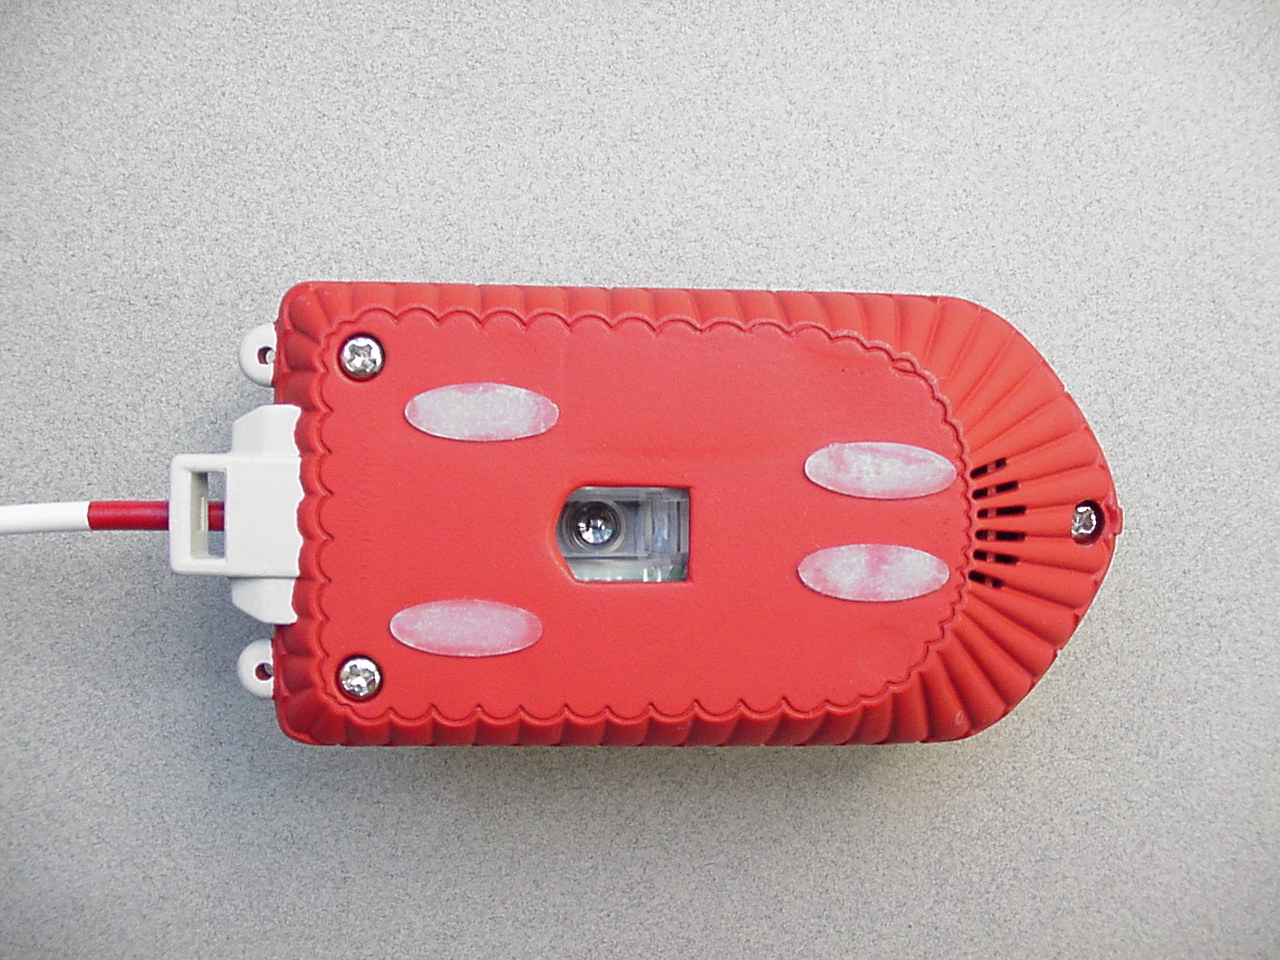
After doing all this, it worked but it didn't really look like a ship to me. I loved the way the cable looked, however. Another trip to the toy store and I found a small police hydro-foil ship. I bought it, took it apart, bought another mouse (optical this time), and transferred the guts into this new toy. The result is a little strange and different, but cool (I think). There were several challenges along the way. For example, the guts of the optical mouse were way too long and wide. For the length, I cut off the sections for the buttons since I would be using my own buttons anyway. The problem with the width was more difficult. I used my Dremel to grind away the outer traces on the circuit board and used bits of wire to reconnect the traces.
|
 |
 |
 |
 |
 |
 |
 |
 |
 |
 |
 |
 |
 |
 |
 |
 |
 |
 |
 |
 |
 |
 |
 |
 |
Keyboard
|
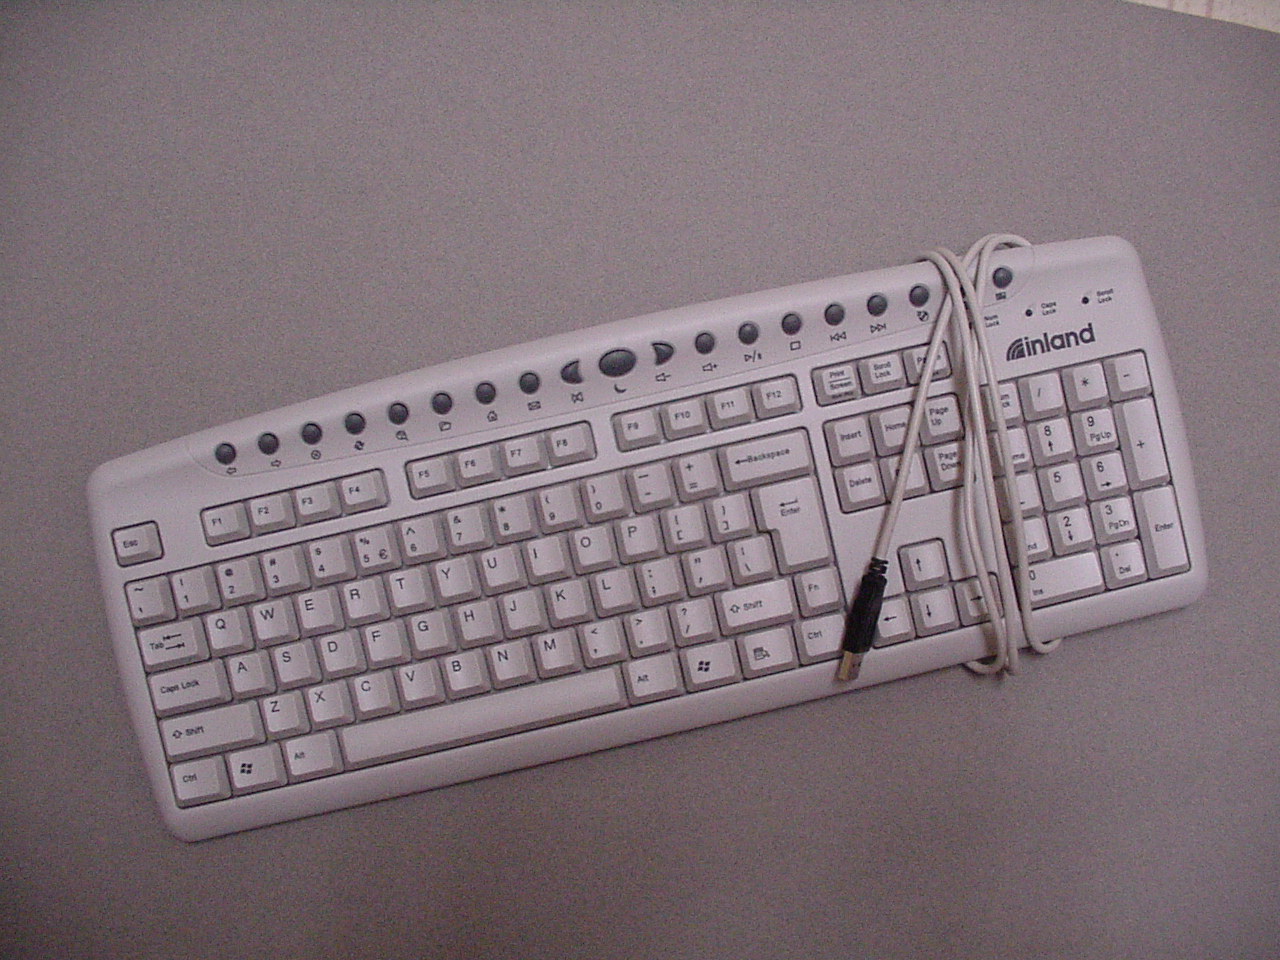
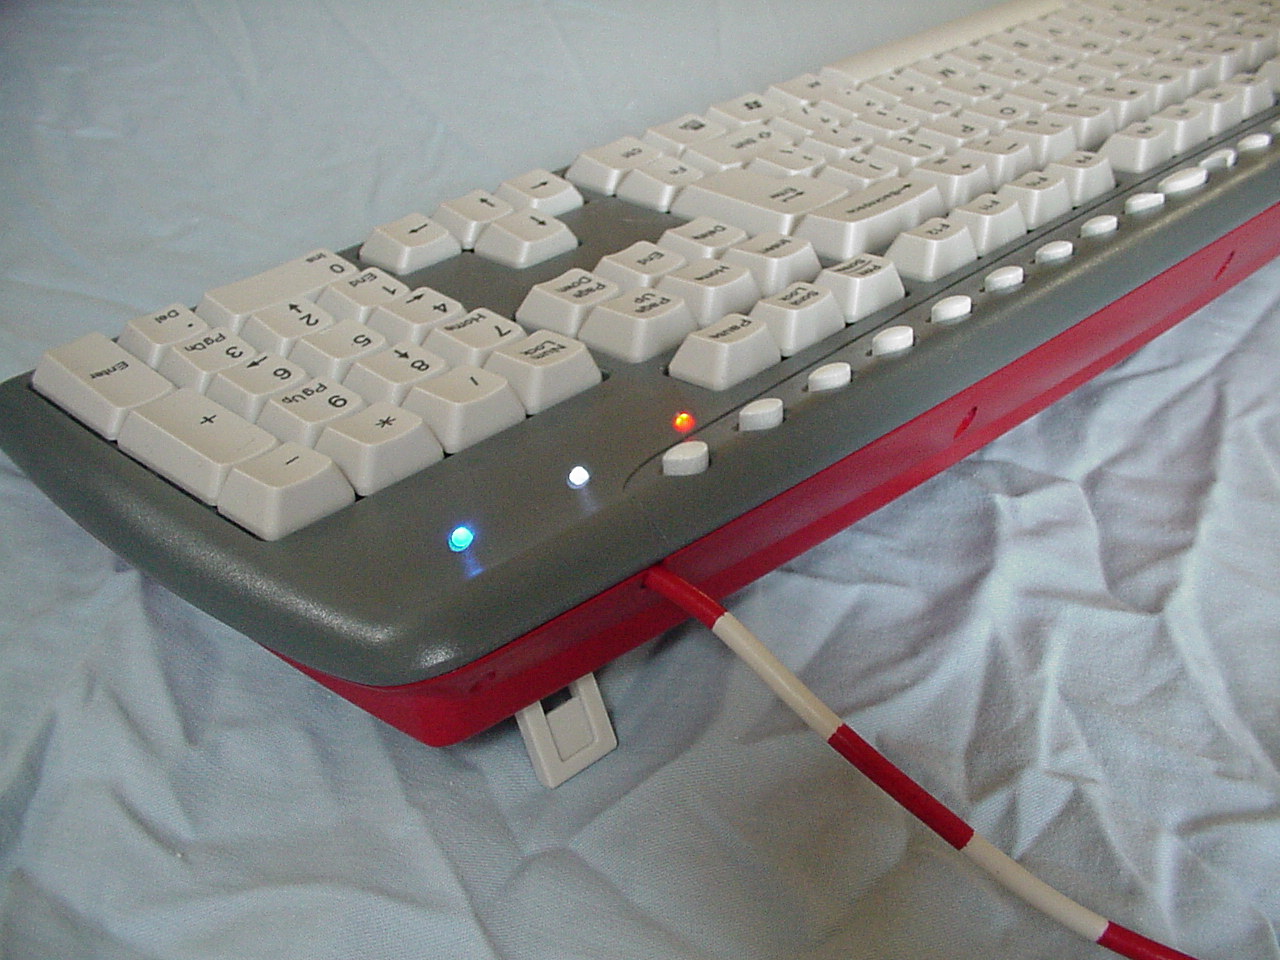
The keyboard was the easiest piece. Basically, modding the keyboard amounted
to buying a cheap keyboard and disassembling it so I could replace the LEDs
for the caps lock (and other lights). I also painted (actually dyed using
vinyl dye) the keyboard.
With the LEDs, I replaced the existing green LEDs with ultra-brite LEDs in a red/white/blue pattern to be patriotic. The problem was, the keyboard used a clear piece of plastic in front of the LEDs. I was having a problem with the red LED contaminating the white LED with some of it's color. The solution was to cut the solid clear plastic piece and paint the edges black to prevent the color bleed. The parts were glued back together and I had no more problems. The keyboard top was painted grey to remind people of a ship hull. The bottom was painted grey to simulate the water line. Lastly, the grey multi-media keys were painted white to remind people of missiles. The cord was dyed similar to what I did for the mouse.
|
 |
 |
 |
 |
 |
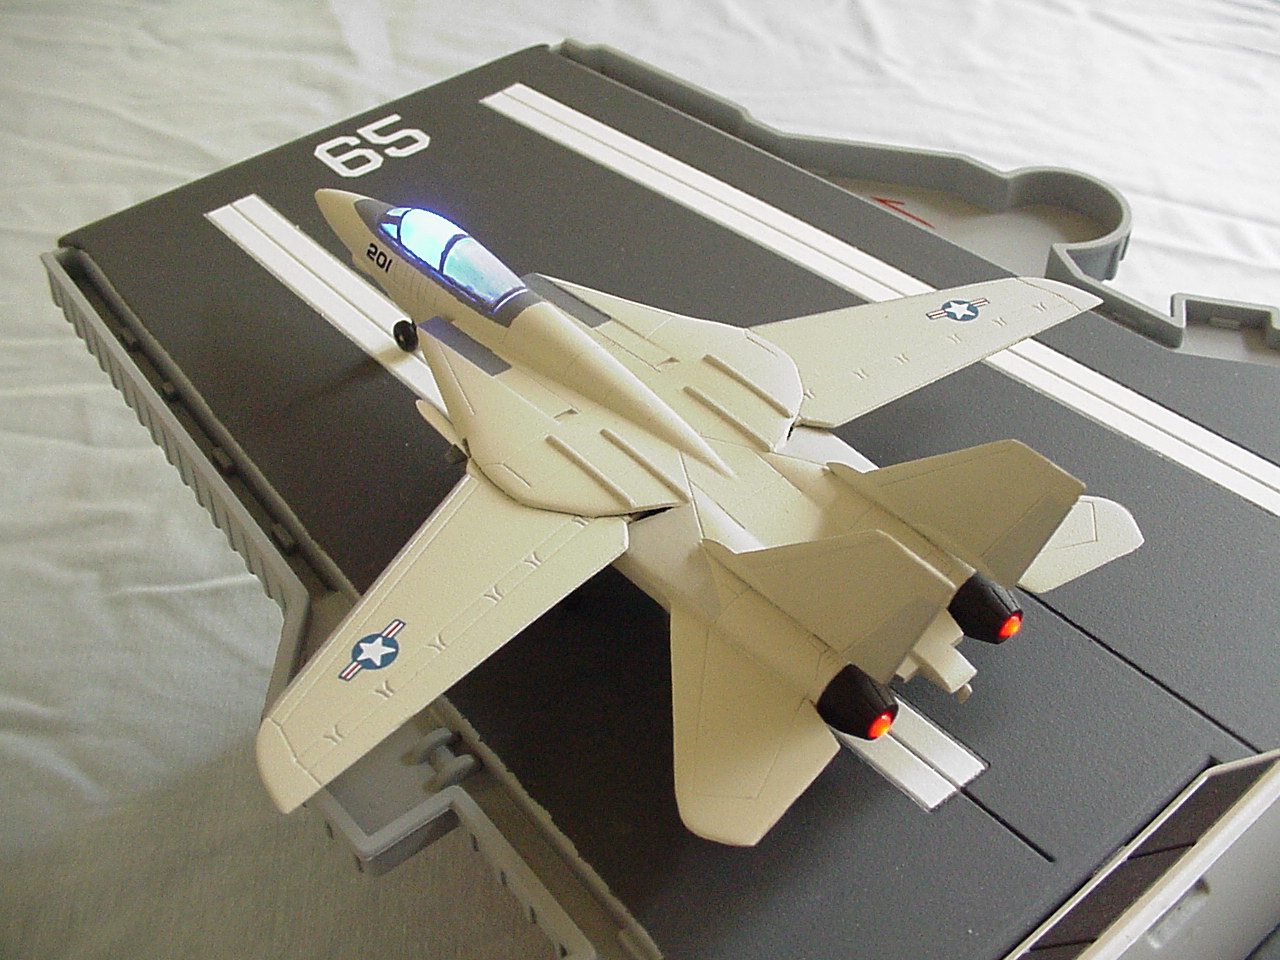
Planes
|
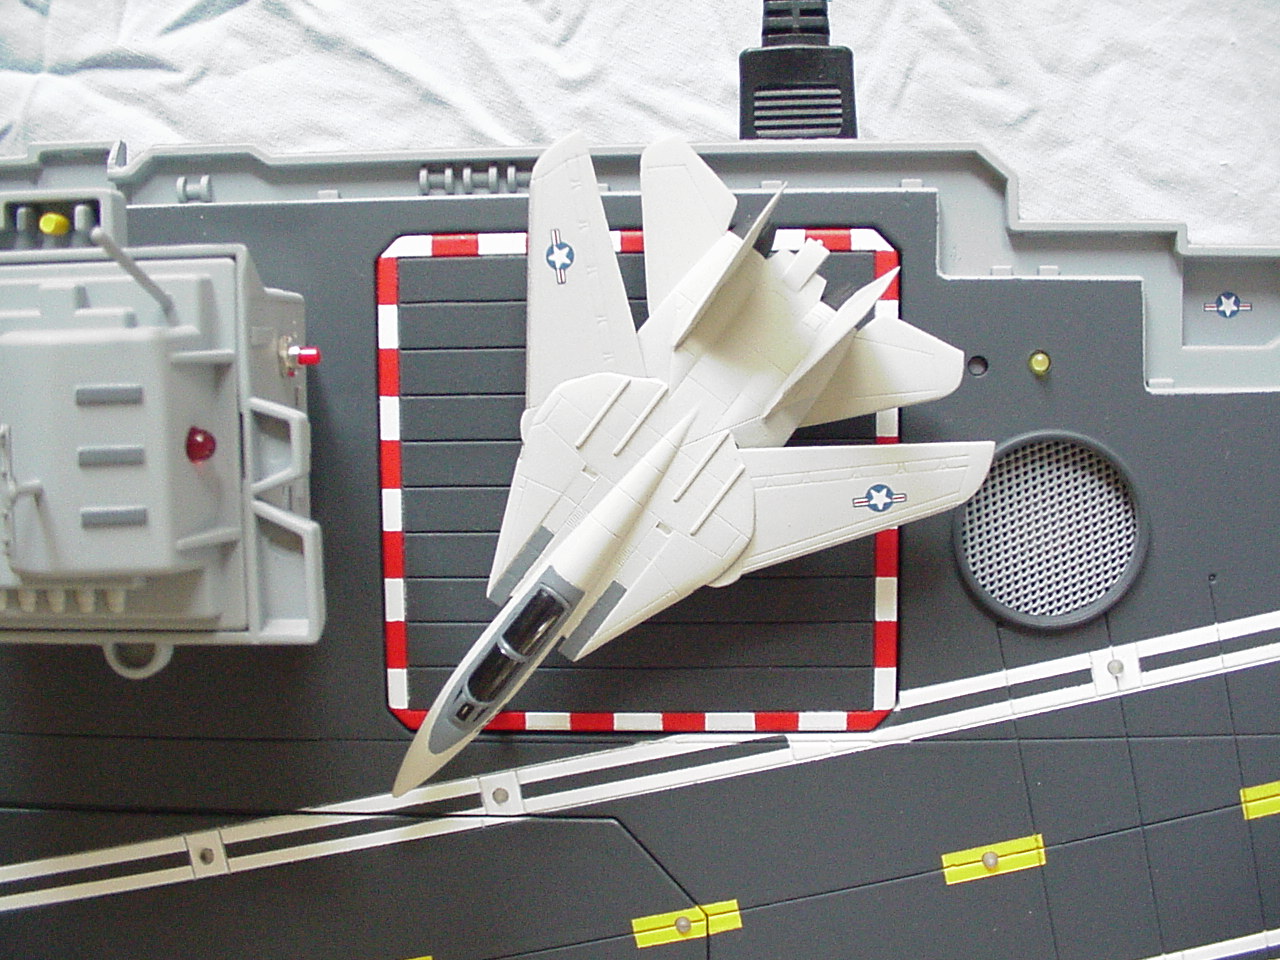
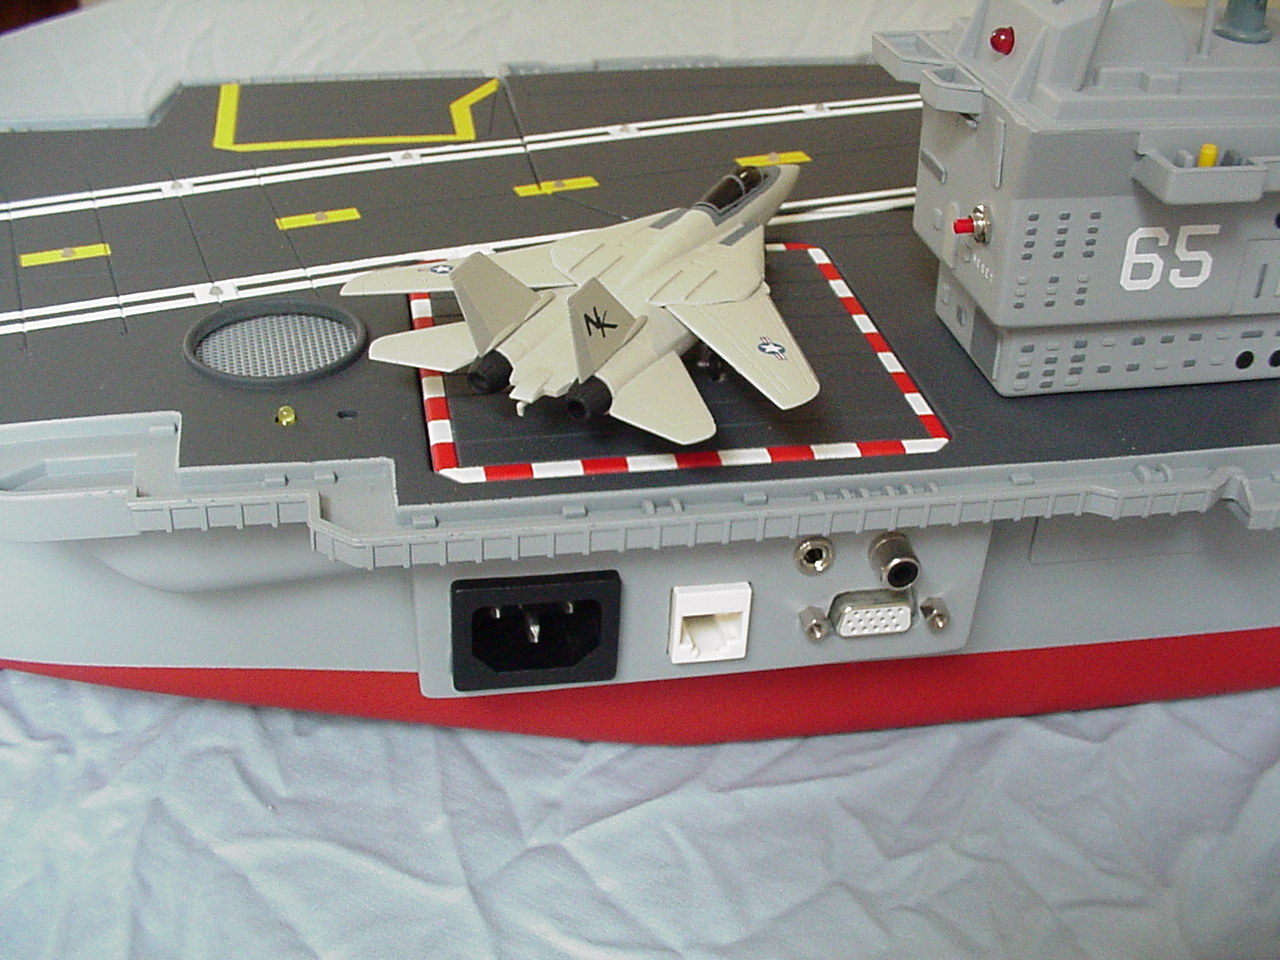
On the deck of the aircraft carrier, I wanted several planes to give the mod
a cool, realistic look. The die-cast planes that came with the toy were
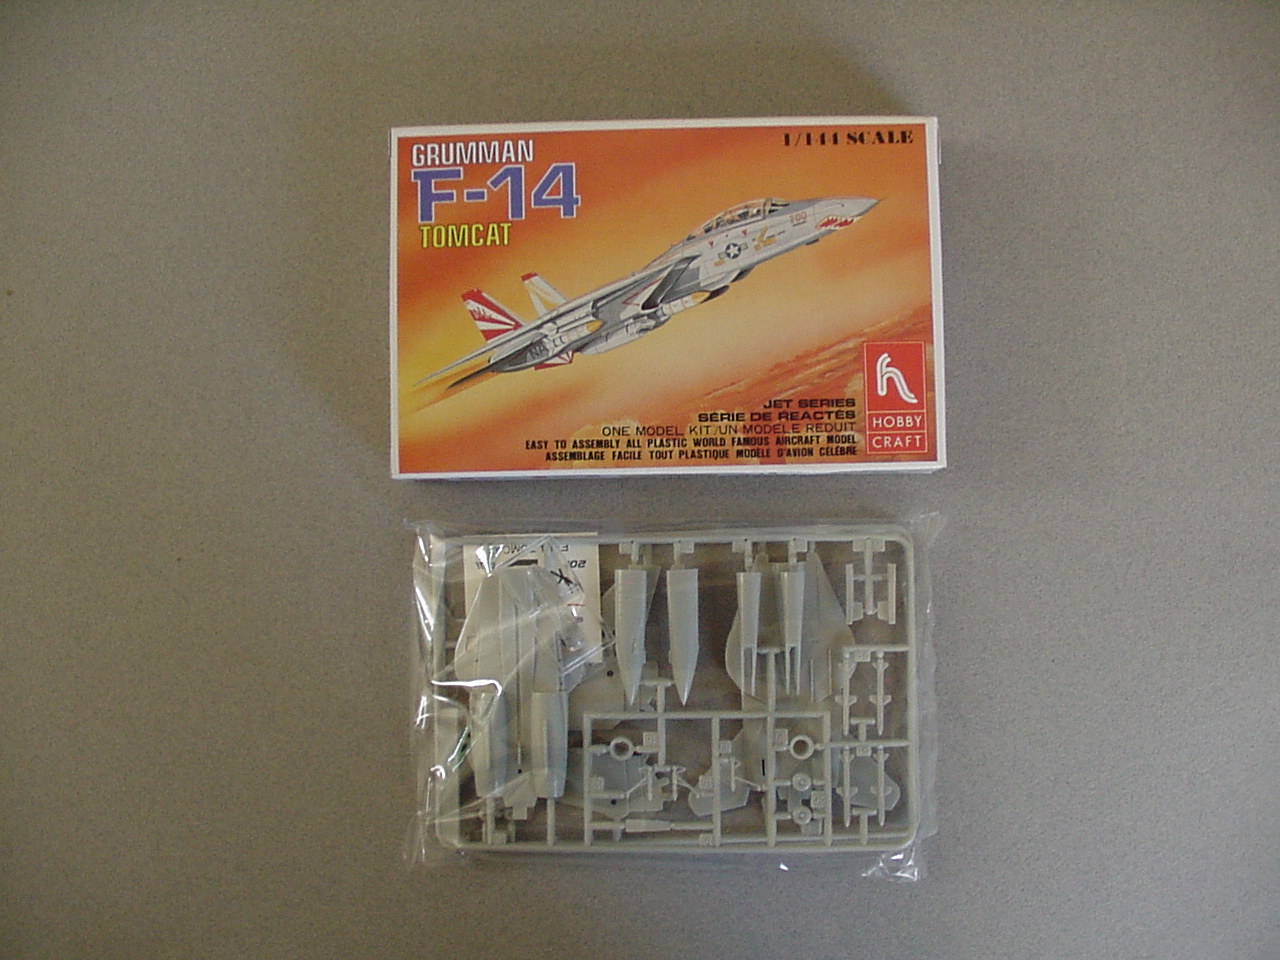
junk, so I went to a hobby store to find some plastic model kits. Finding
appropriate types of planes/helicopters was difficult in the scale I needed.
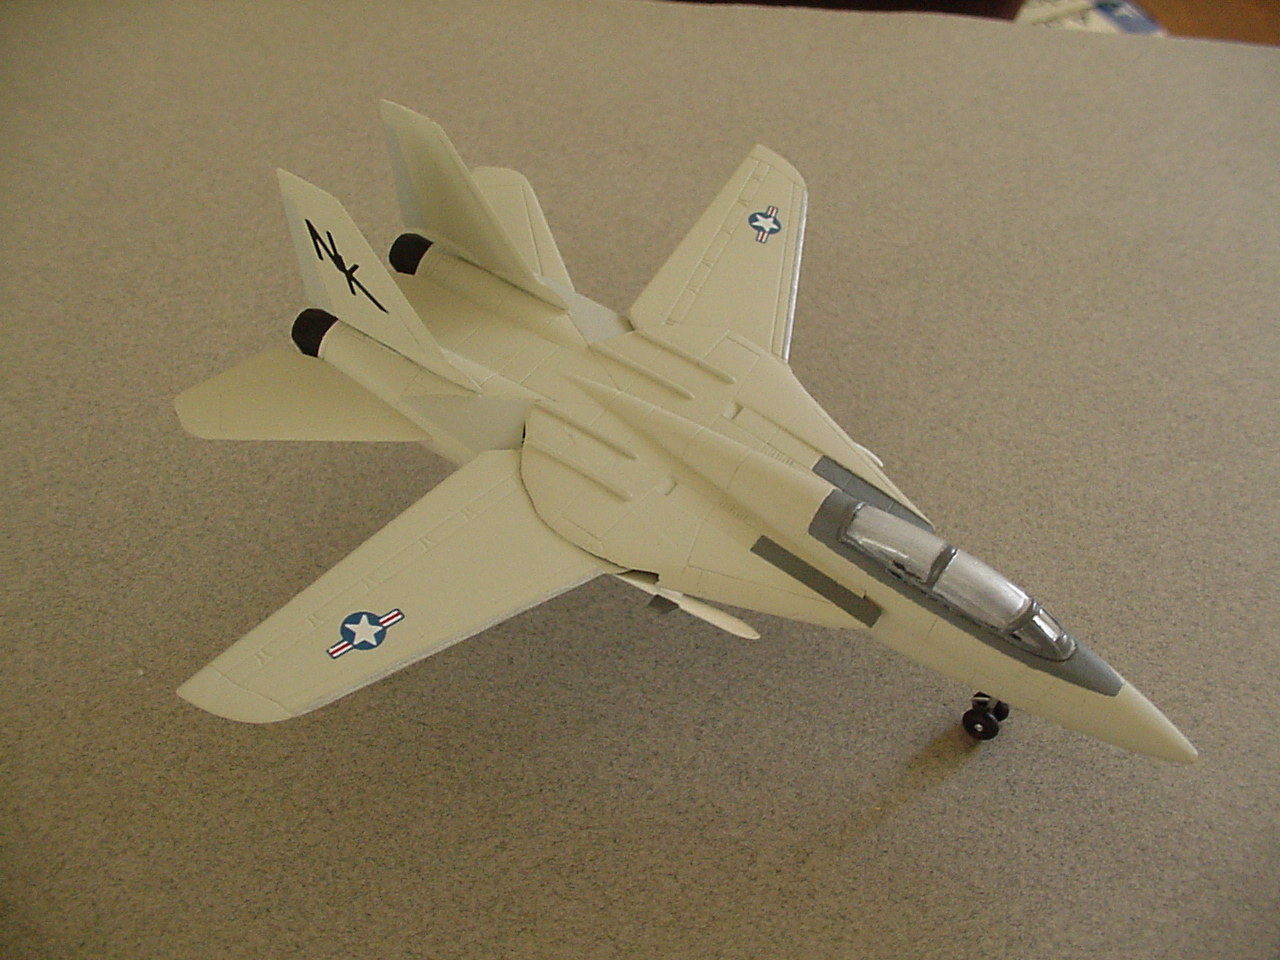
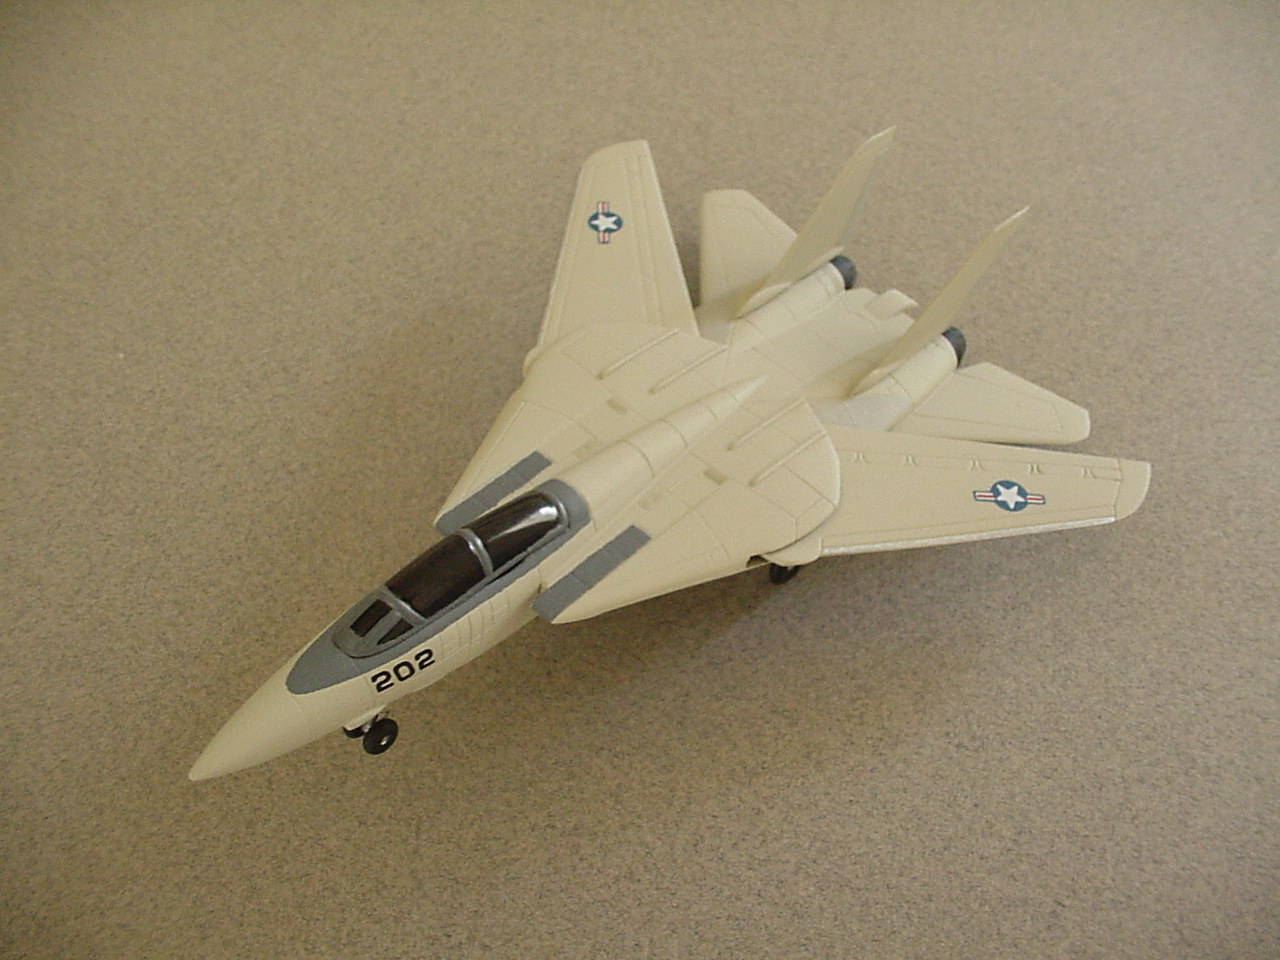
Everything was too big or too small. Eventually I found 2 F-14 aircraft and
decided that would have to be good enough.
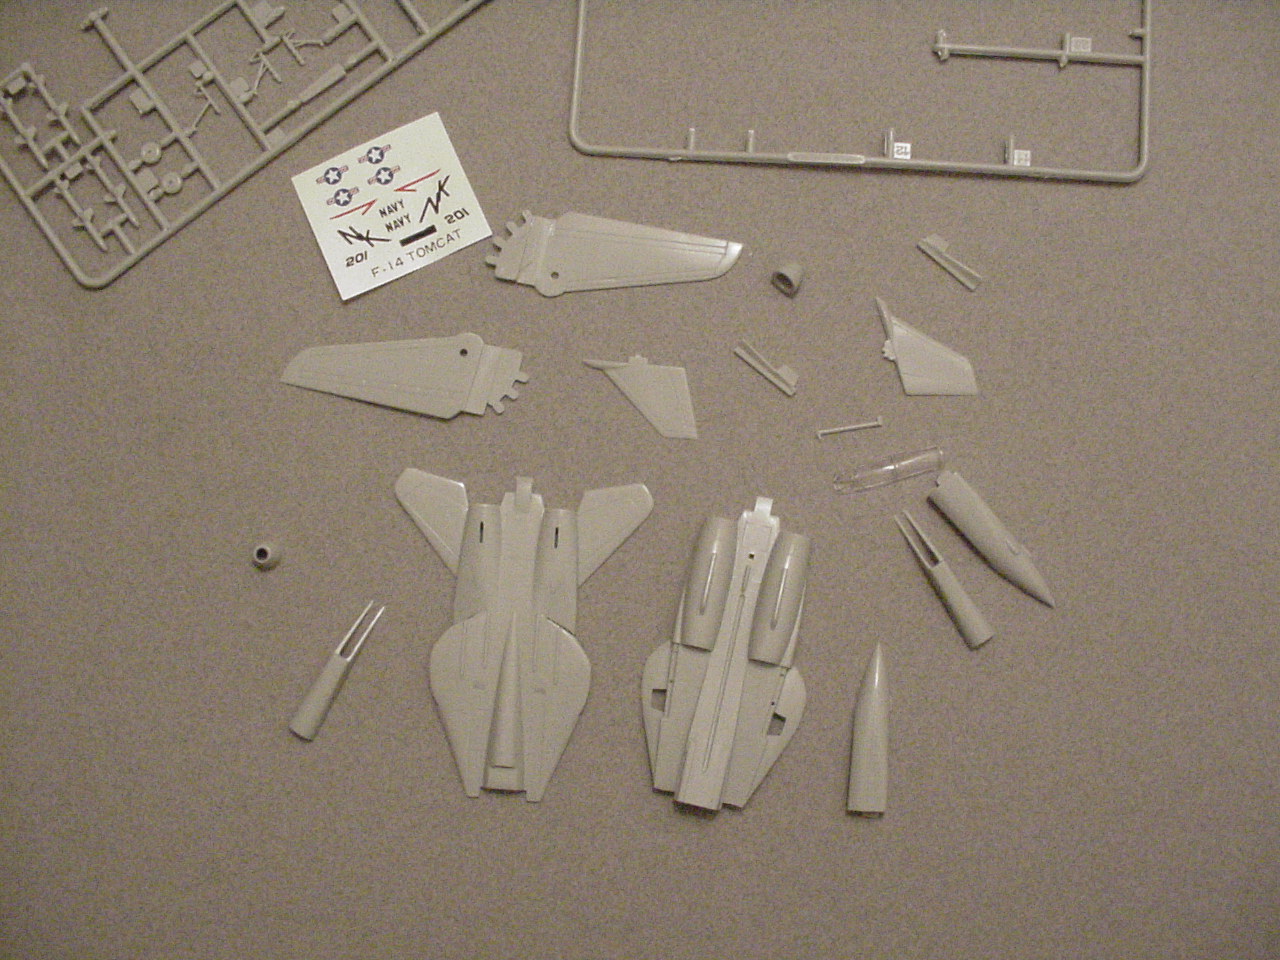
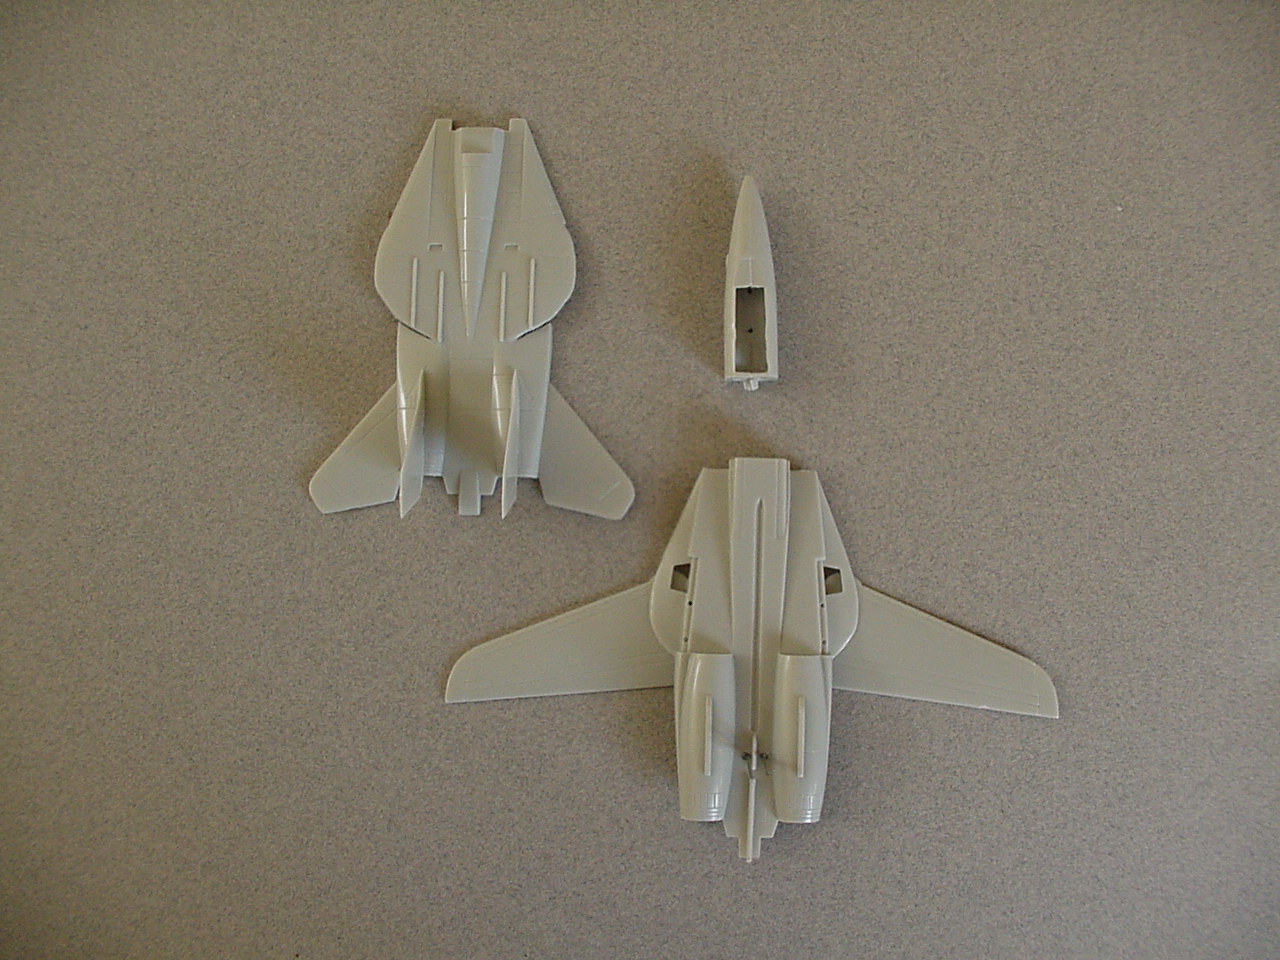
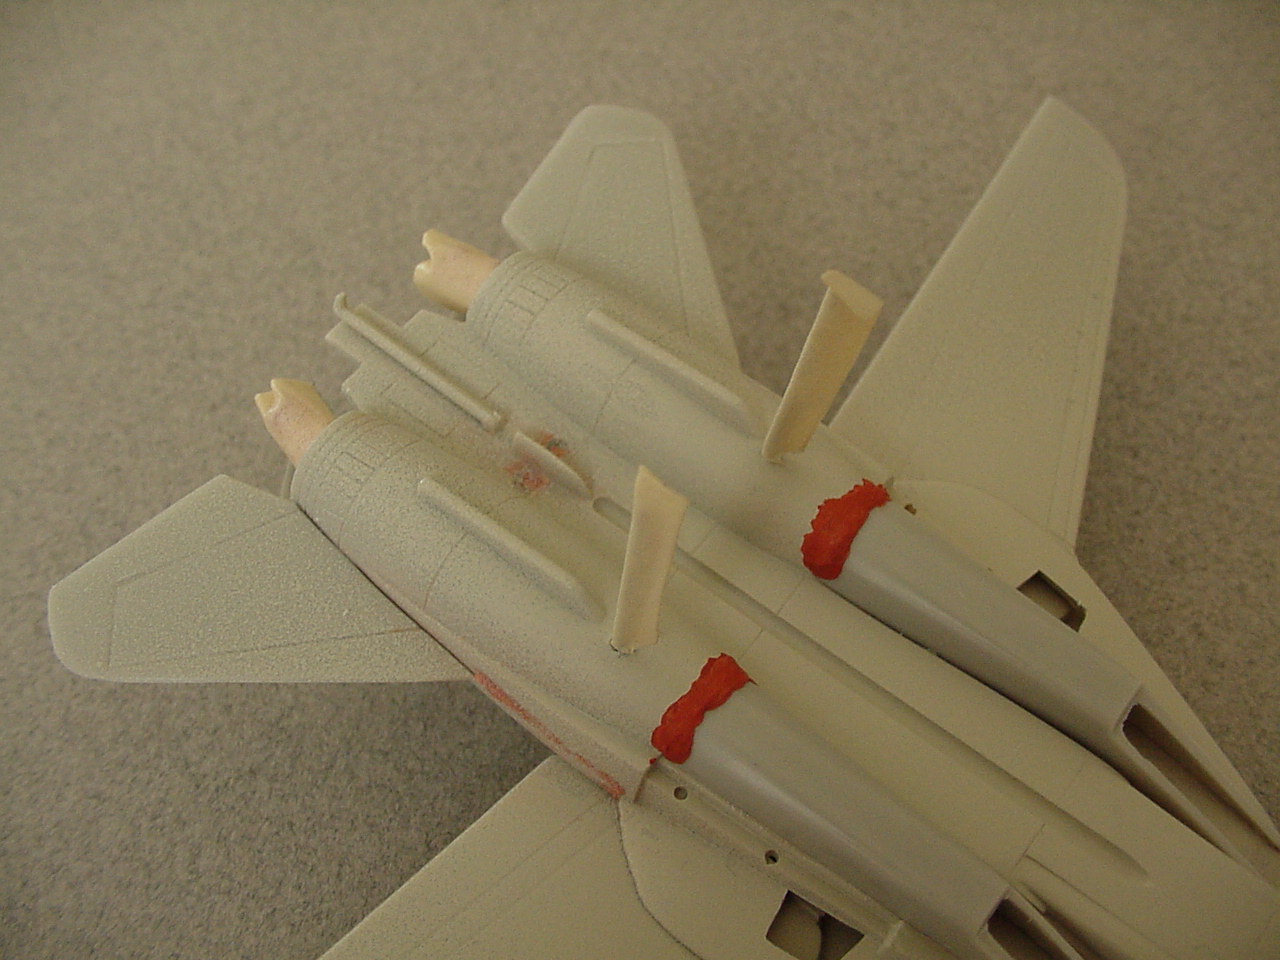
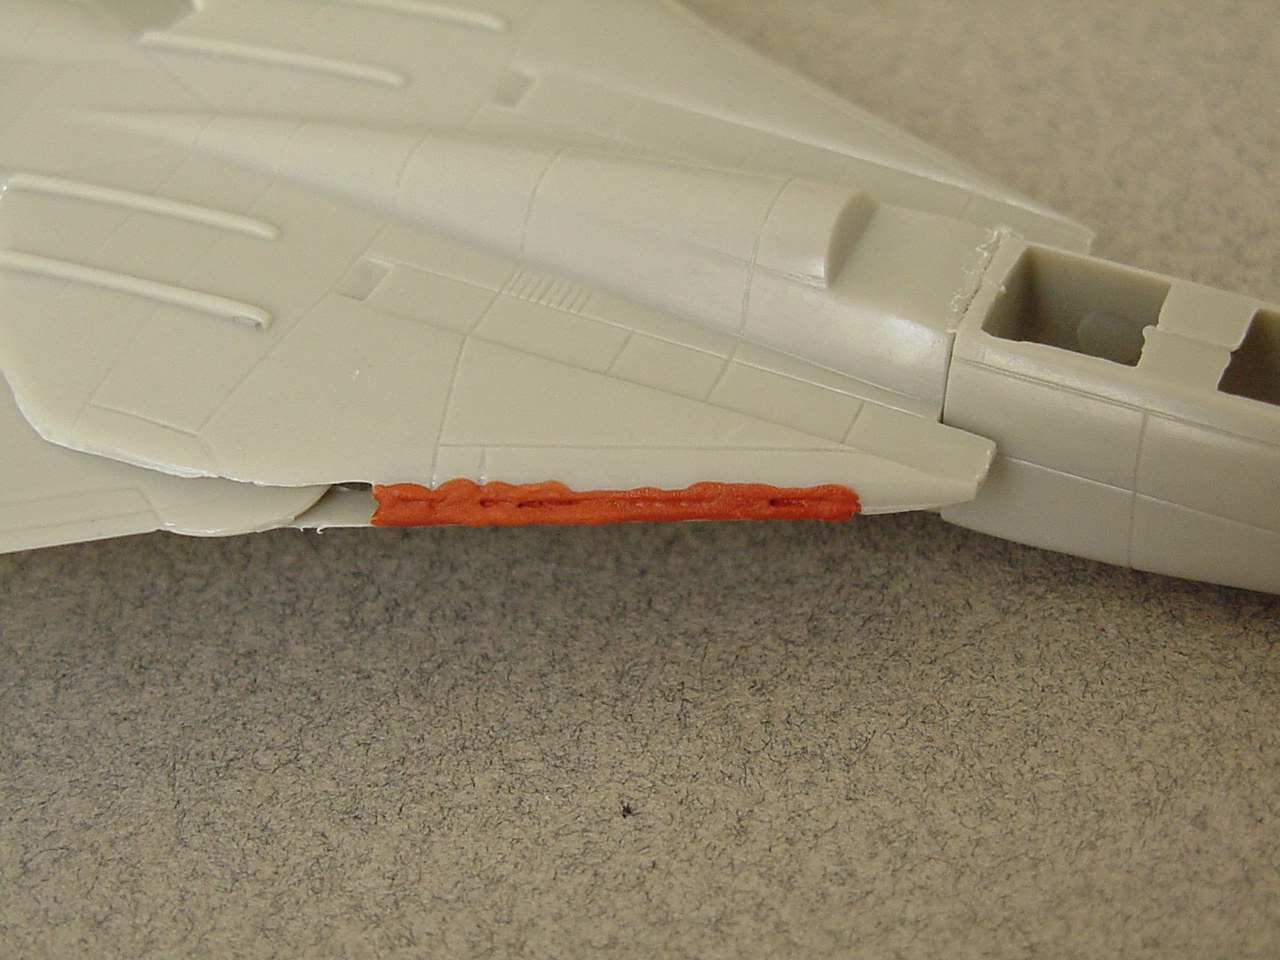
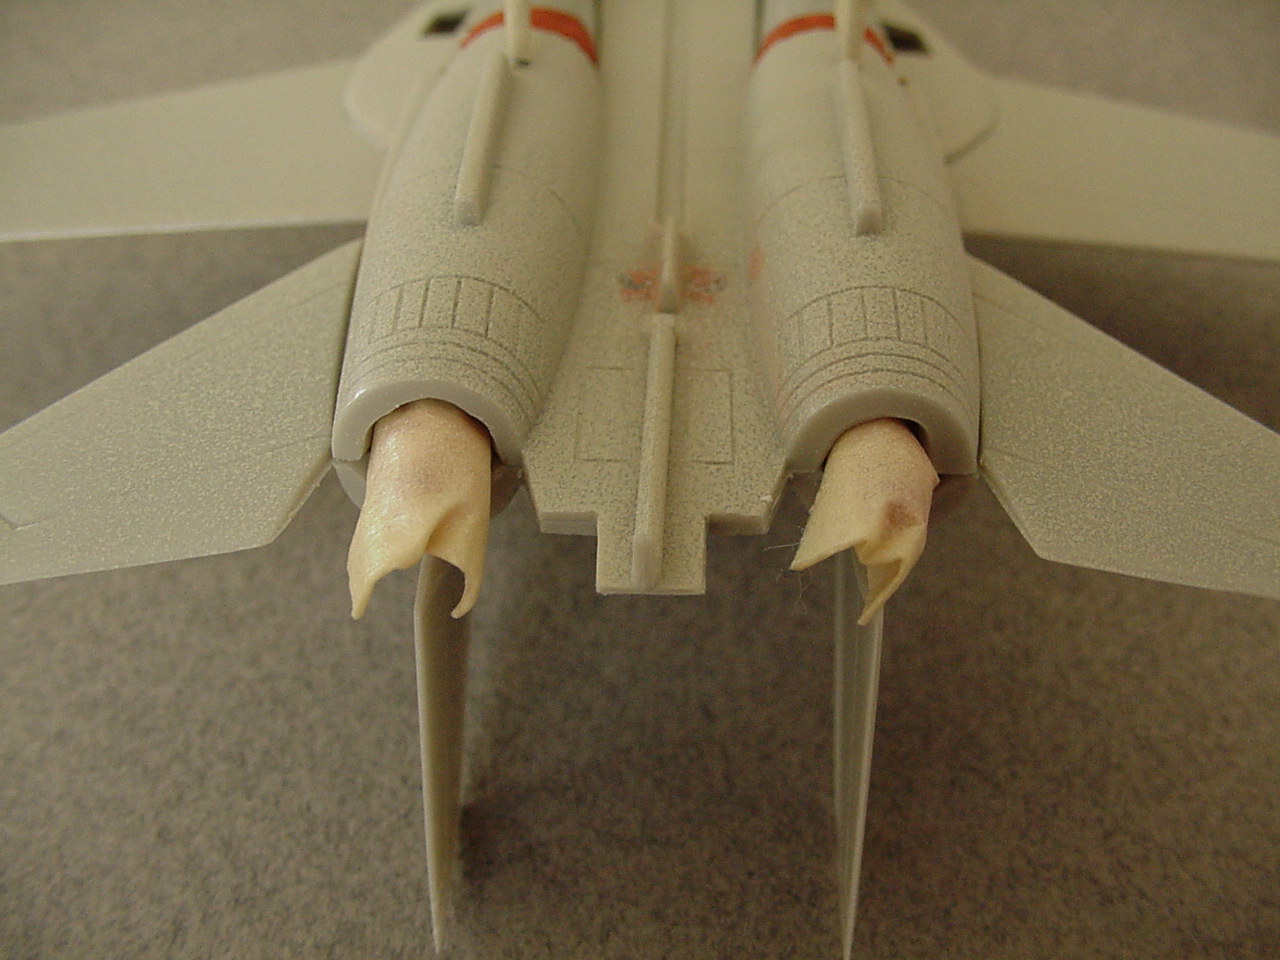
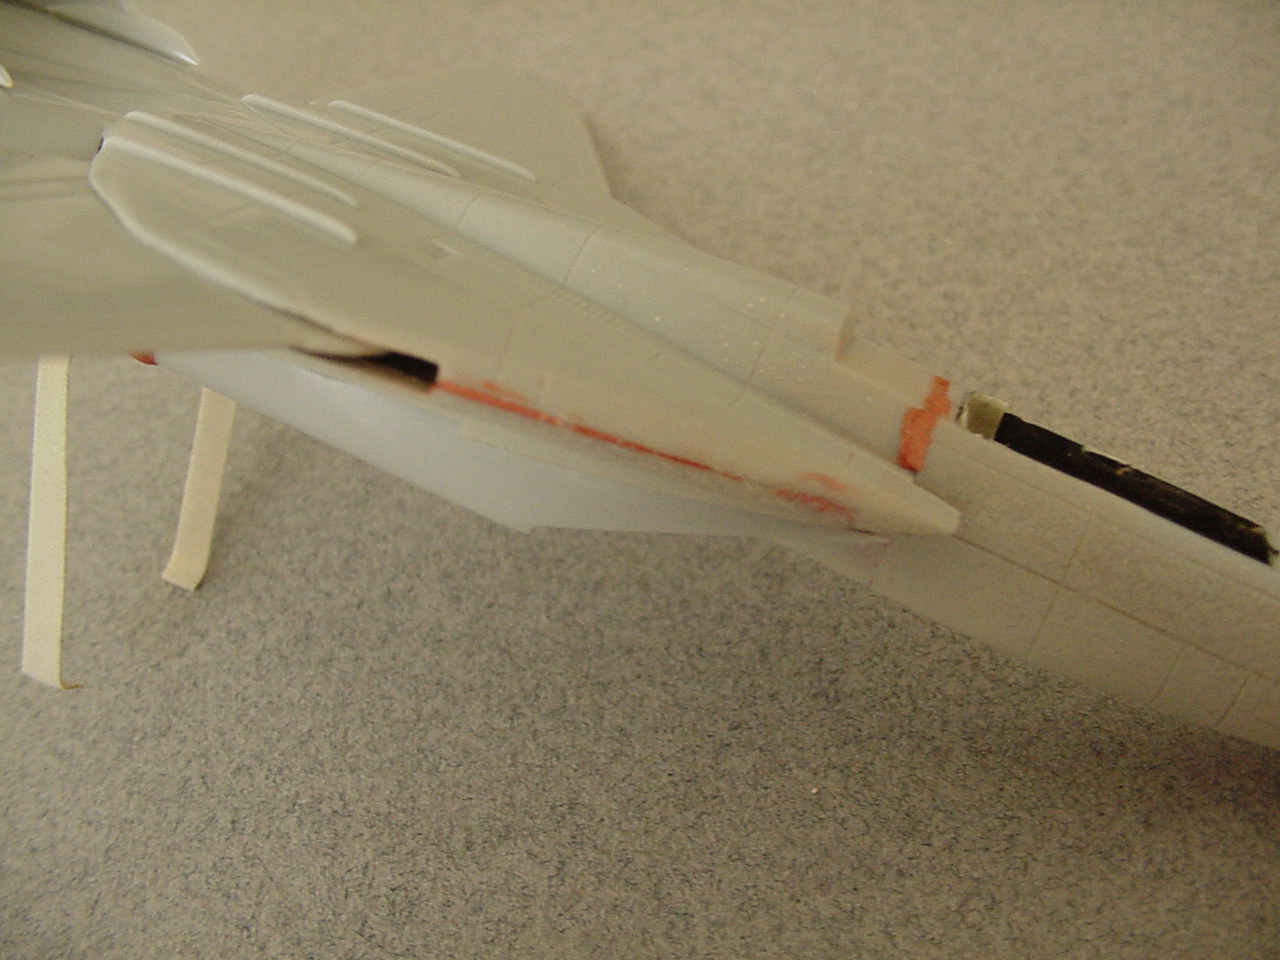
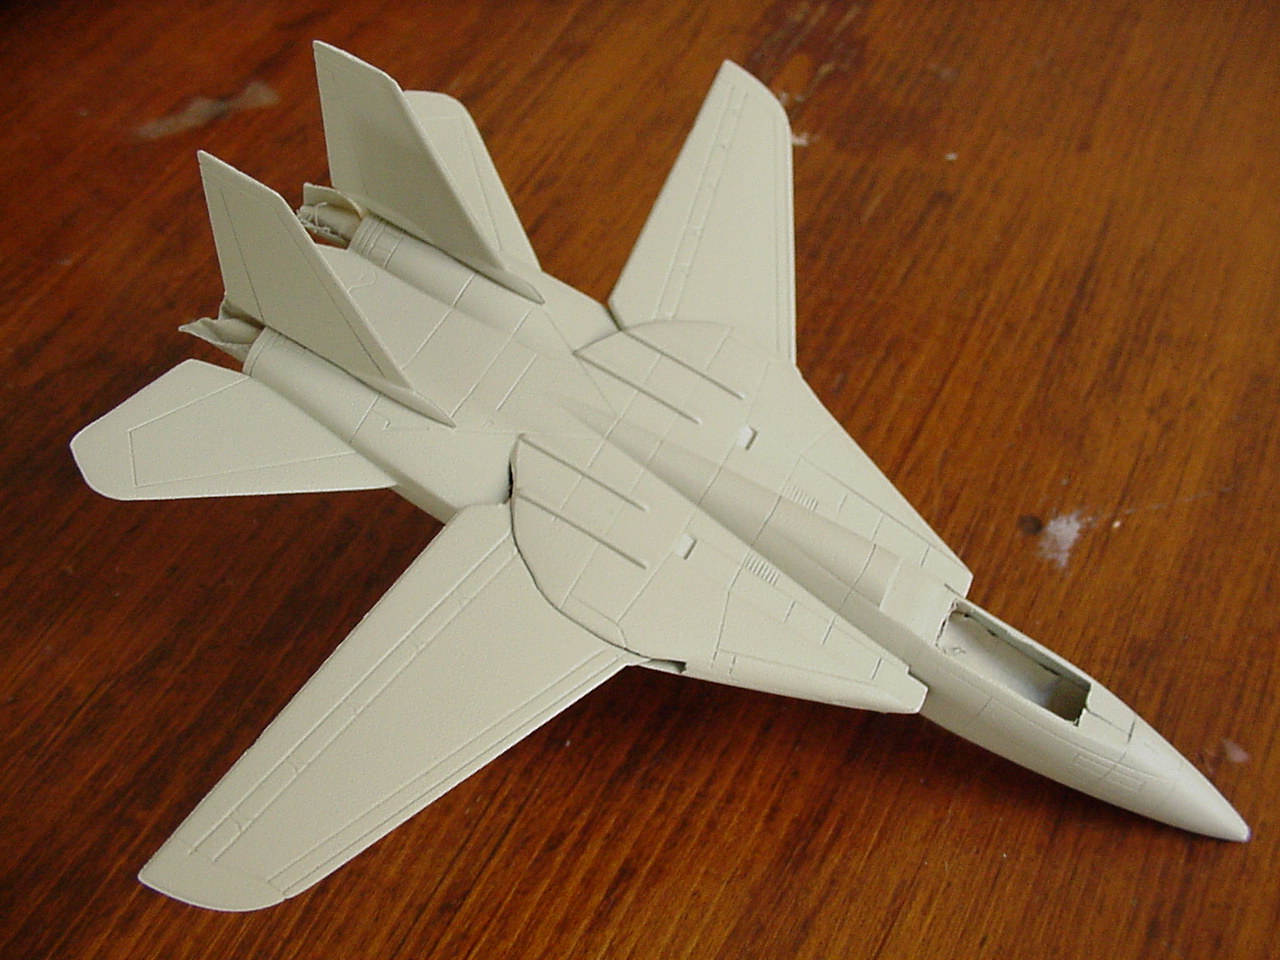
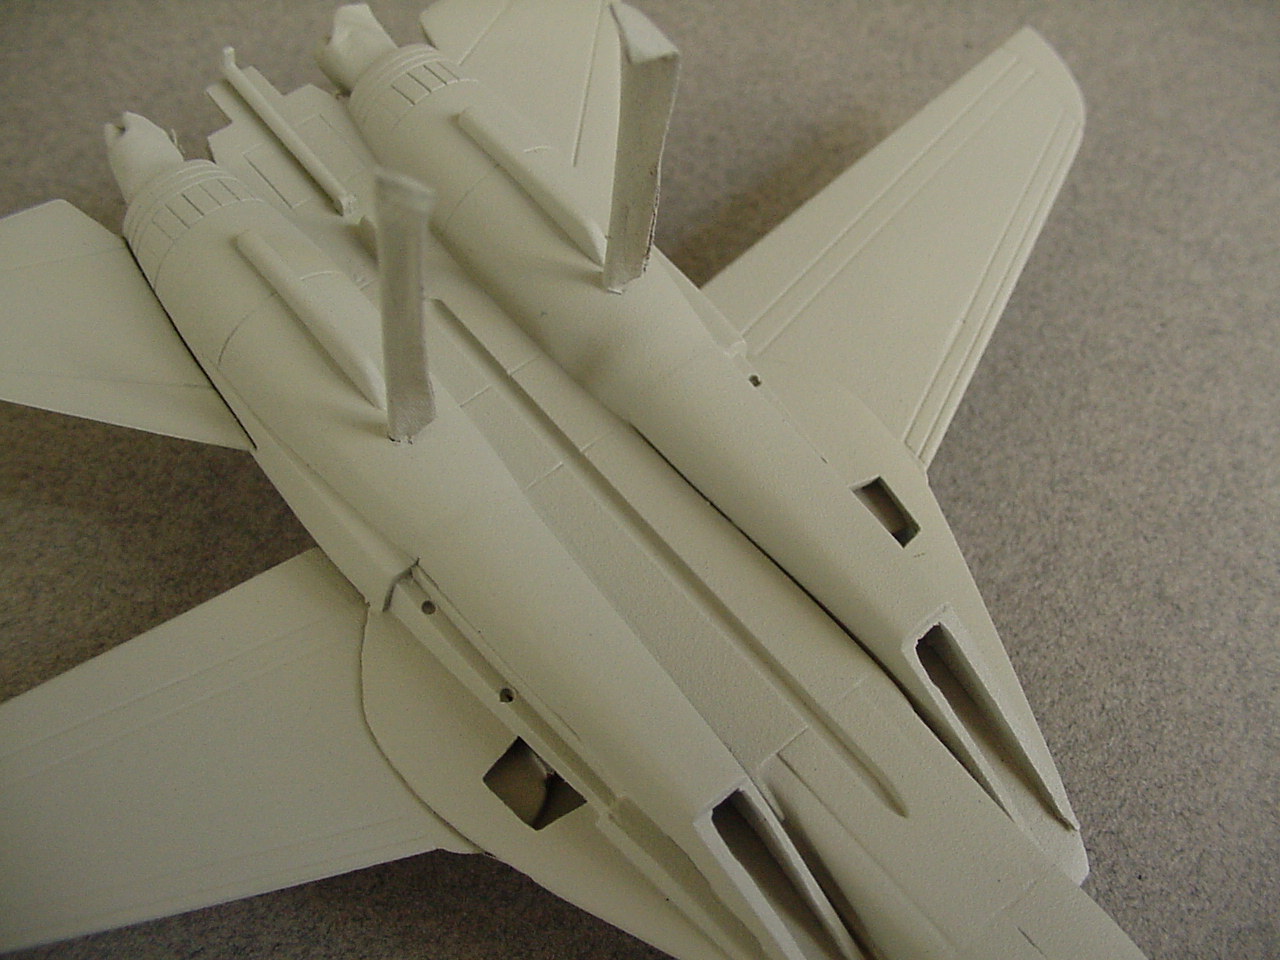
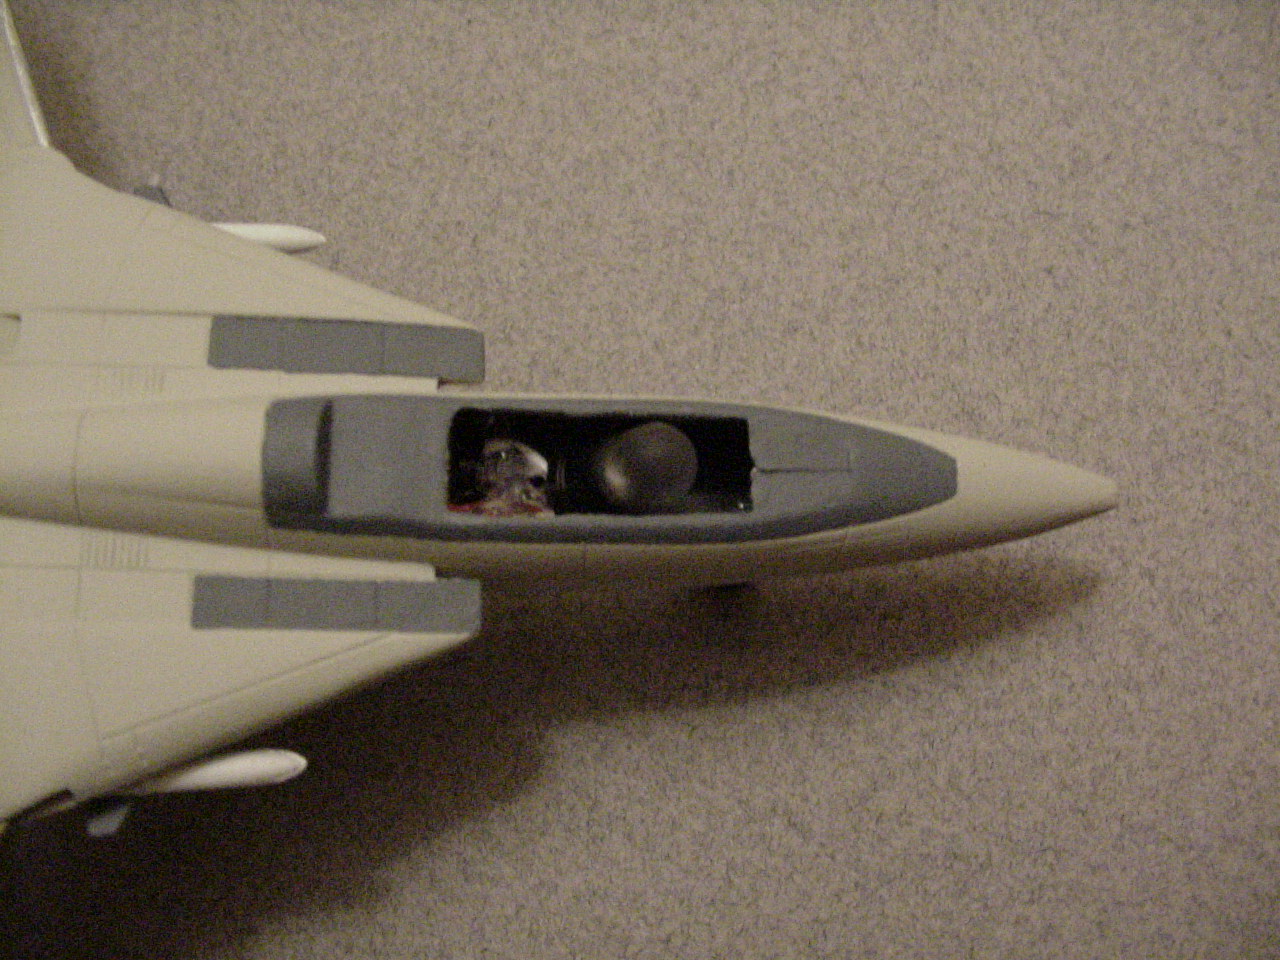
I wanted to make at least one of the F-14s light up, so I decided I would put lights in the engines and cockpit of one of them and have it be the hard drive activity light. I came up with the idea that if I used a couple of solid metal pieces as the power leads (like the pins from an LED), I could make the plane removable. What good is a toy with small planes if you can't remove the planes and play with them? There were only a couple of problems with the planes above and beyond what building any plastic model kit entails. First, since these were very cheap kits from some company I had never heard from before these kits were of pretty low quality. Thus when gluing the top/bottom halves together the pieces didn't line up very well. I ended up using modeling putty to fill the holes and sanding the pieces down. Very difficult when the section you are trying to sand is only a few millimeters long. In the end, looking closely you can tell things didn't line up well. But without someone mentioning it, you probably wouldn't notice. Second, adding the lights to one of the planes was pretty difficult. Besides the small spaces I had to work with, the main section of the plane was best painted as one piece, rather than gluing two already painted pieces together and have it looking poor. I had to seal the electronics into the already glued together model, but cover the LEDs with tape and leave enough space for the wires to stretch so that the LEDs would not interfere with the painting. In the end, I liked the results.
|
 |
 |
 |
 |
 |
 |
 |
 |
 |
 |
 |
 |
 |
 |
 |
 |
 |
 |
 |
 |
Toys, toys, toys
|
I've said it before, and I'll say it again. One of the best things about
being an adult is being able to walk into a toy store and know that if I
really want something, I can buy it. I have only myself to be accountable
to. It almost makes up for having to pay taxes...
|
 |
 |
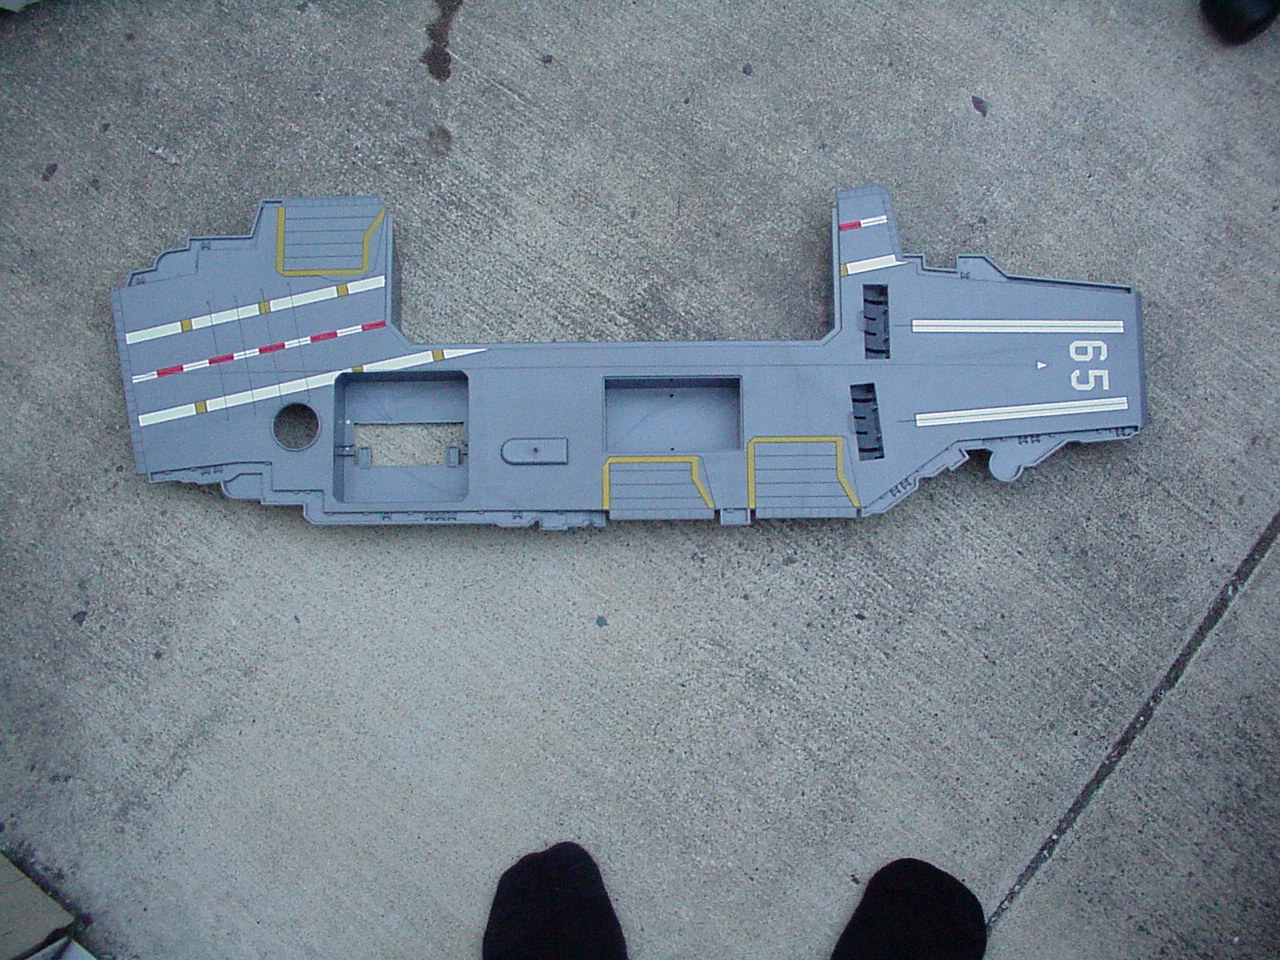
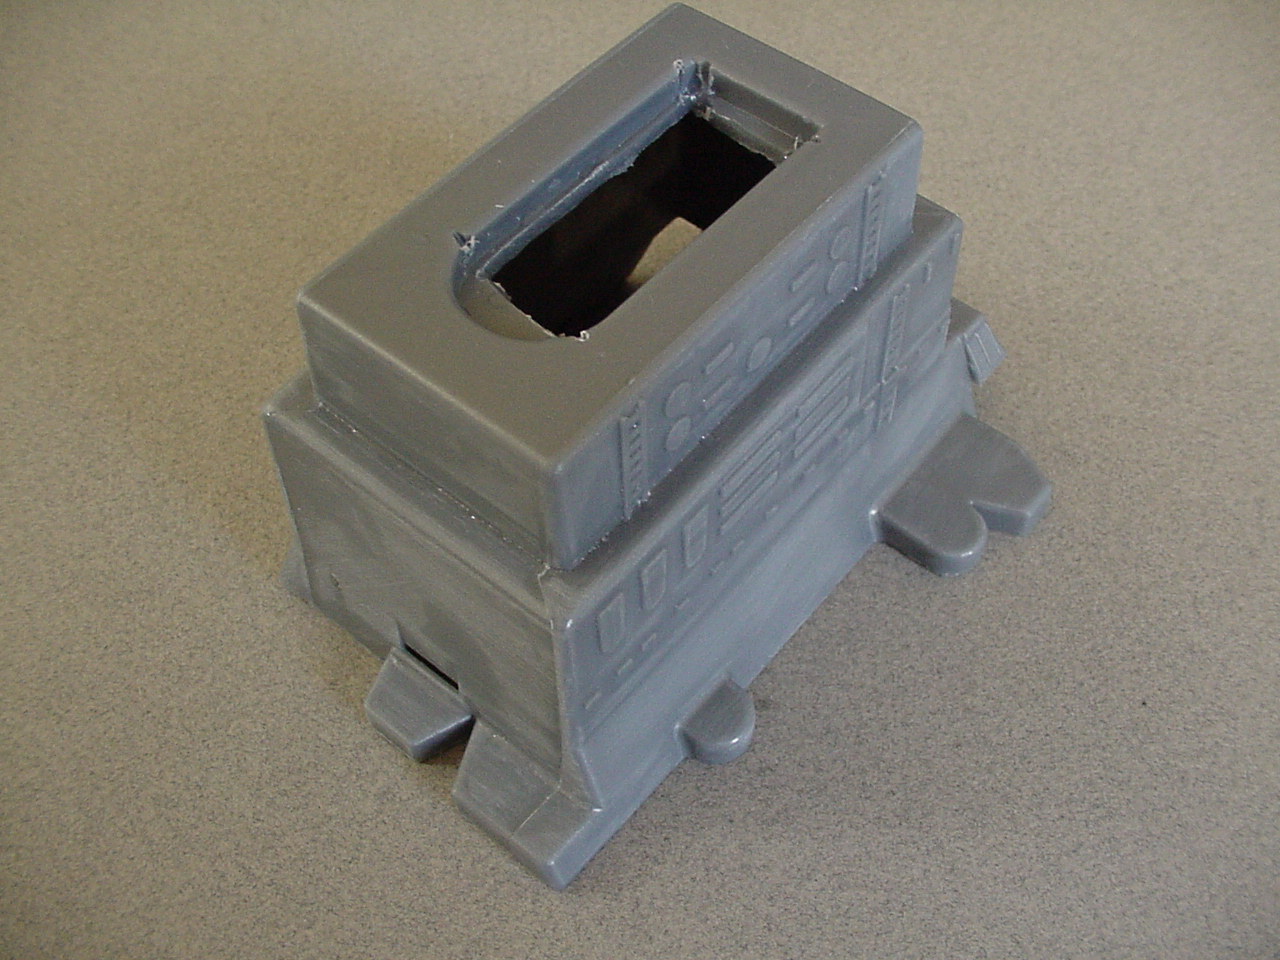
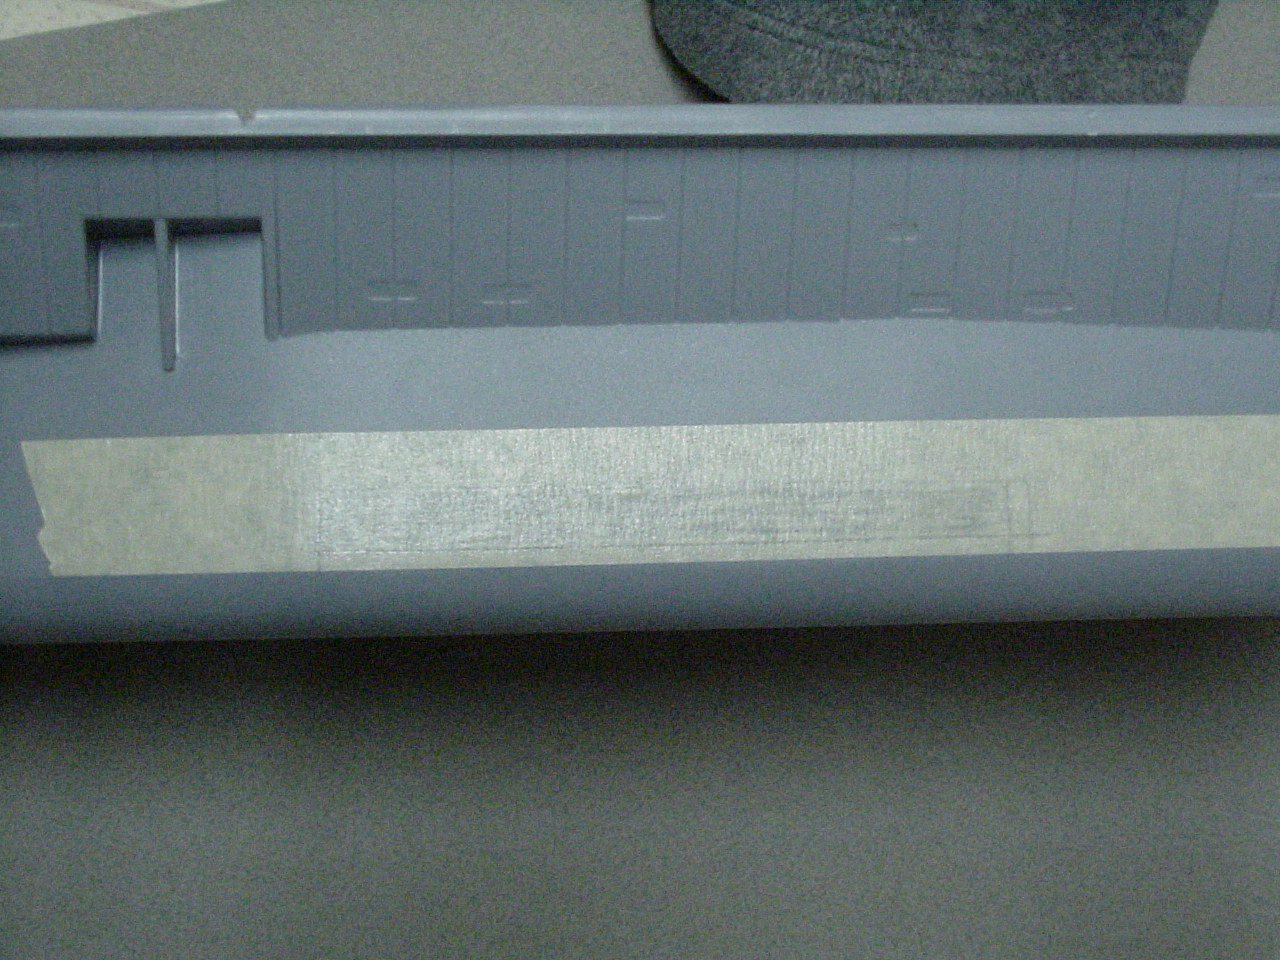
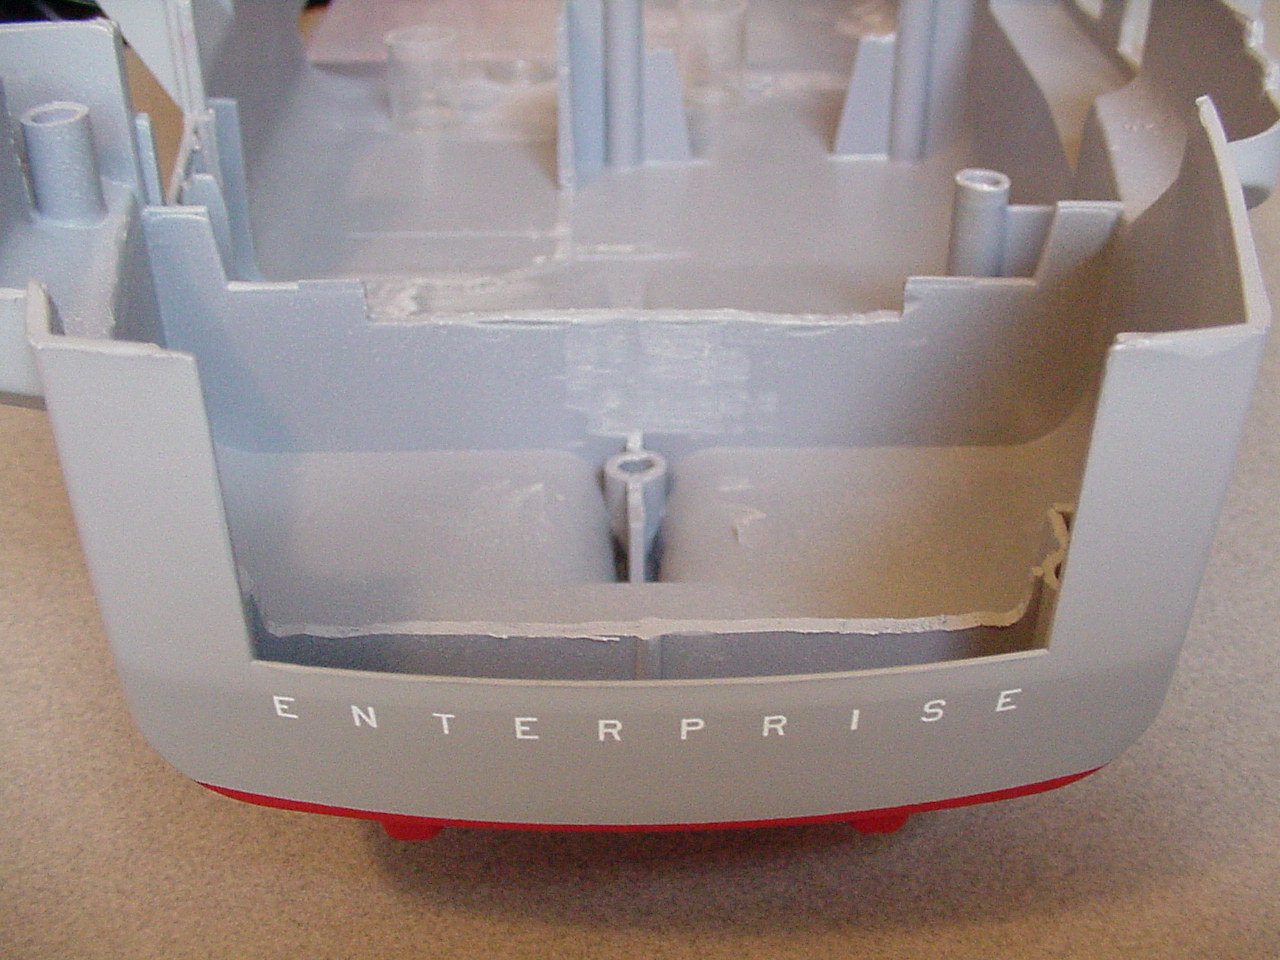
The Hull
|
The main hull and deck are, of course, where the majority of the work was
performed. In general, the work proceeded in three stages - plan the components
with respect to location and function, perform all modifications to the case'
itself, and assemble everything together. That completely ignores all the
difficulty actually associated with each task, however.
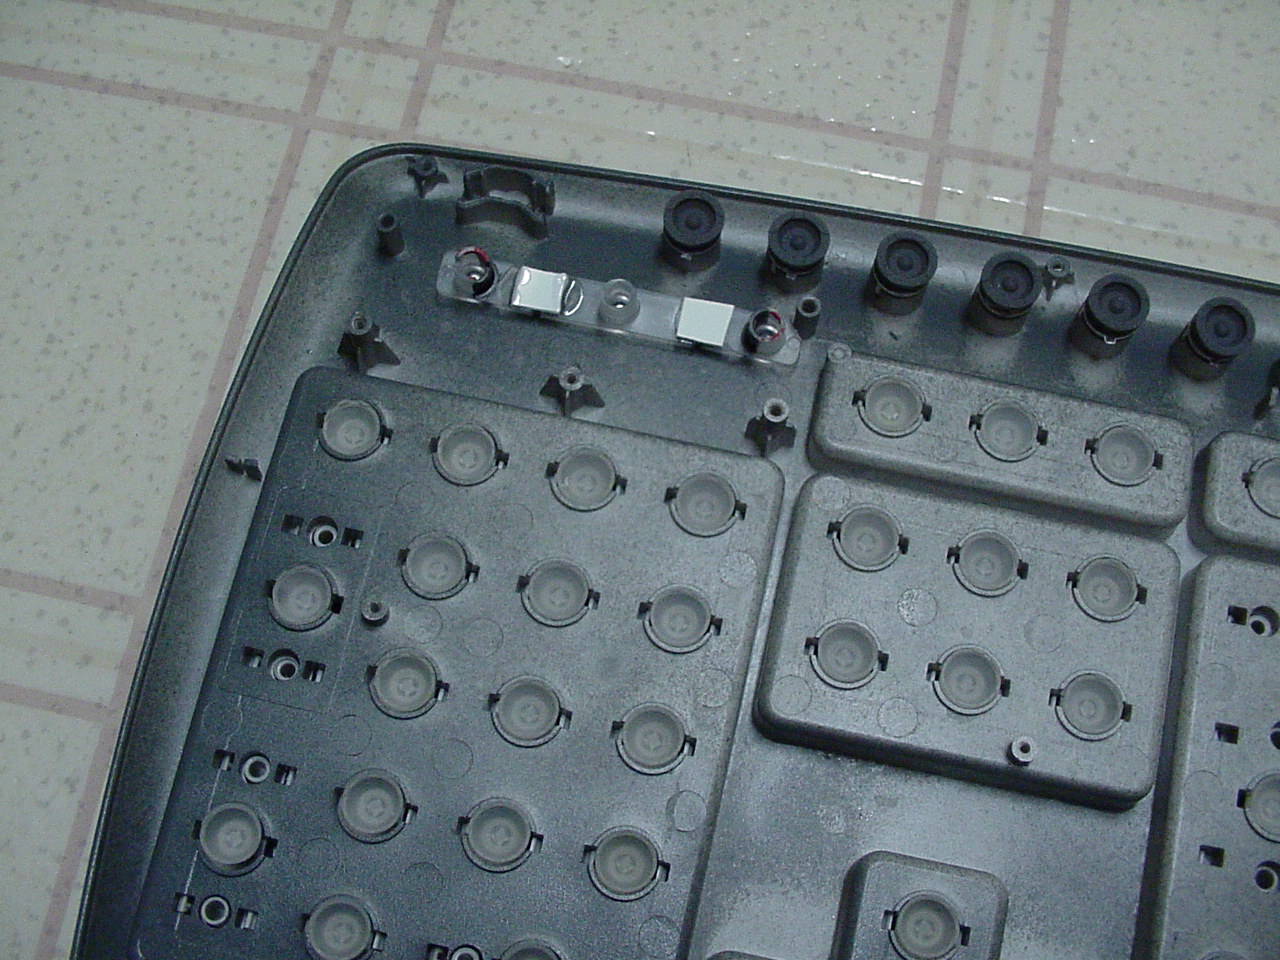
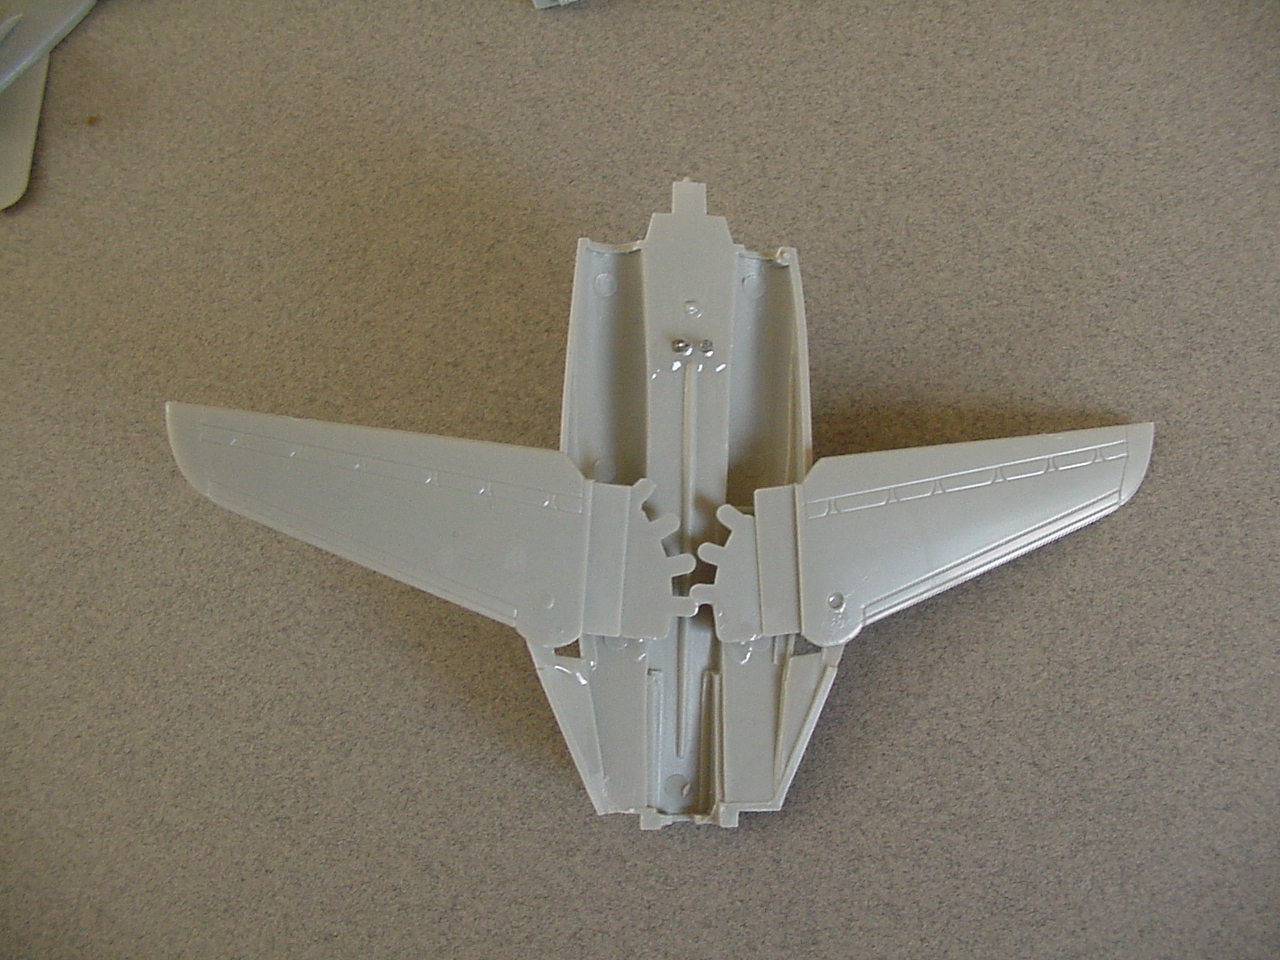
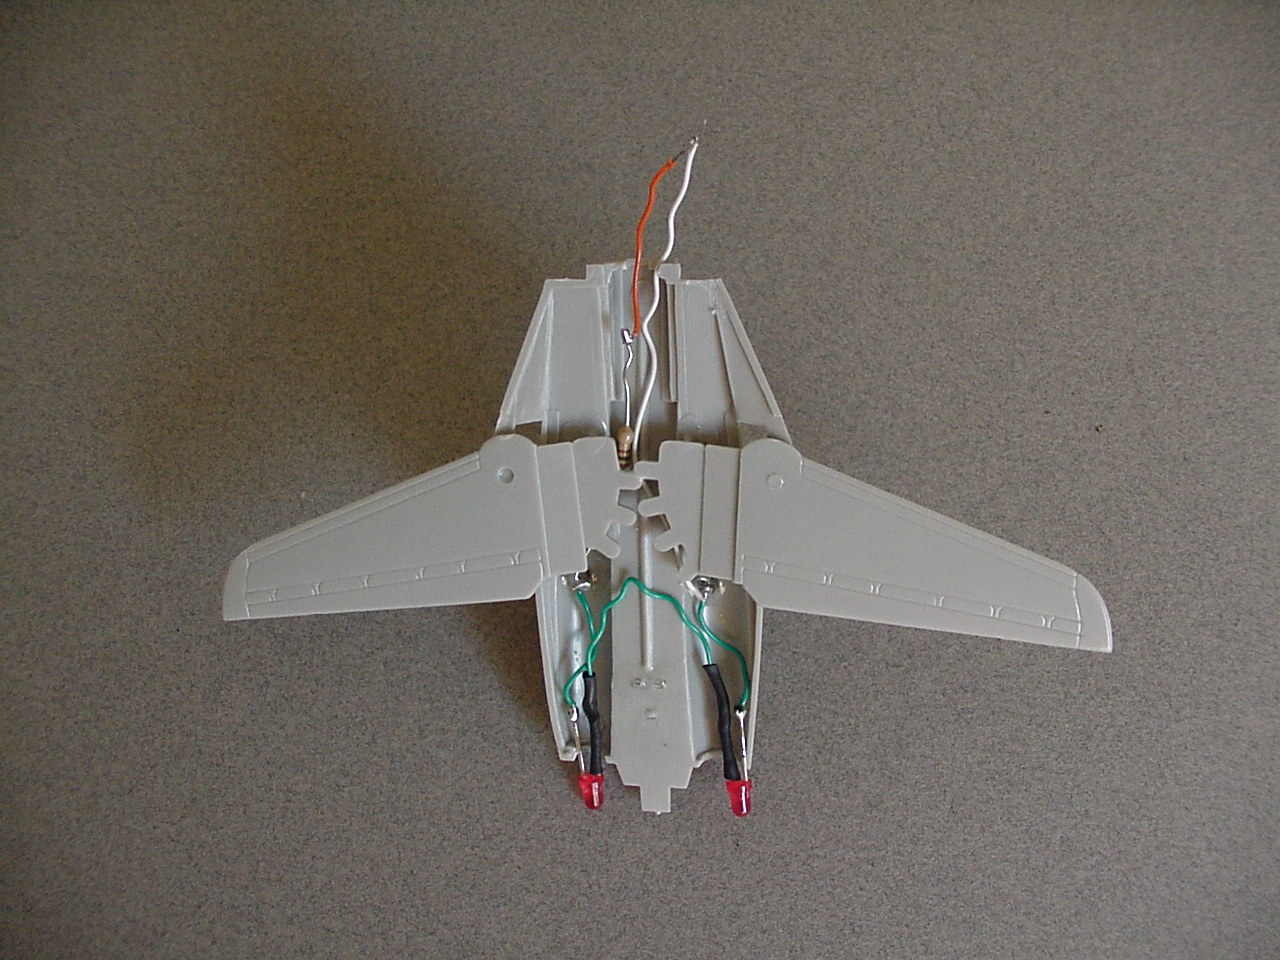
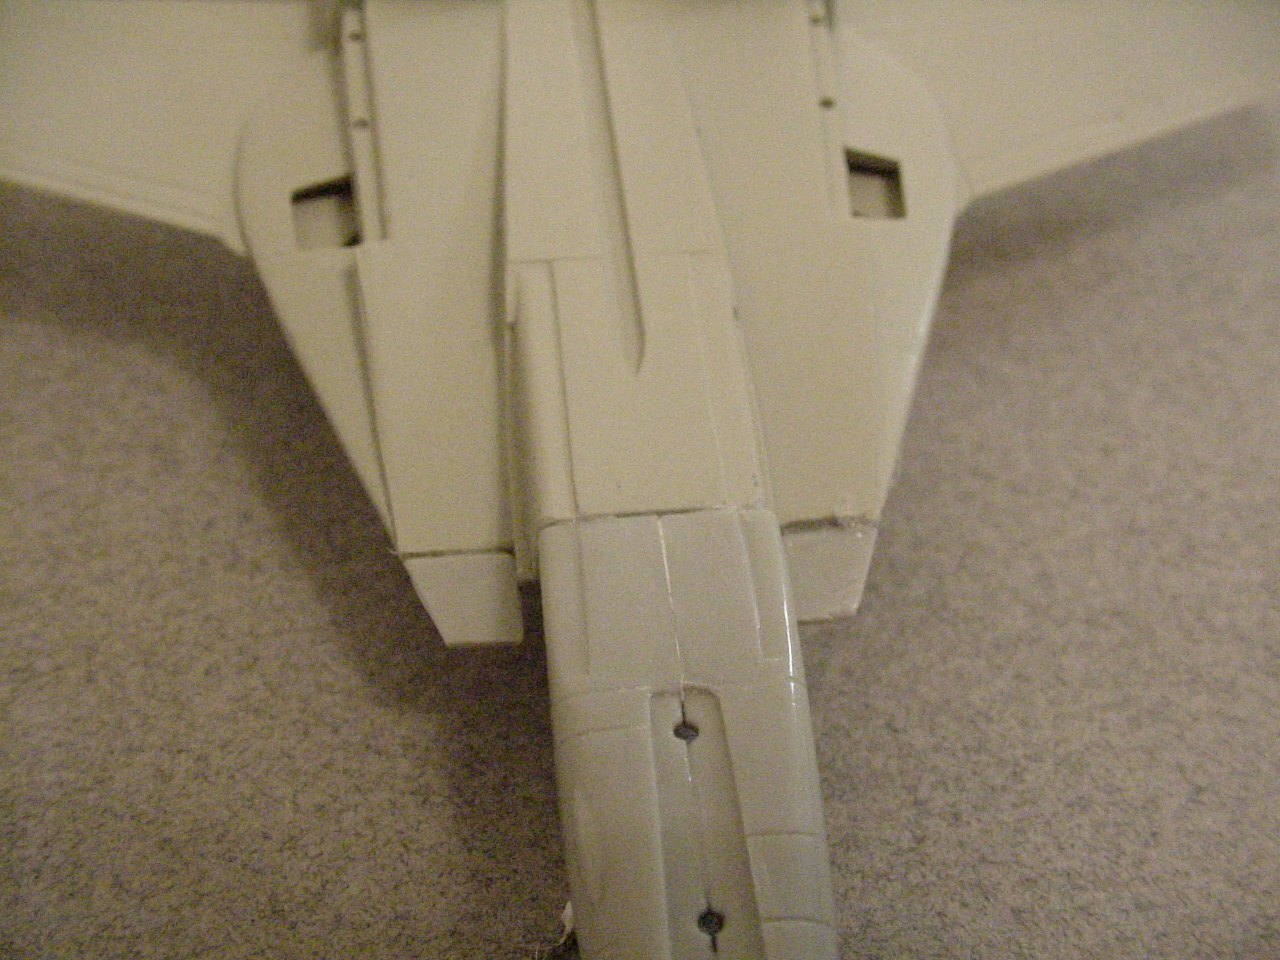
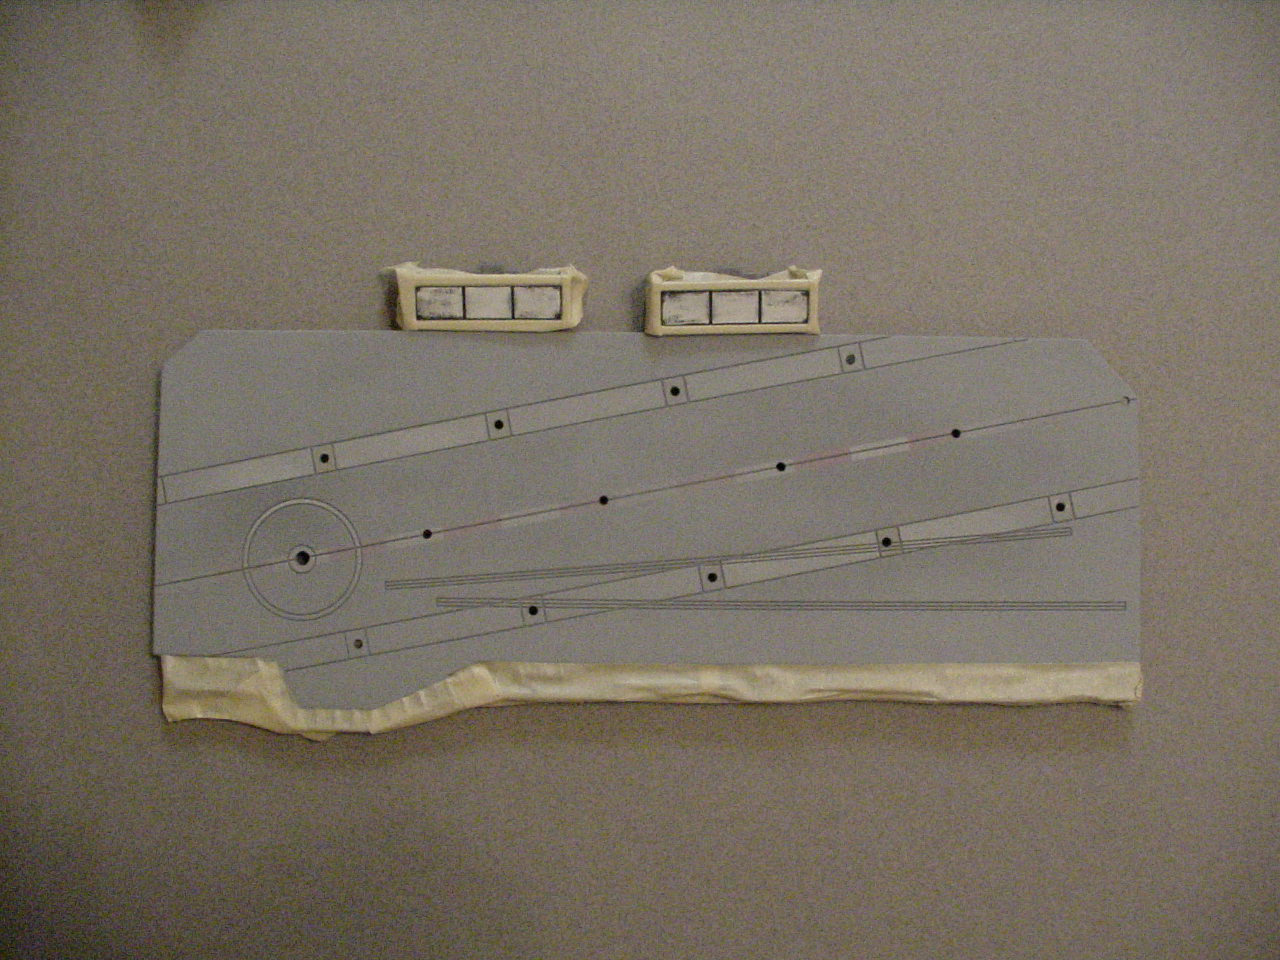
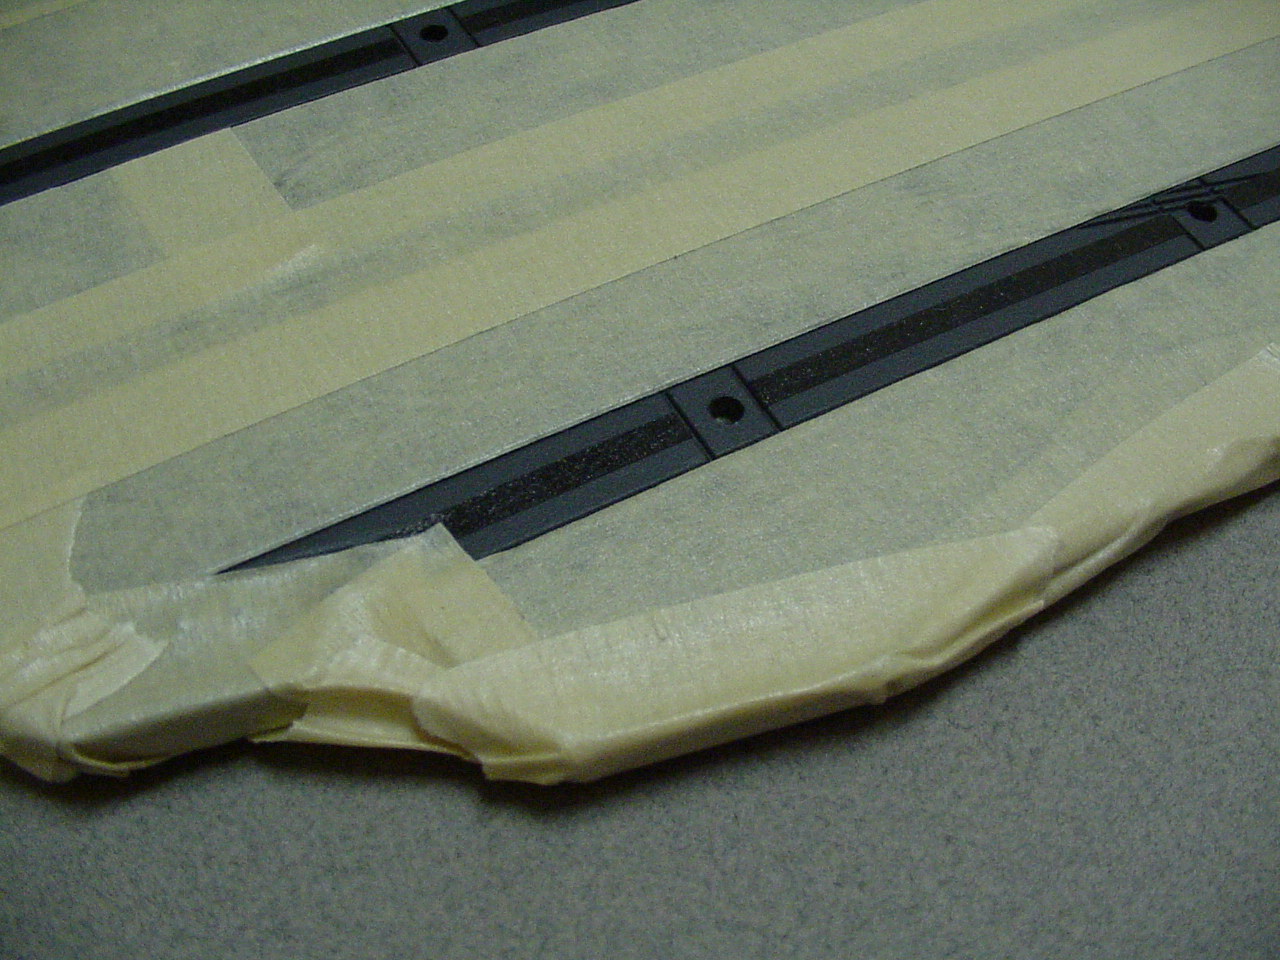
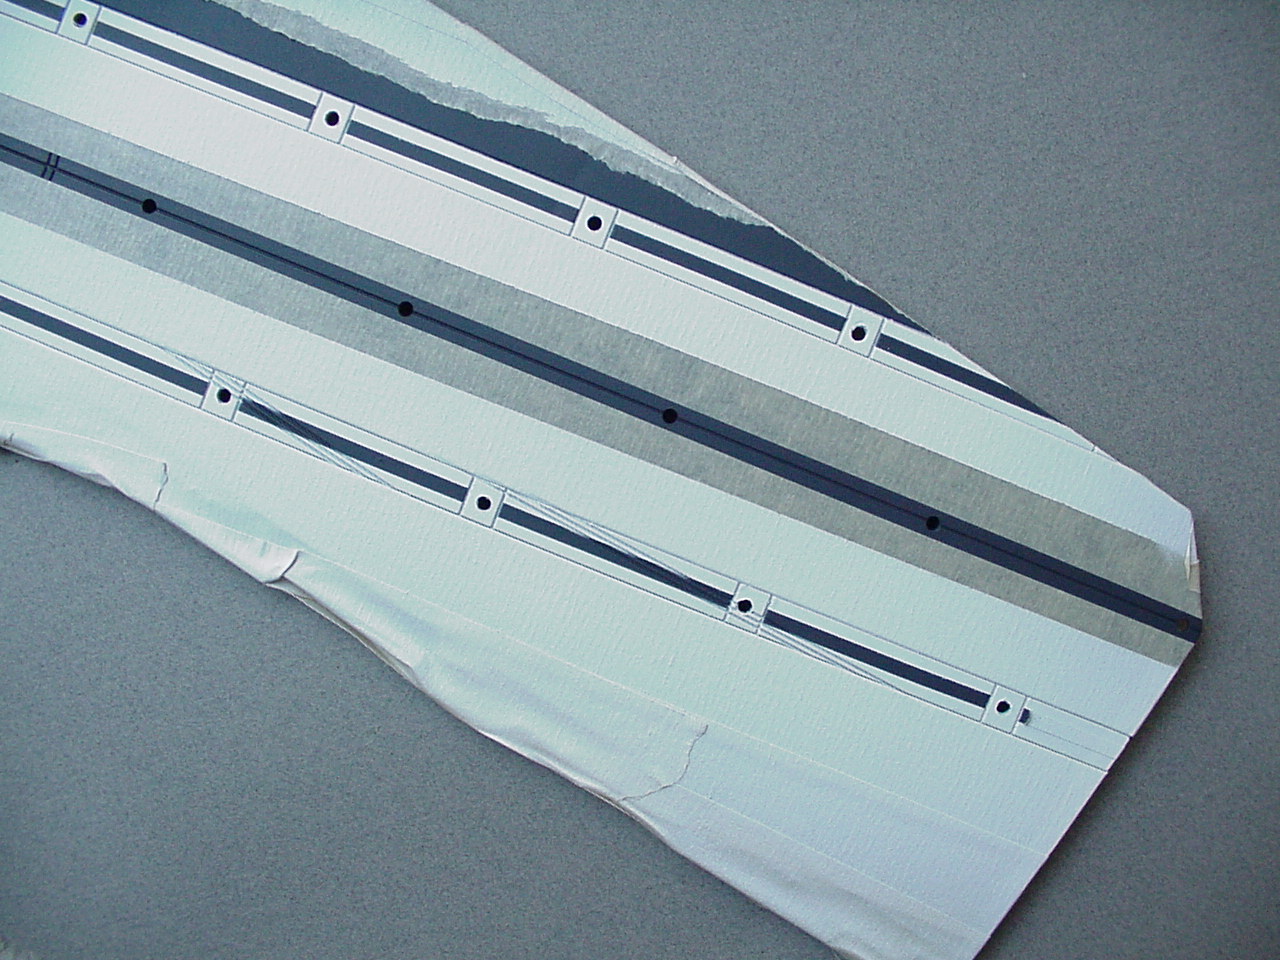
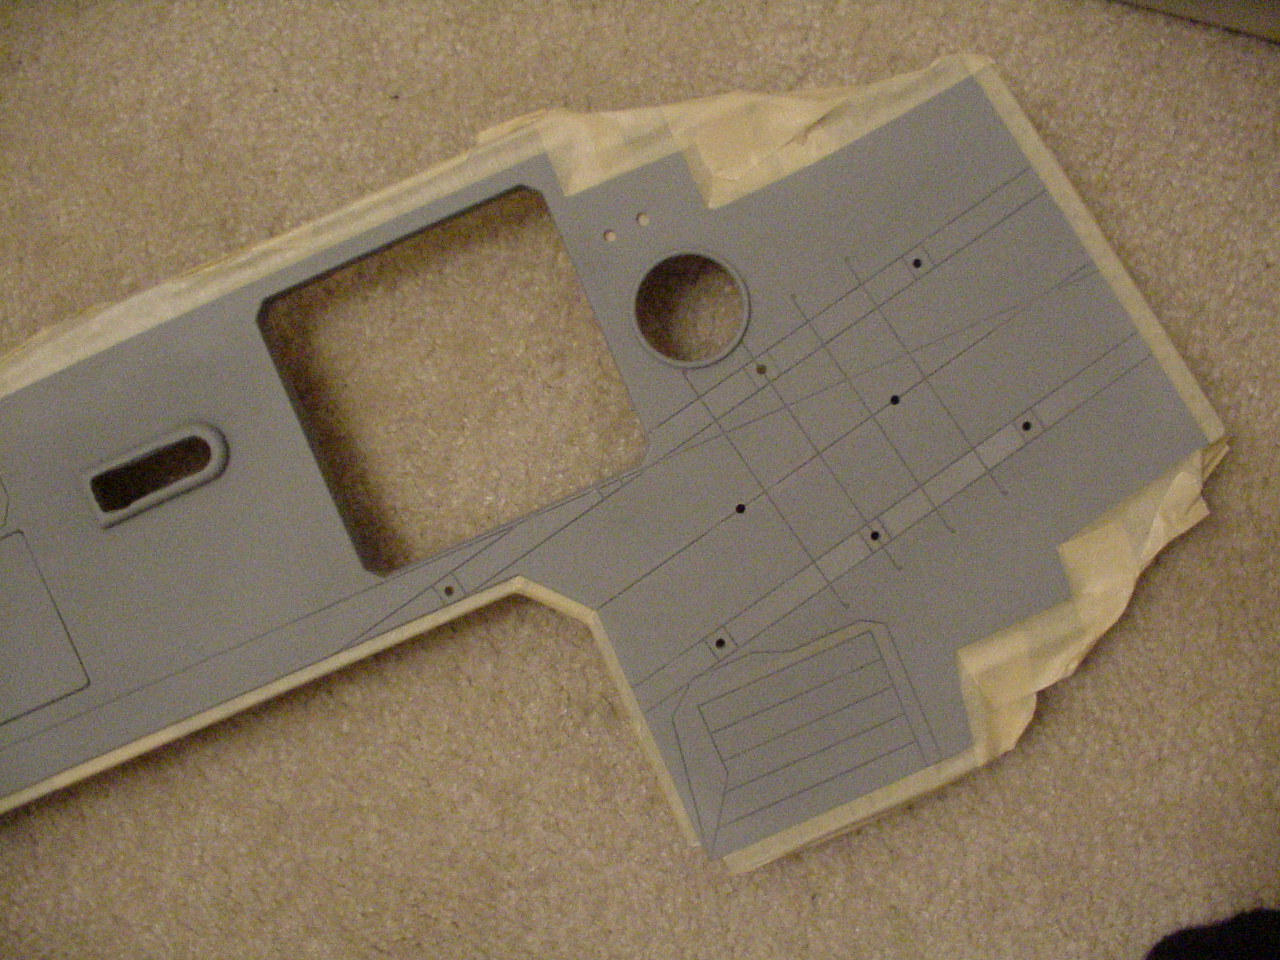
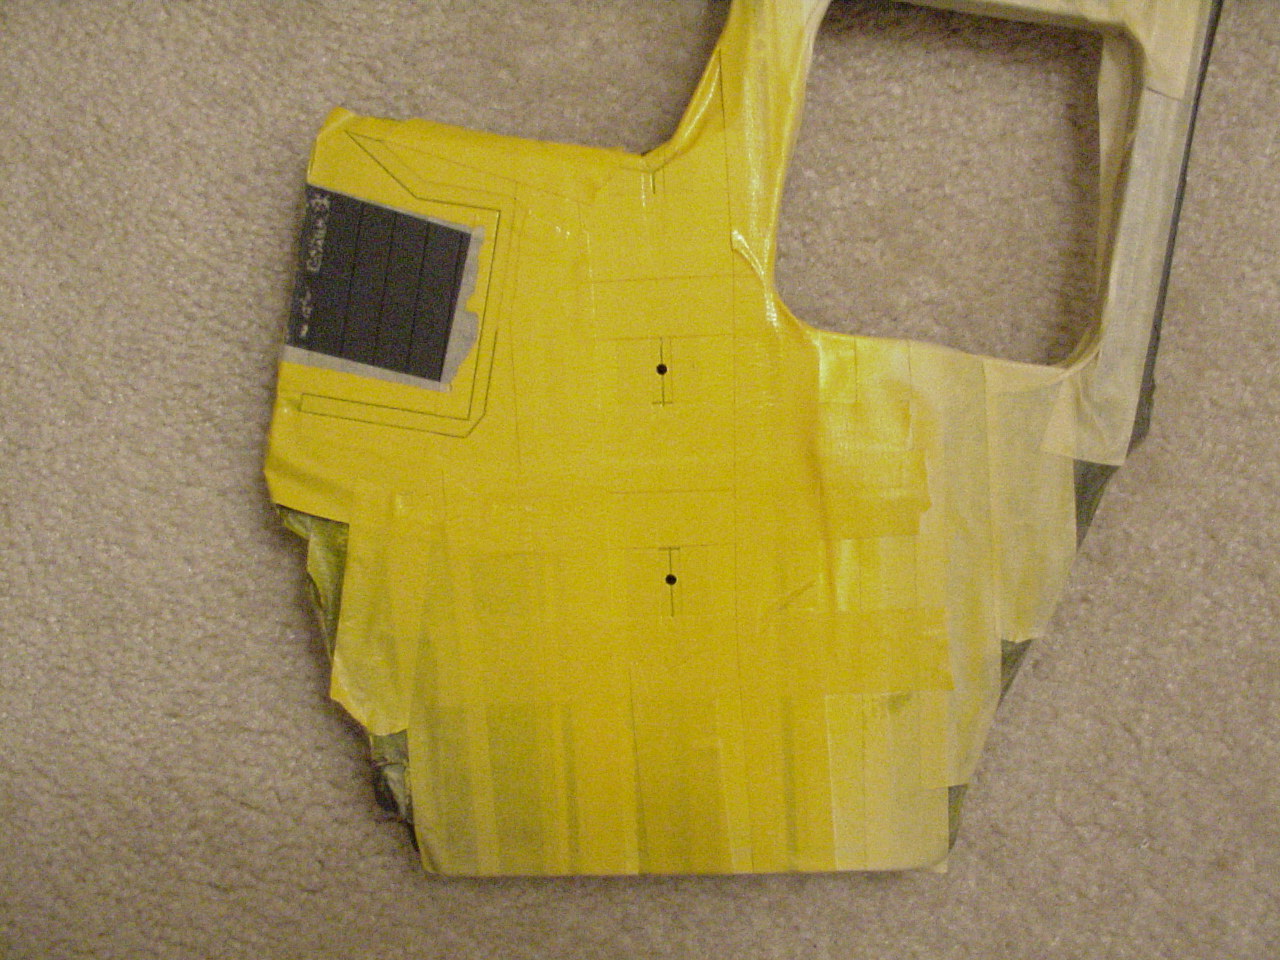
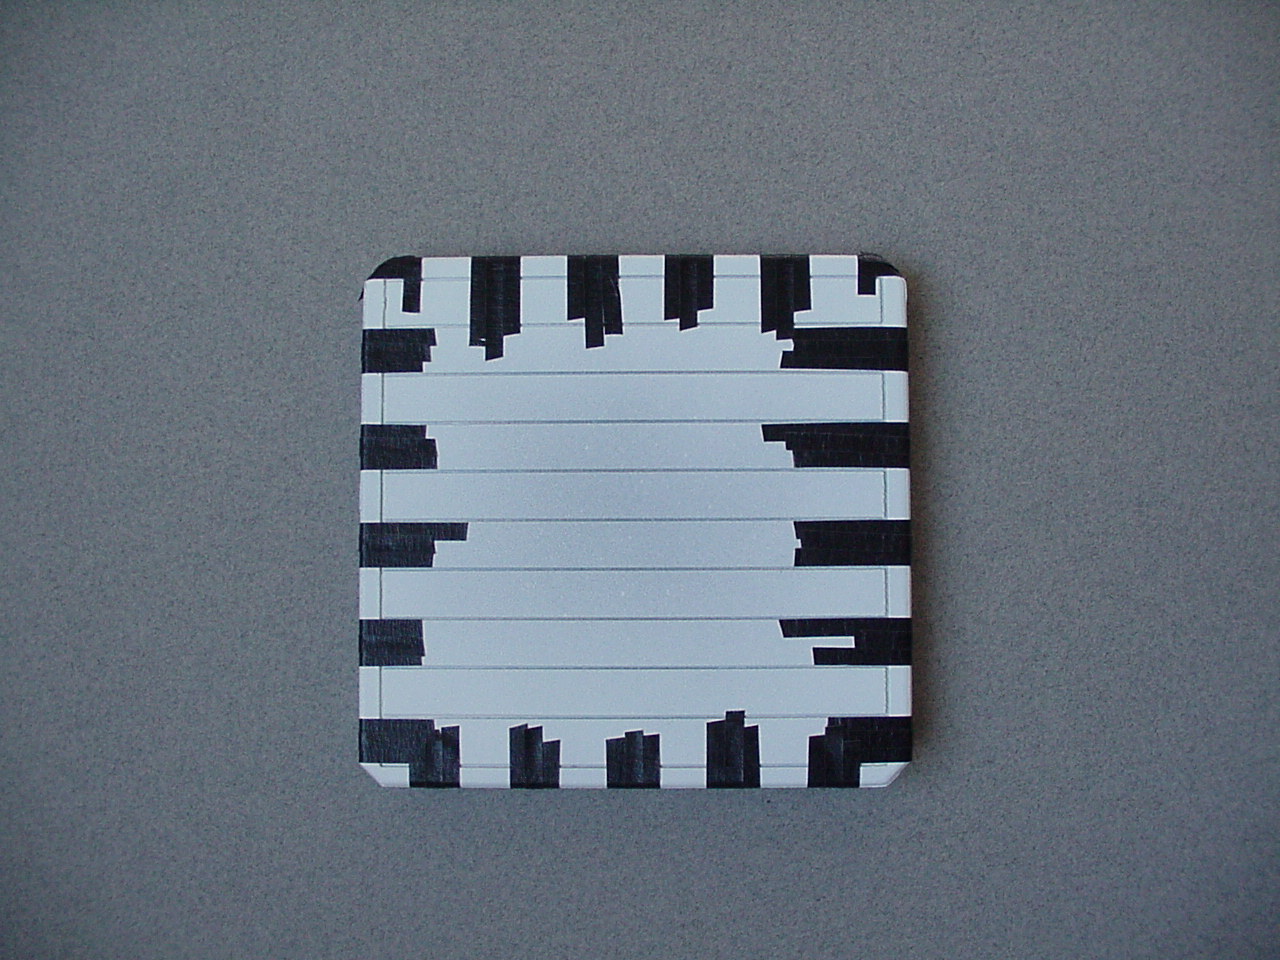
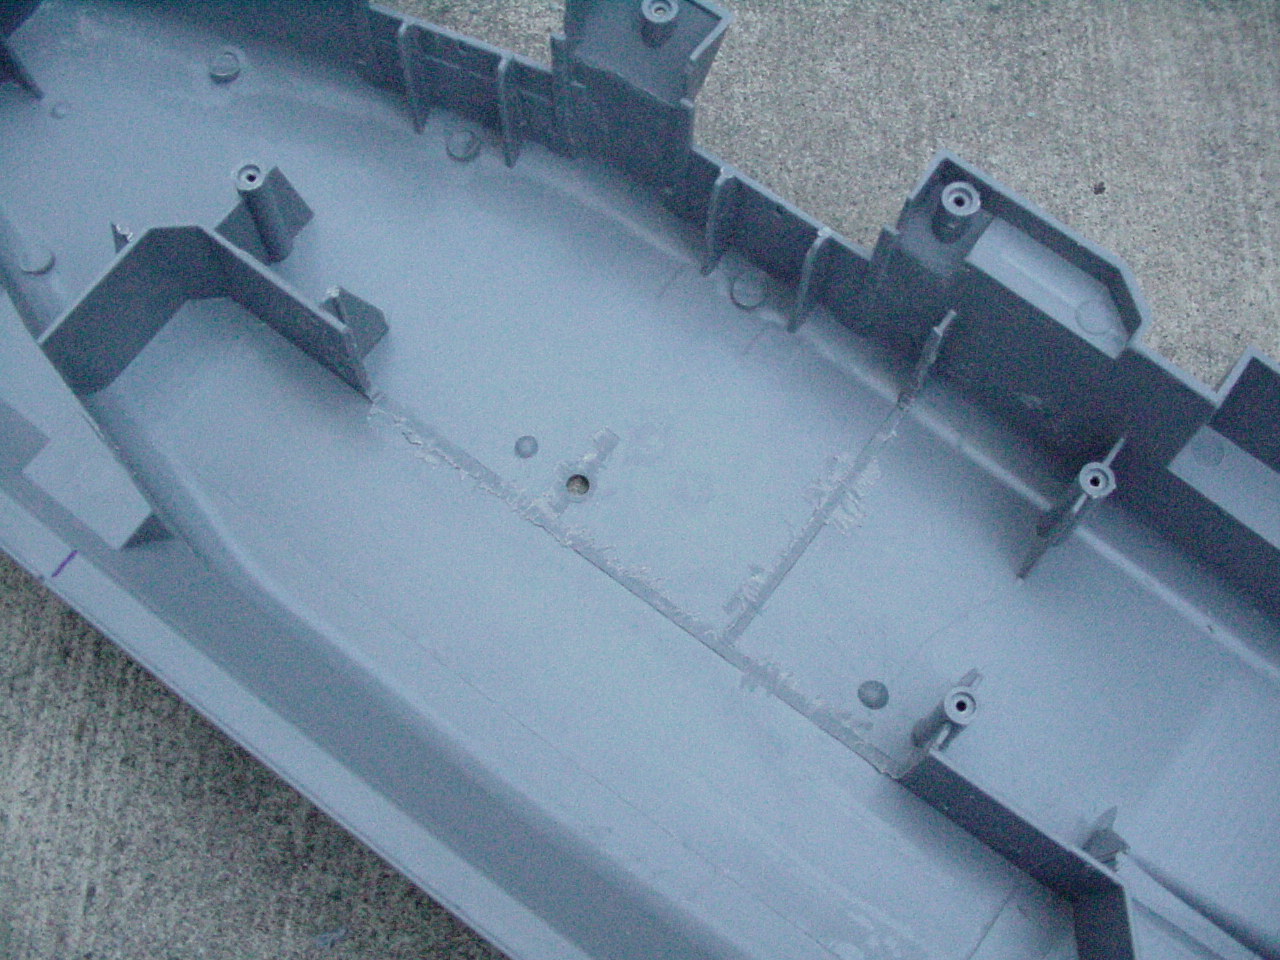
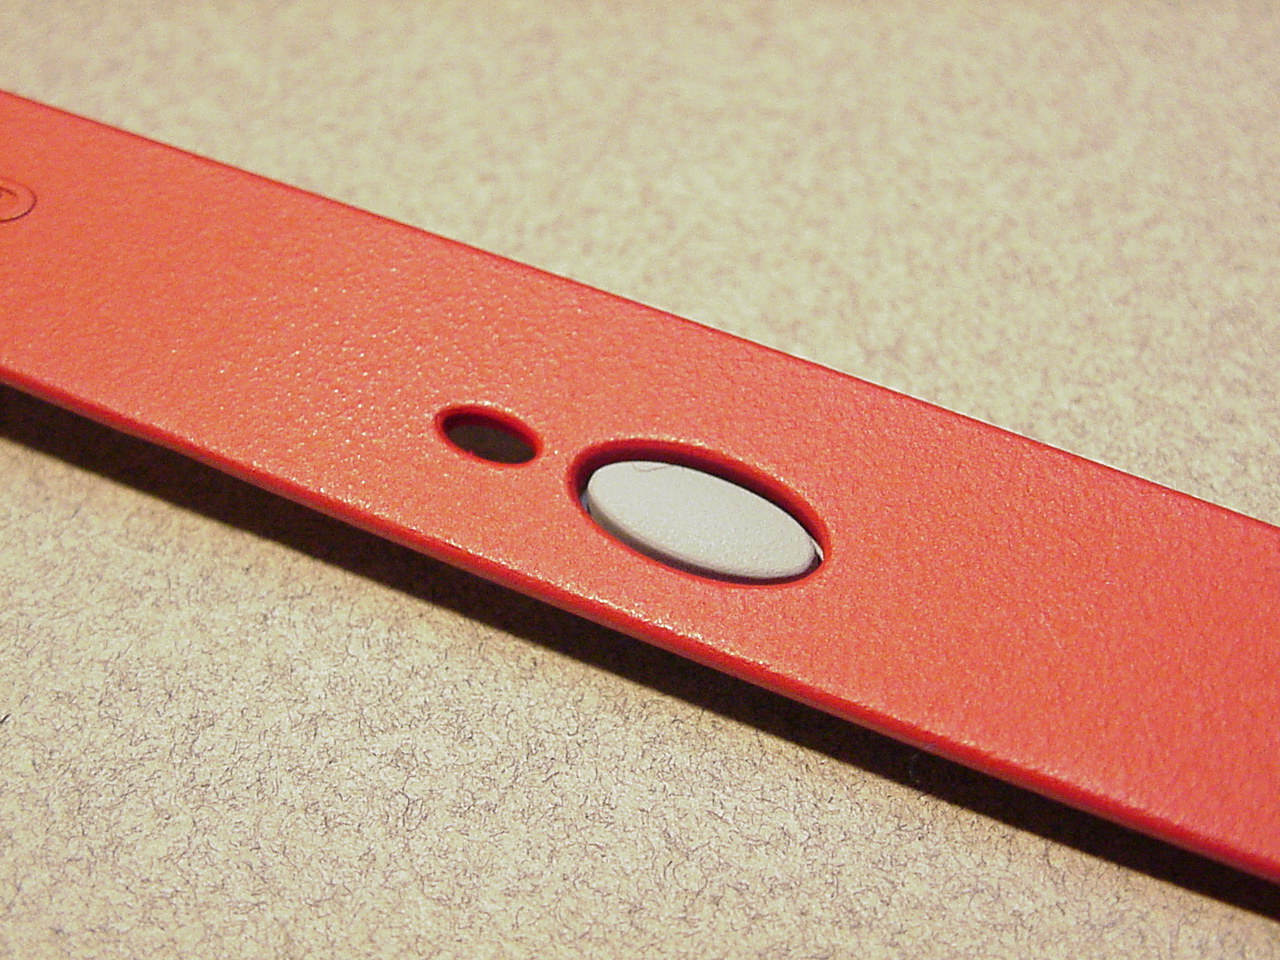
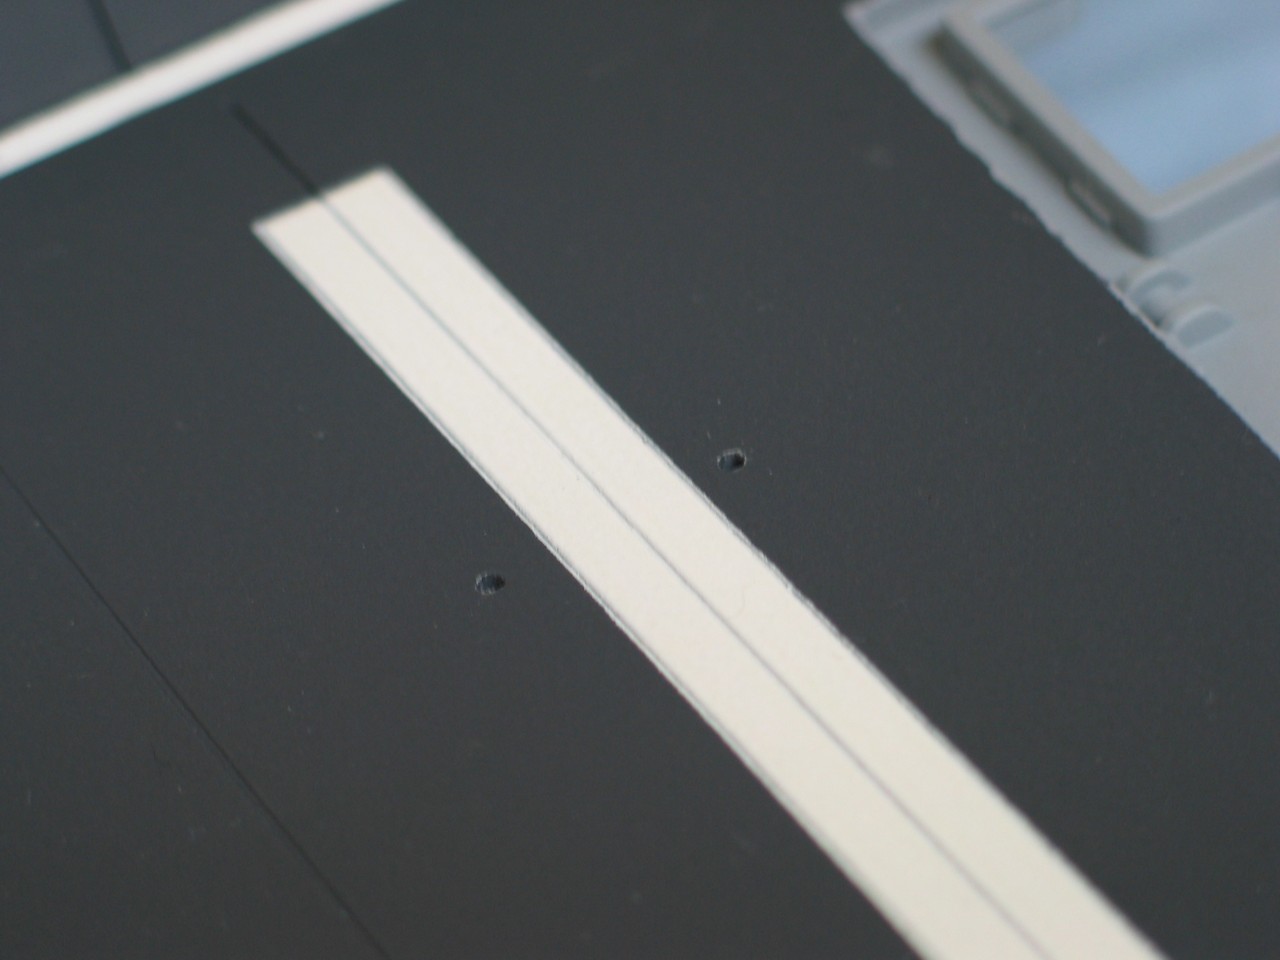
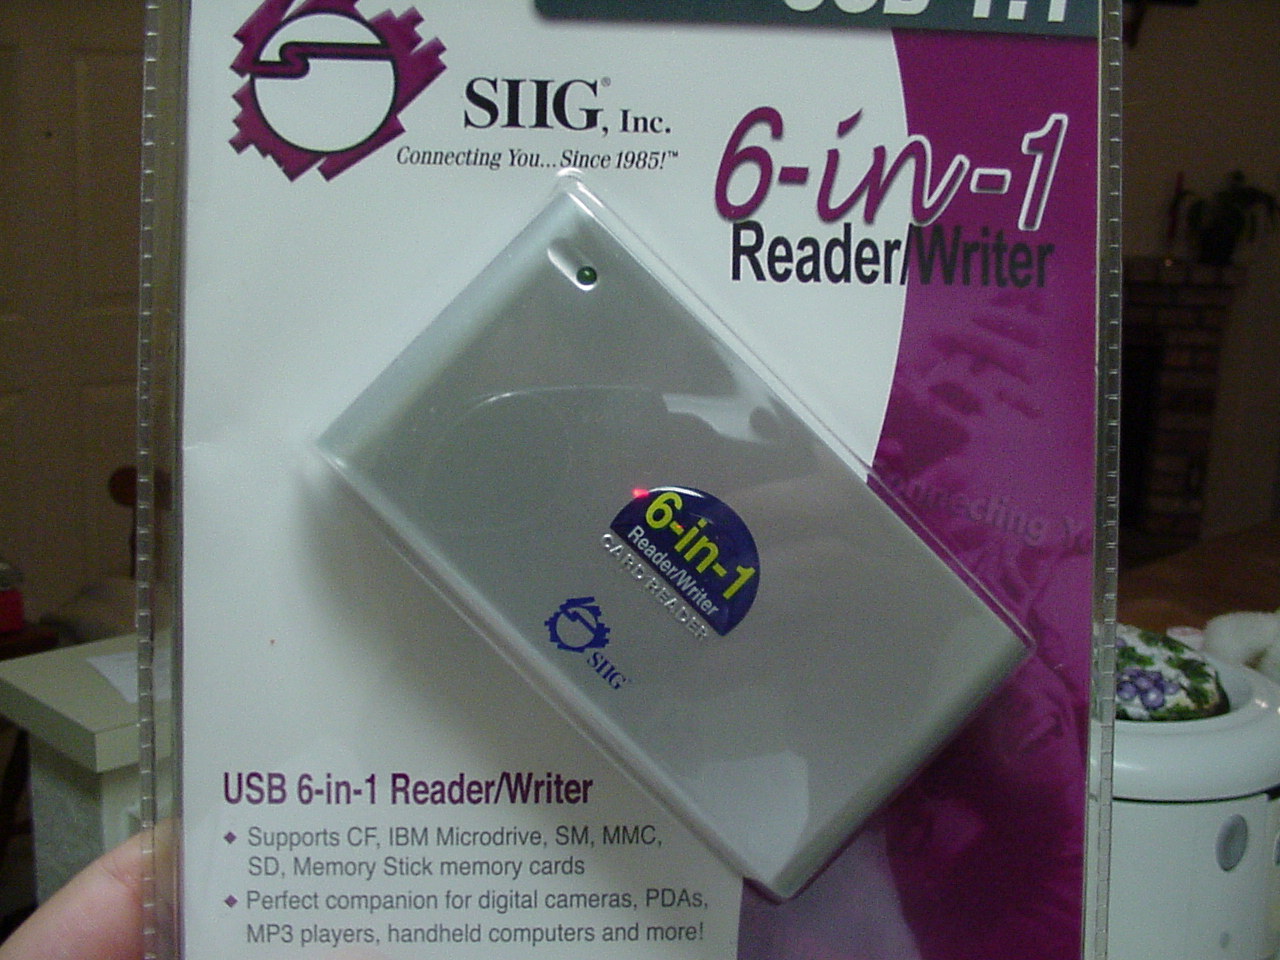
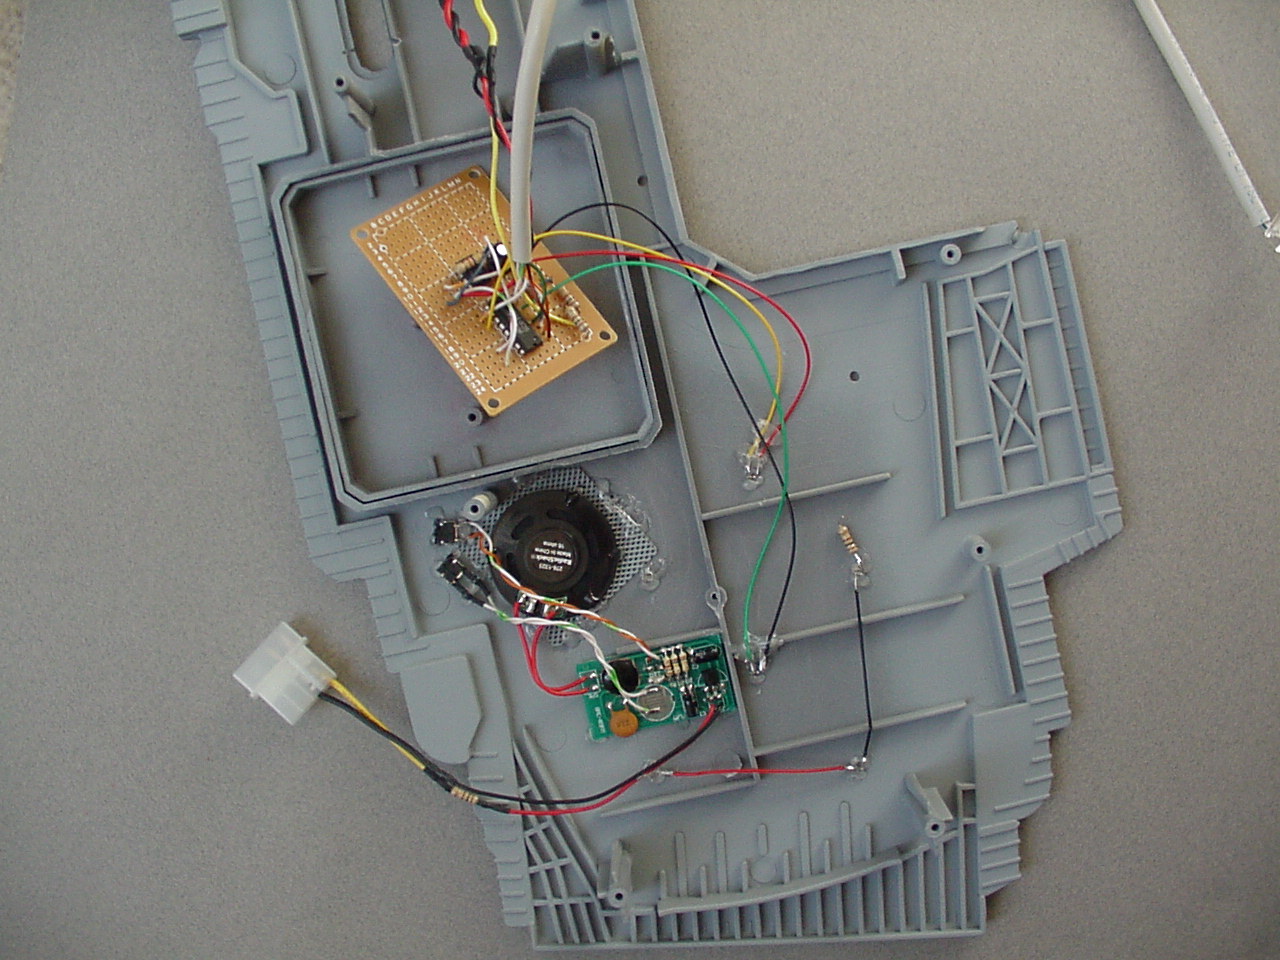
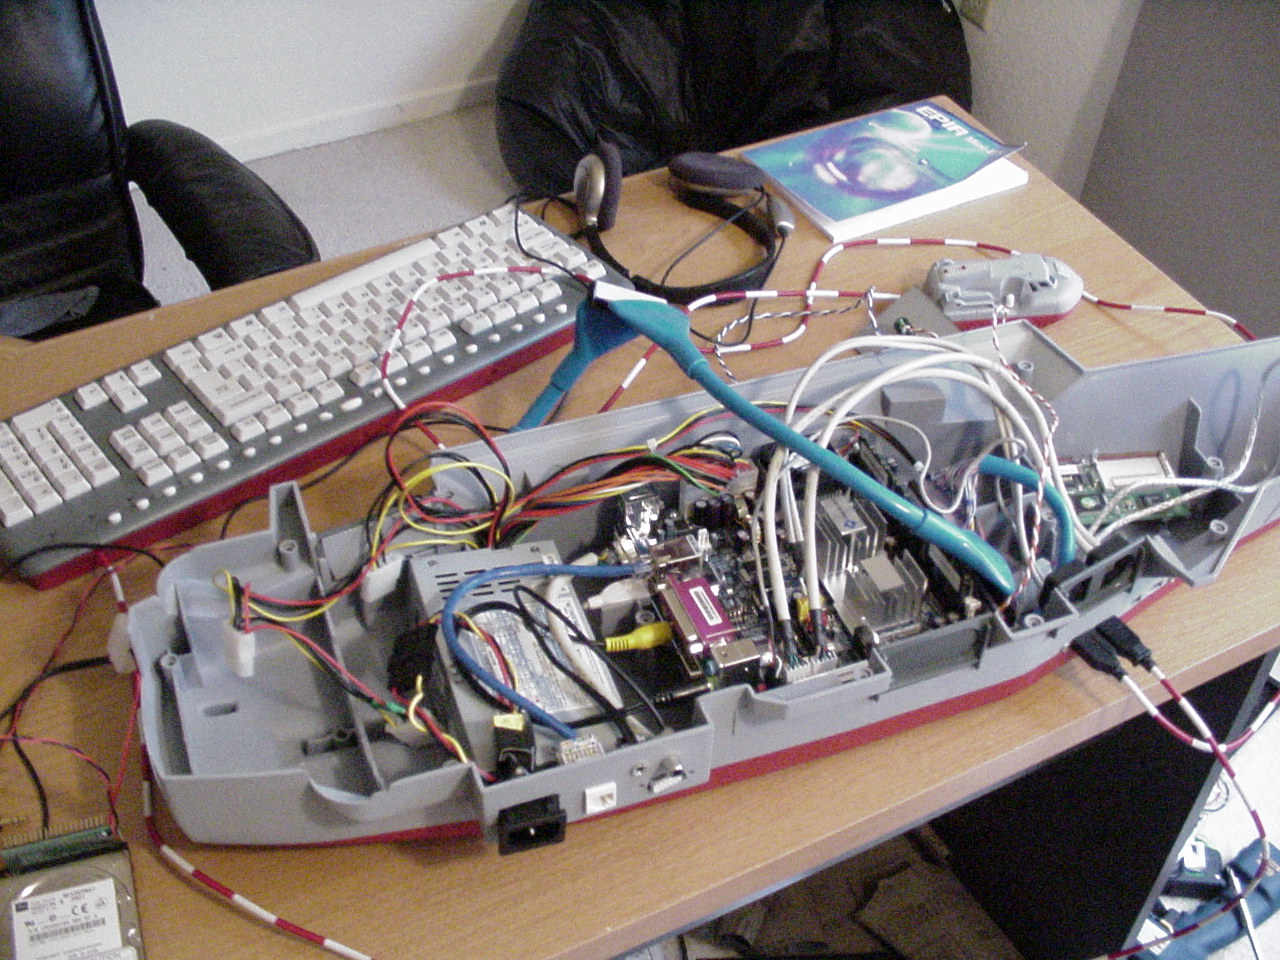
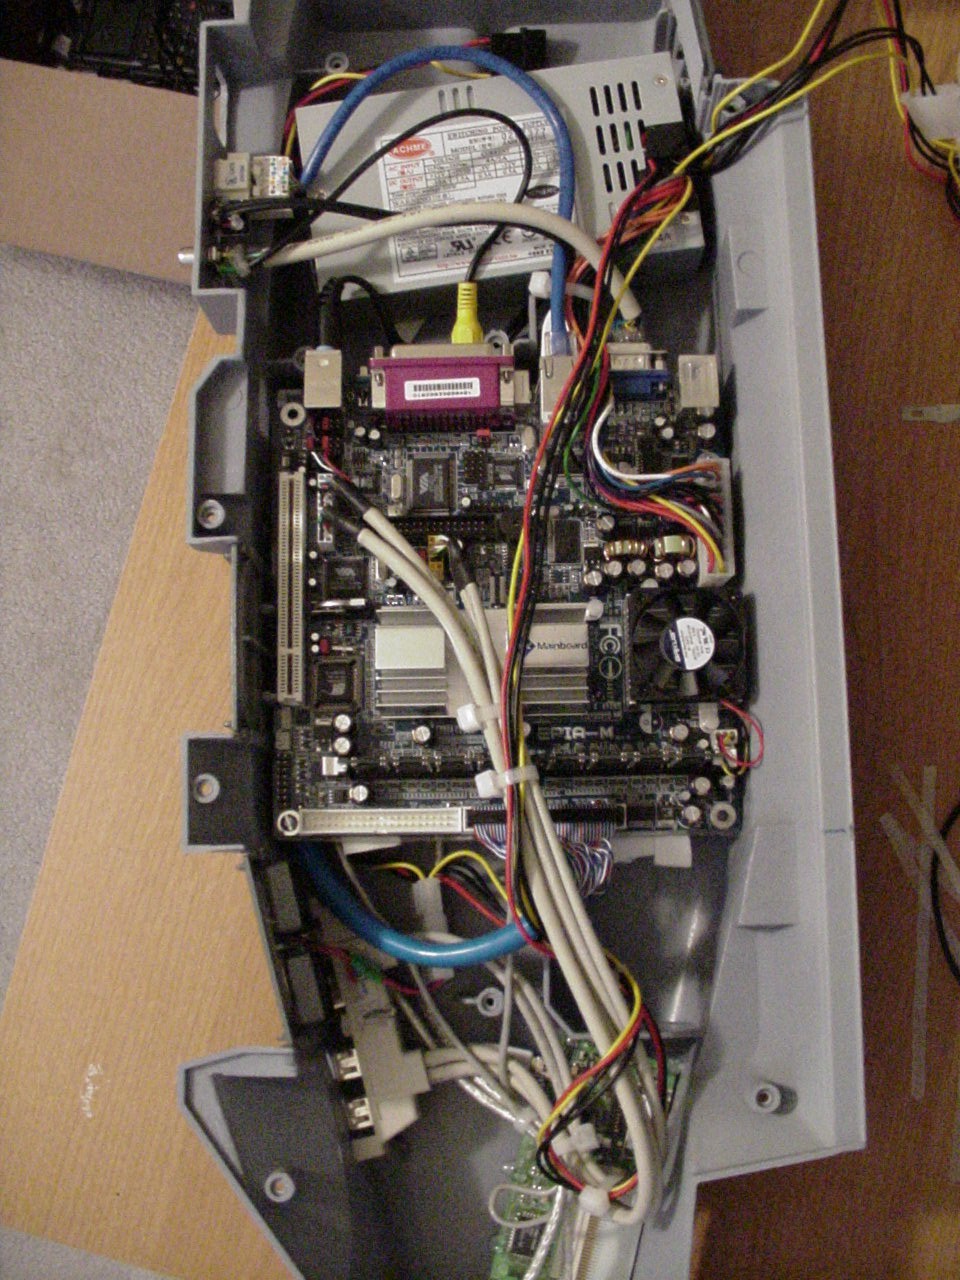
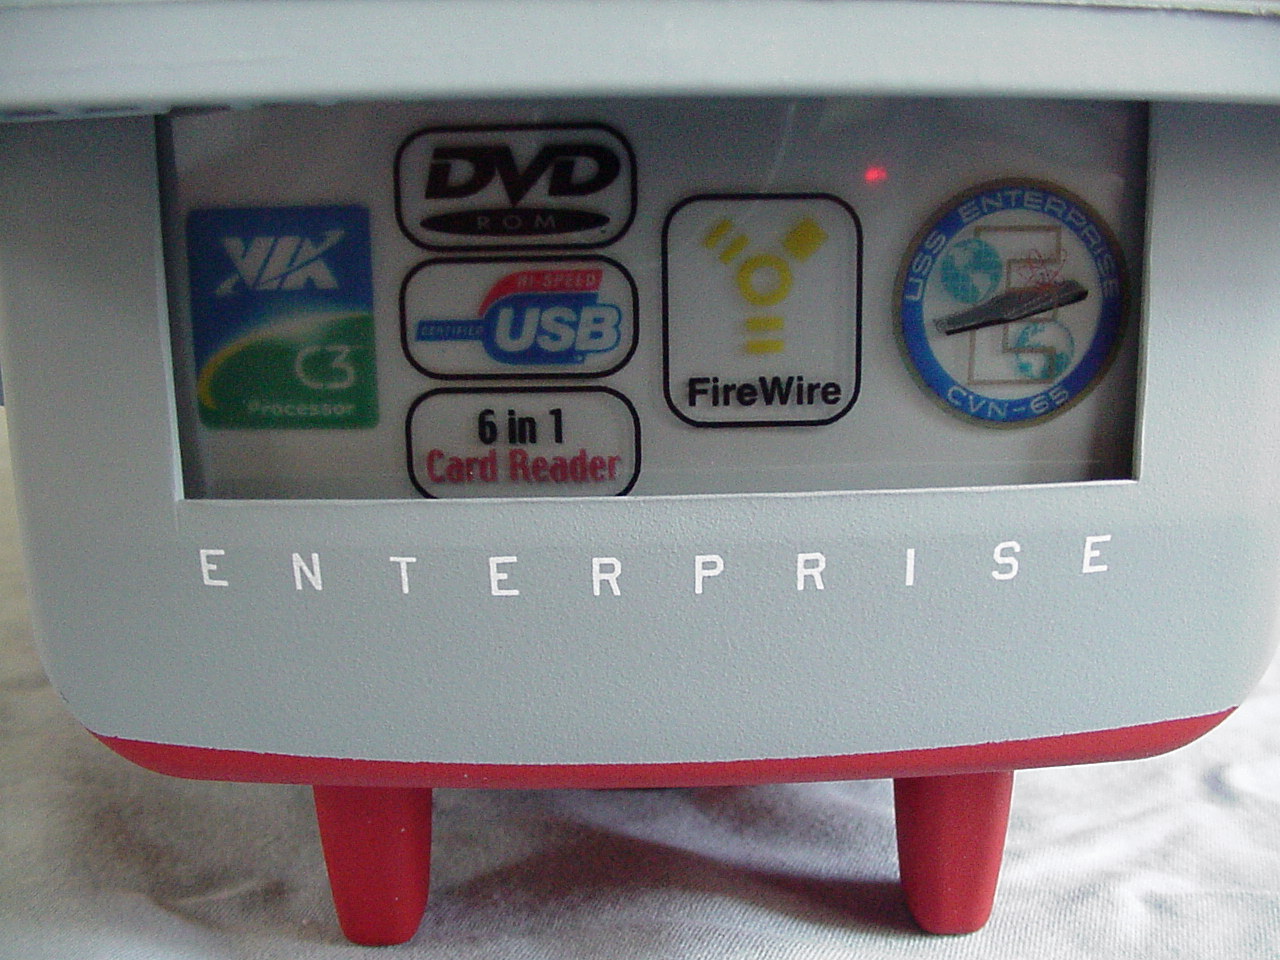
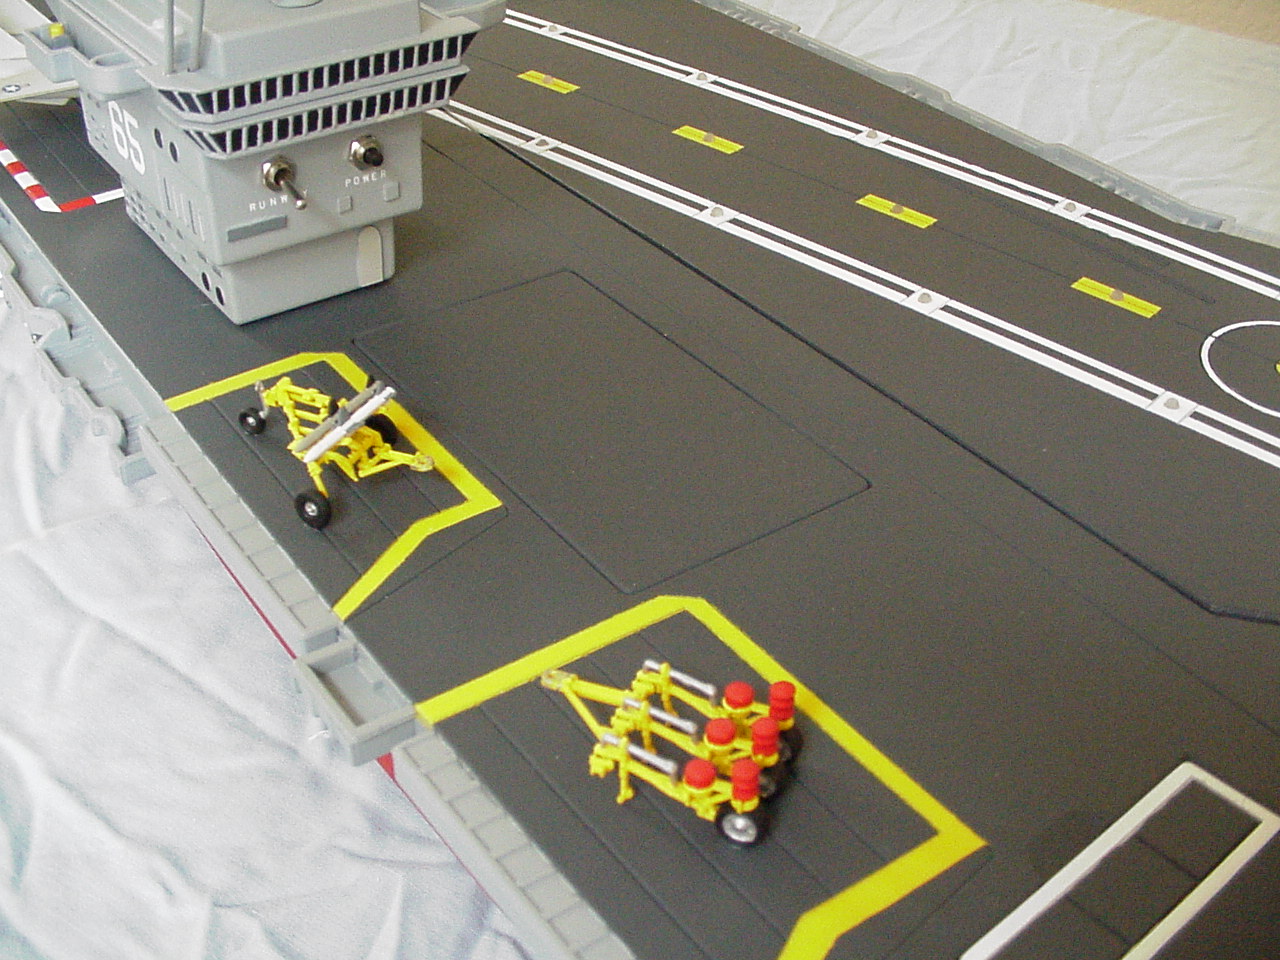
The planning of the hull was actually a gradual thing. I knew which motherboard I would be using, and I knew which power supply. But items such as the sound circuit, DVD-ROM drive, and memory card reader/writer were relative late-comers in the process. One significant problem with the planning stage was that despite the size of the toy, there were few areas which were flat enough on the hull to add all the ports I needed. There were quite a lot of modifications to the basic structure that may not be readily apparent. A lot of plastic was removed from the toy to make sure that everything would fit. I had to be careful not to remove any critical structures. Obviously, I needed to remove at least one main screw mounting hole in the center or the motherboard wouldn't fit. I had to make sure that losing that mount didn't affect the structural integrity of the mod overall. Trying to cut holes for the memory card reader/writer and the DVD-ROM was especially difficult. While the pictures may not totally show the state of the hull, it's actually slightly curved. Trying to cut precise holes for non-curved pieces in a curved structure is not the easiest thing to do. The deck of the aircraft carrier went through a lot. There was a lot of painting, of course. But also quite a few lights were added so that the runway would light up (actually, the white lights down the side simply light up while the lights in the center of the runway light up in sequence). Over twenty-two LEDs were each individually sanded and wired into the runway alone. Also, the command center went through serious modification. It was painted, had electronics for switches added, and had additional detail added with sheet plastic. All in all, these modifications were the hardest part of the mod. Knowing that a single accidental cut with my Dremel could ruin weeks of work was certainly somewhat stressful.
|
 |
 |
 |
 |
 |
 |
 |
 |
 |
 |
 |
 |
 |
 |
 |
 |
 |
 |
 |
 |
 |
 |
 |
 |
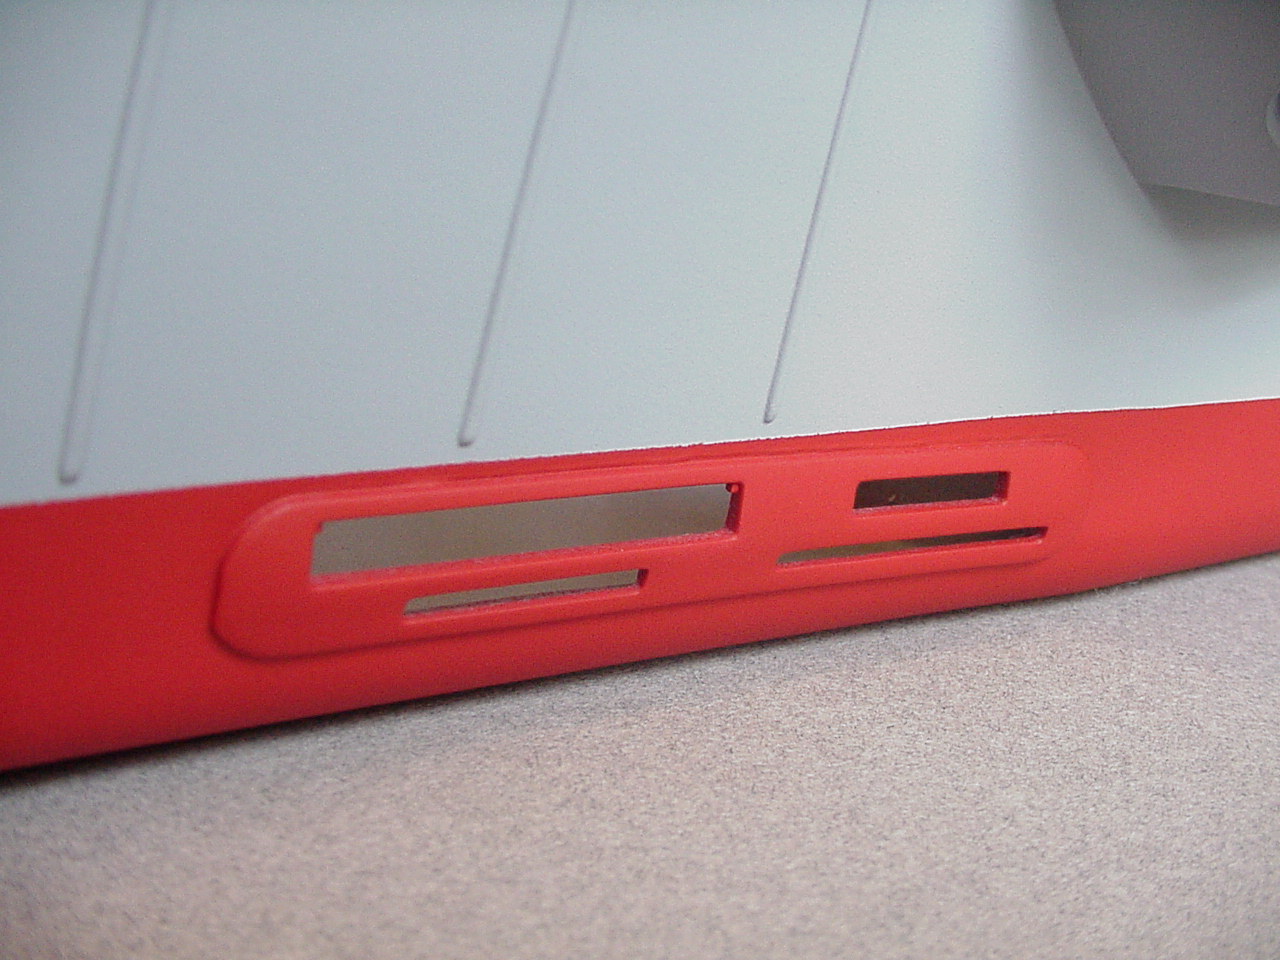
Electronics
|
The electronics in this mod were simple, but effective.
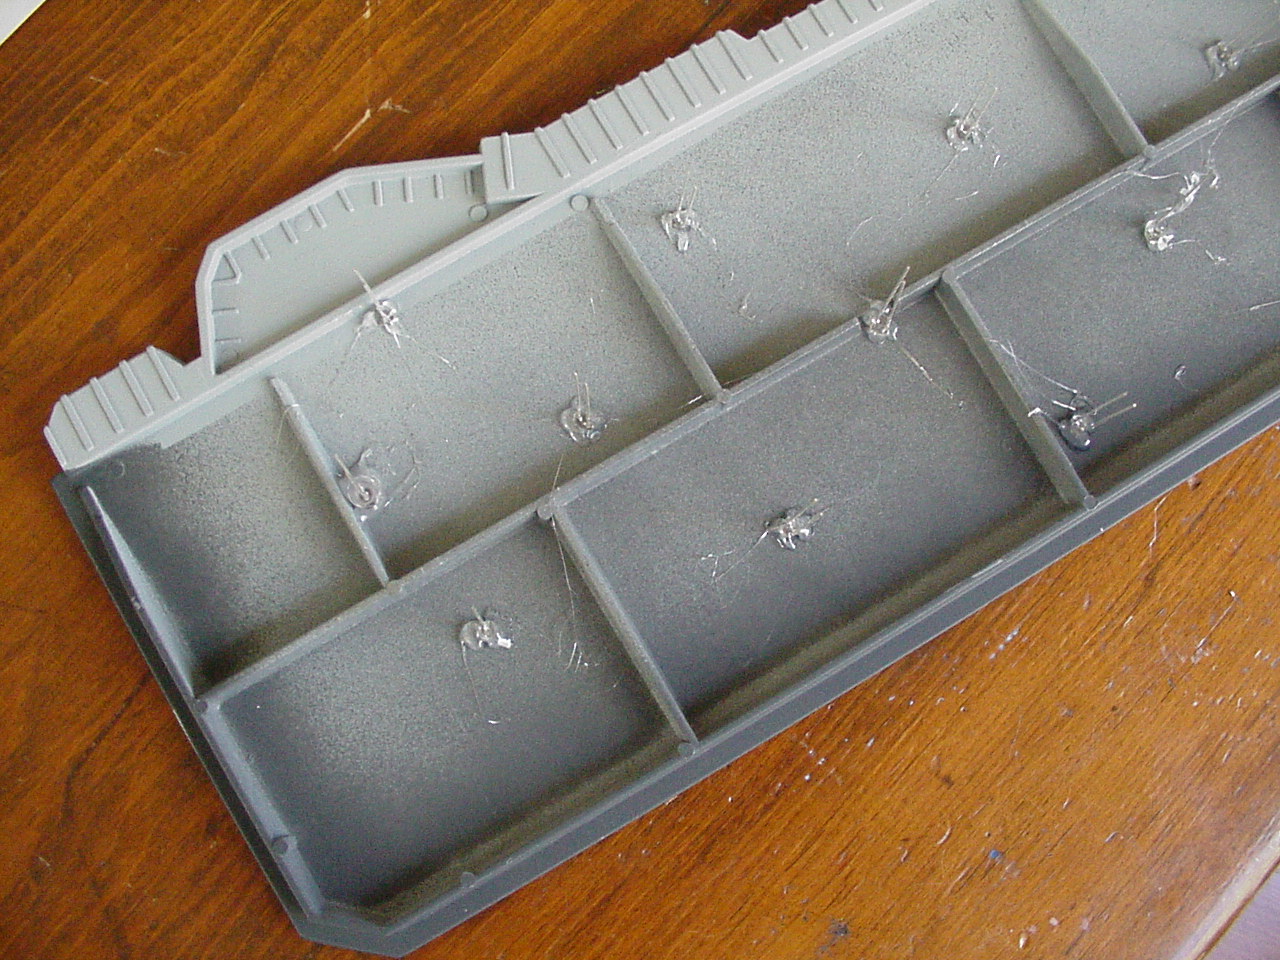
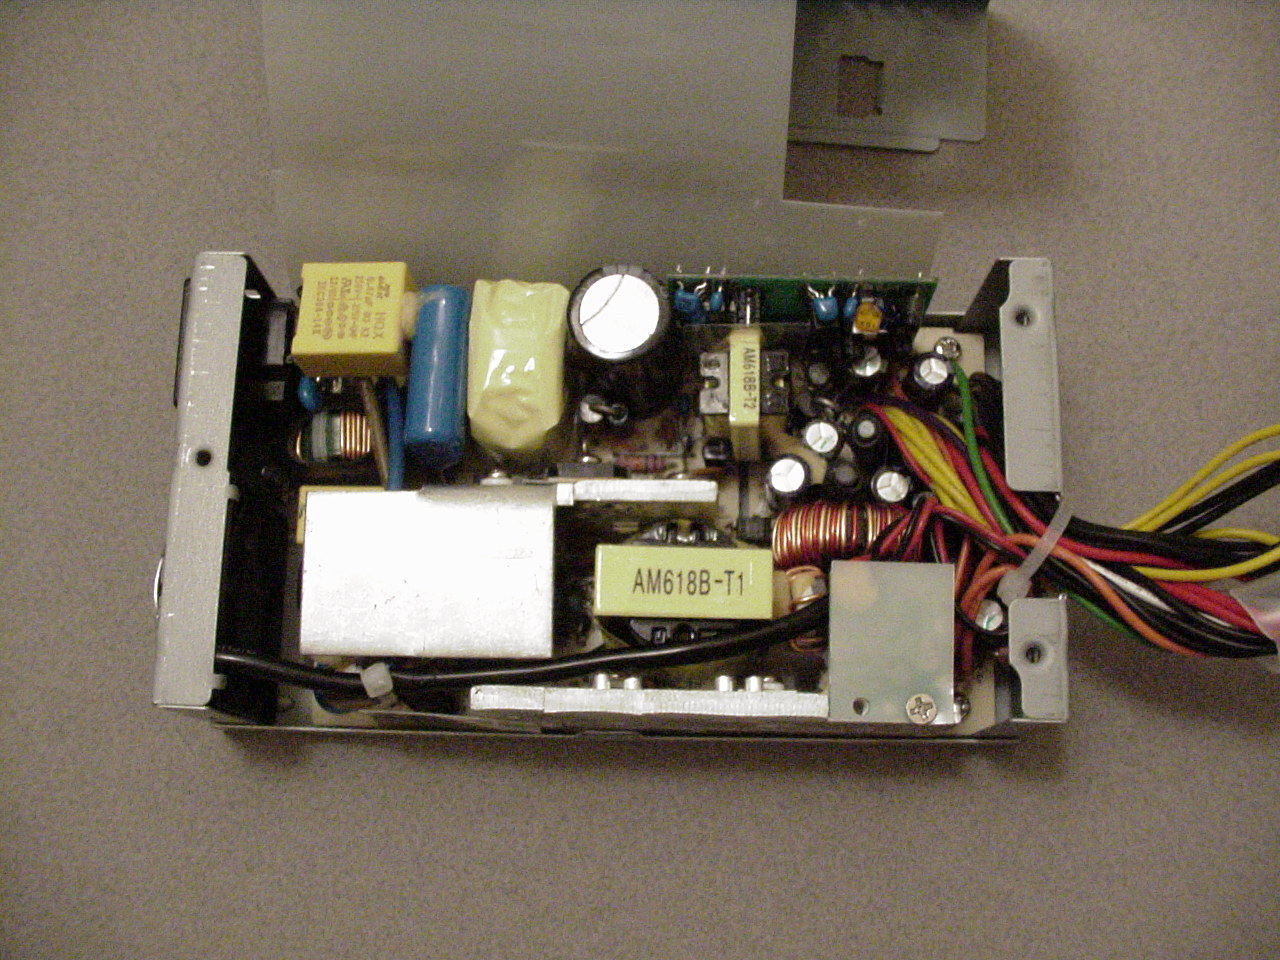
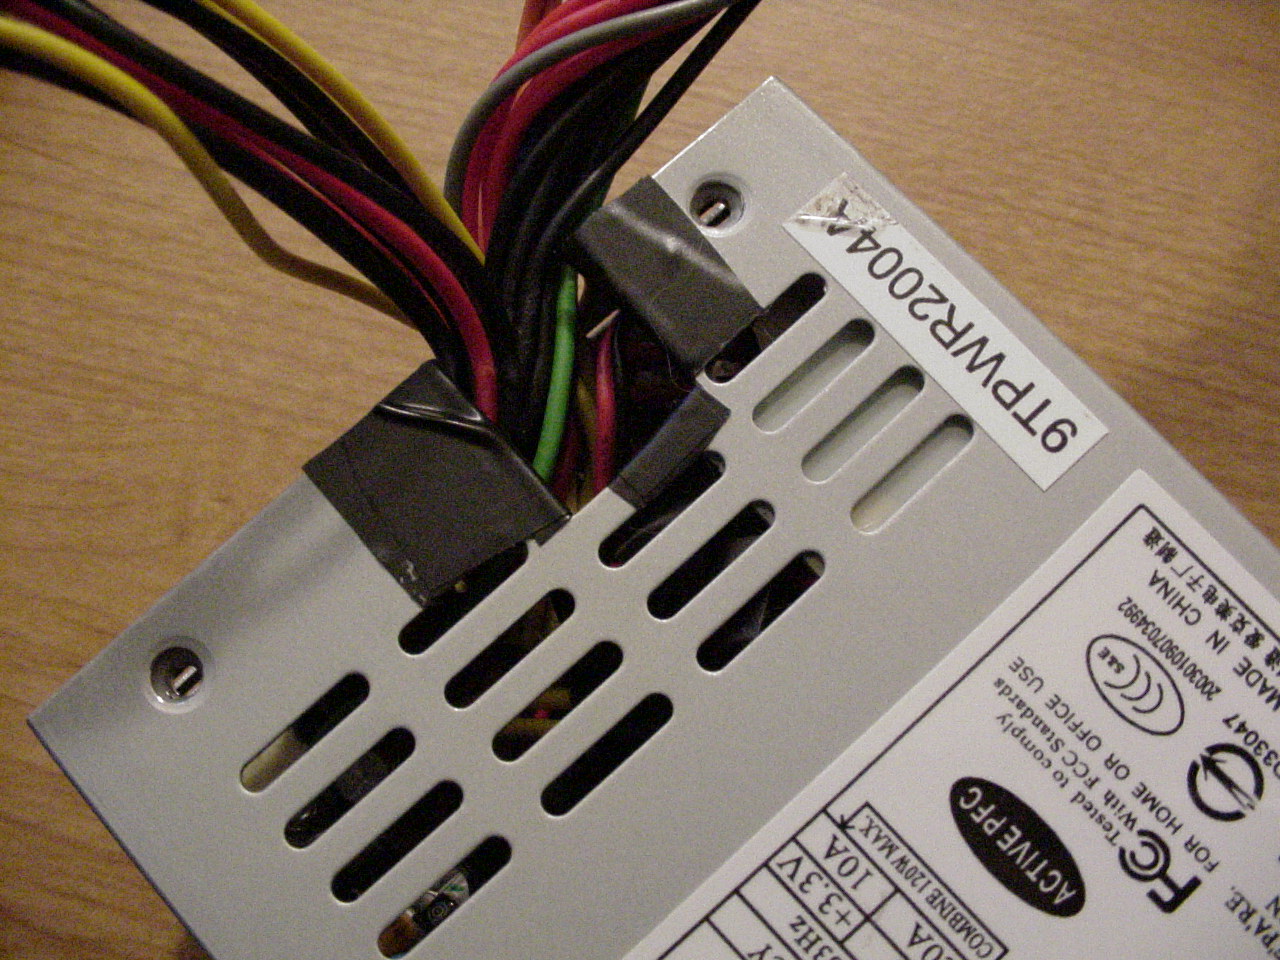
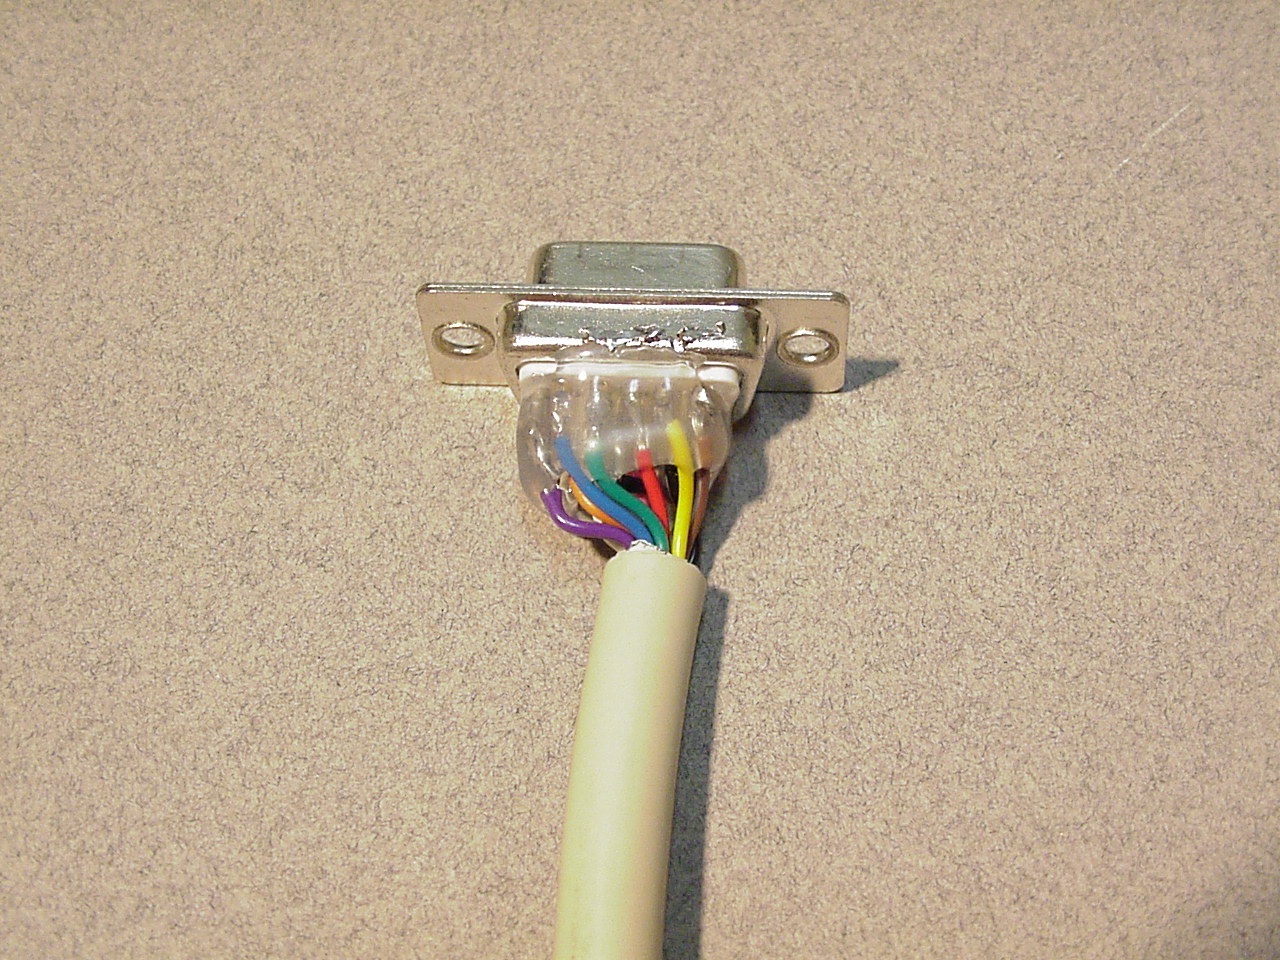
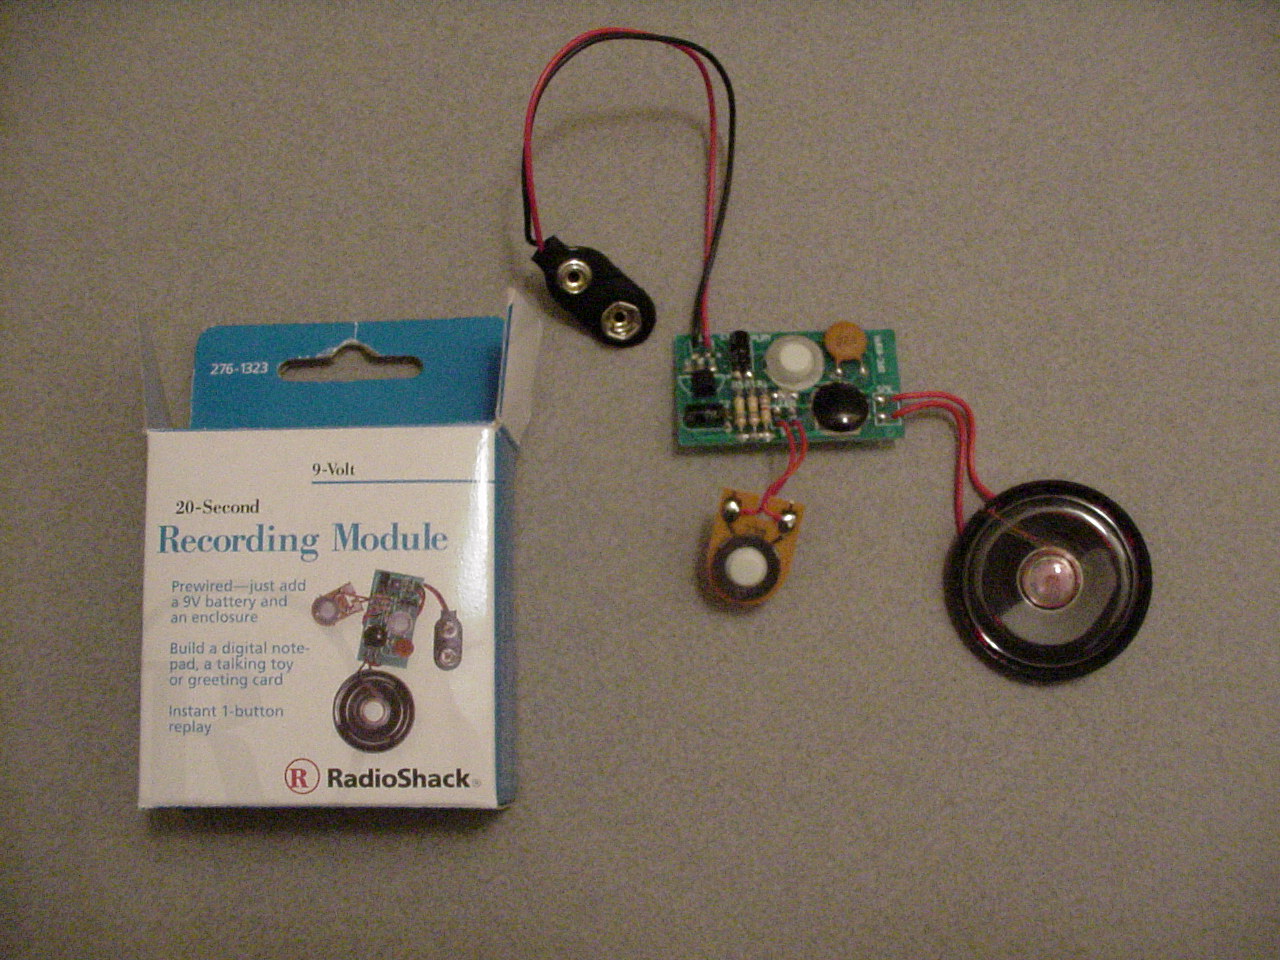
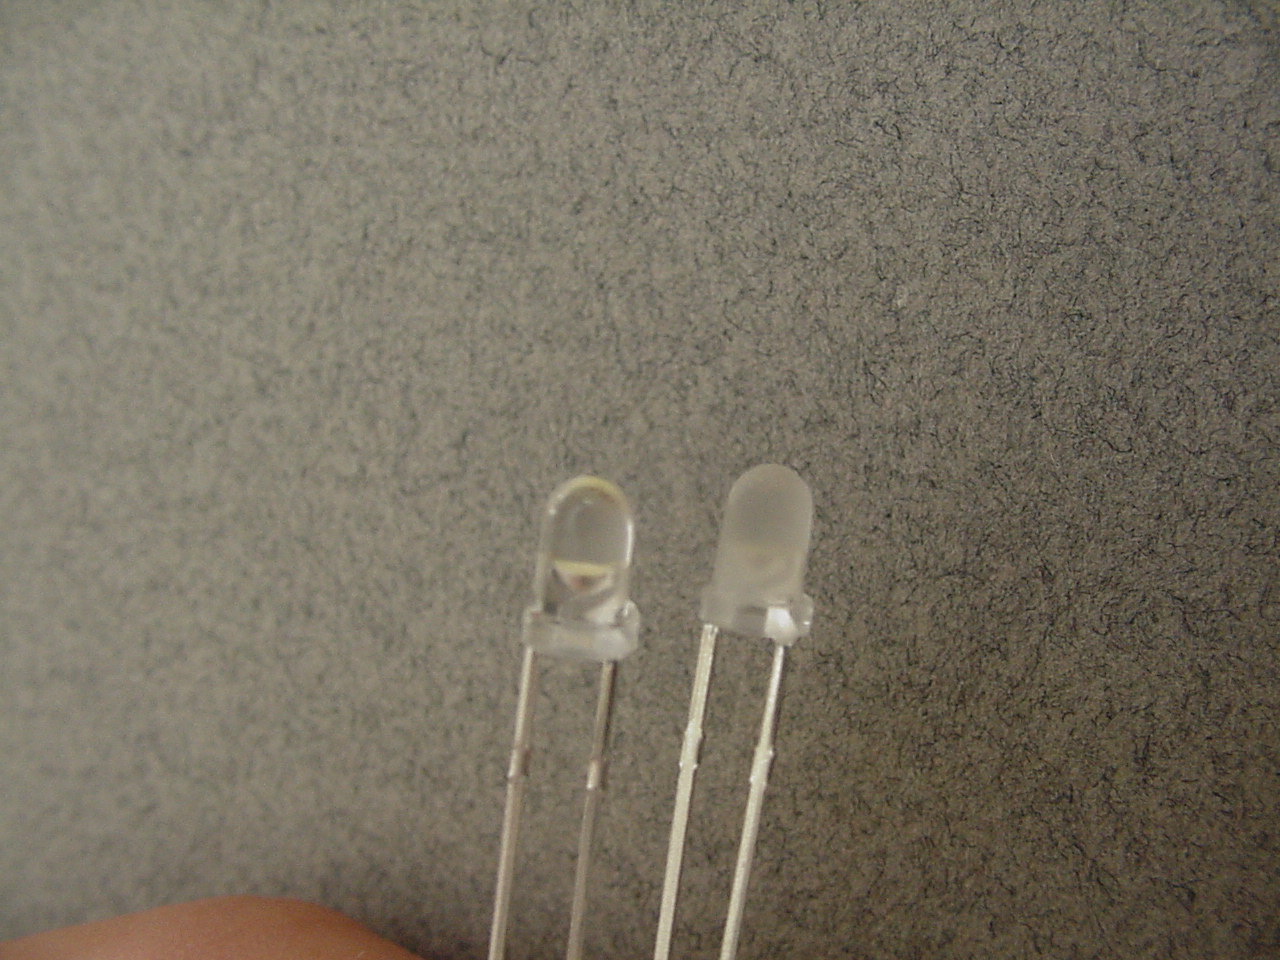
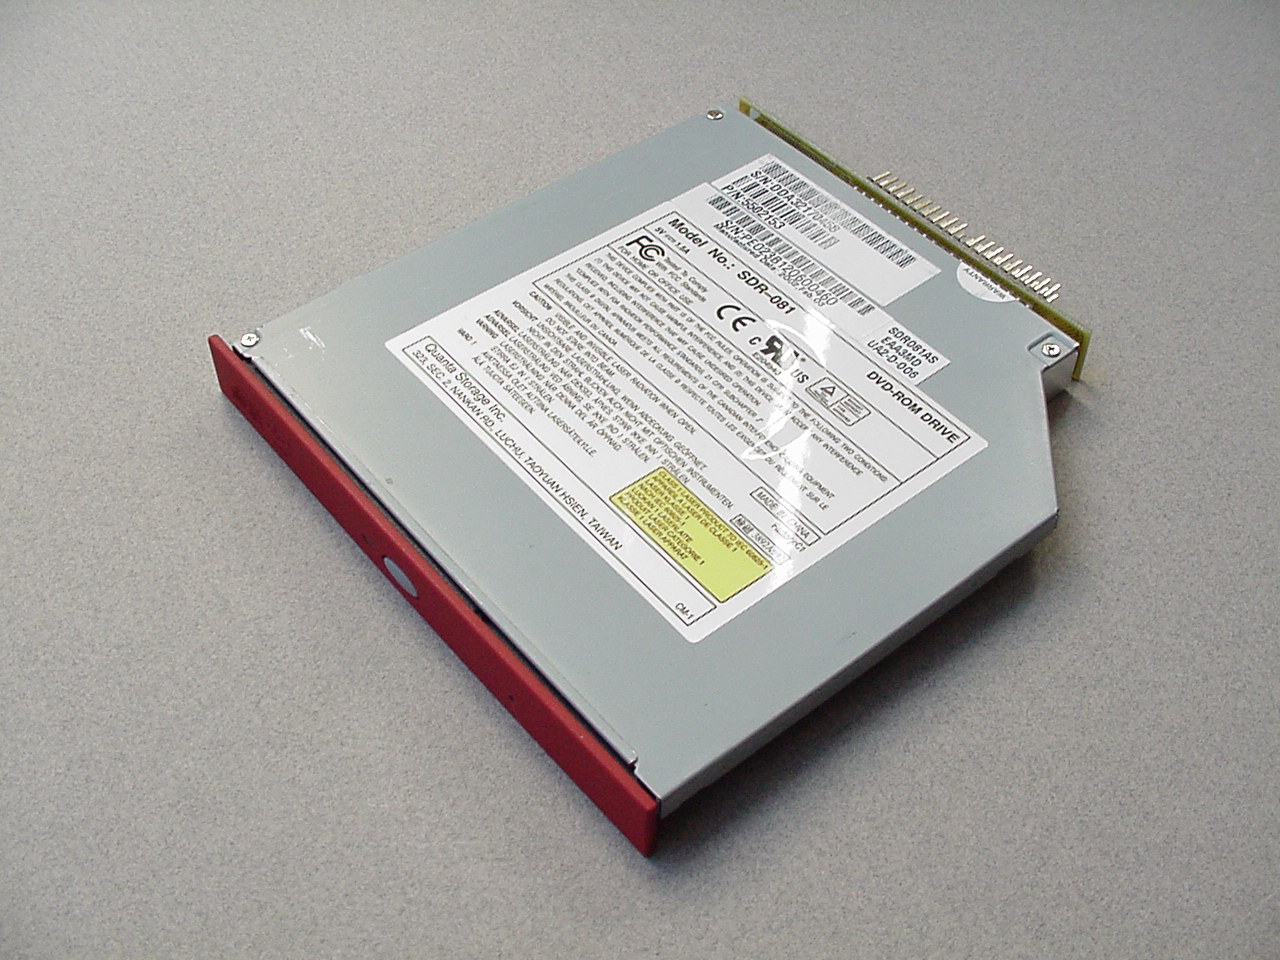
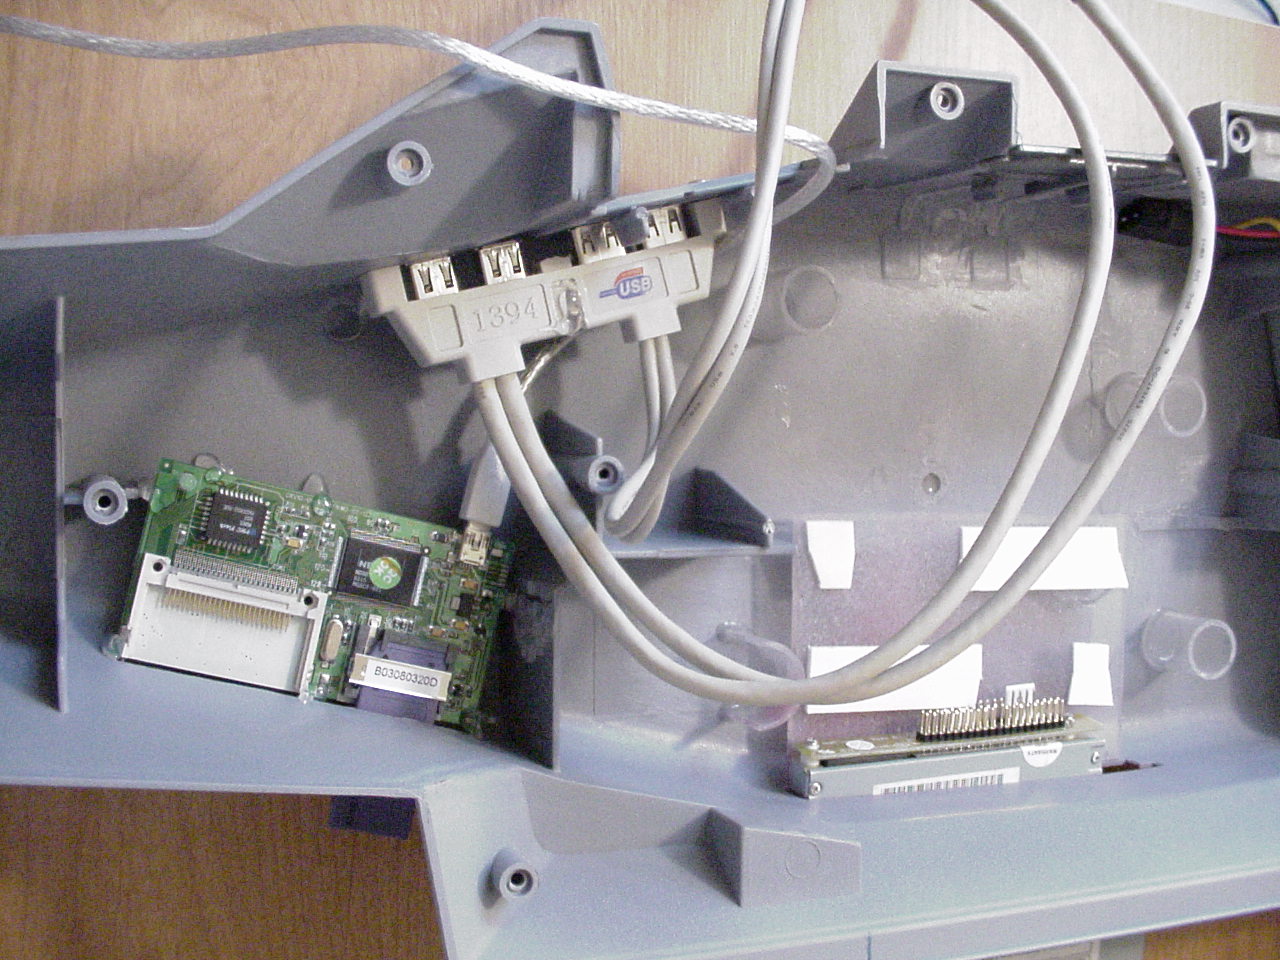
The majority of the electronics were the standard computer stuff. A motherboard, a DVD-ROM, a laptop hard drive (with desktop hard drive adapter), power supply, the usual. The only thing about them (besides fitting everything in the case in general) which wasn't standard was two things. First, most of the connectors from the motherboard required extension cables to be made to go the small distance between the port panel at the back of the mod and the motherboard. Also, I had to open the power supply to both move the power plug connector external to the power supply and to move the motherboard connector to exit the power supply at the top rather than the side (because the space was so tight inside the mod). There was another cool circuit I used. I got this complete 20-second digital voice recorder/player circuit from an electronics chain store for $20 dollars. I replaced the switches and adapted it to work with a 12 volt power source rather than a 9 volt battery like it came. Next, I recorded 20 seconds of the USA national anthem and mounted it to the underside of the deck of the carrier. Through holes I drilled in the deck, the mod can now play some audio. The button to re-record the audio is also accessible on the outside of mod, should I want to change the music to something else (Top Gun soundtrack, perhaps?). Lastly, there are the runway lights. I carefully dilled holes down the sides of the runway to place ultra-brite white LEDs along the runway. I also carefully sanded each LED so that the light was more evenly spread. These lights are turned on and off via a switch on the control tower. Also, I drilled holes down the center stripe of the runway for amber LEDs (also sanded for better light distribution). With these, I built a circuit that would light one LED at a time in a sequential landing pattern. Note that 2/3 of the LEDs are on the removable panel that makes the computer accessible. I used a bit of network cable as the wiring harness to carry the signals to that panel. Thus, the panel can be removed (even while the lights are running) without affecting the rest of the mod.
|
 |
 |
 |
 |
 |
 |
 |
 |
 |
 |
 |
 |
 |
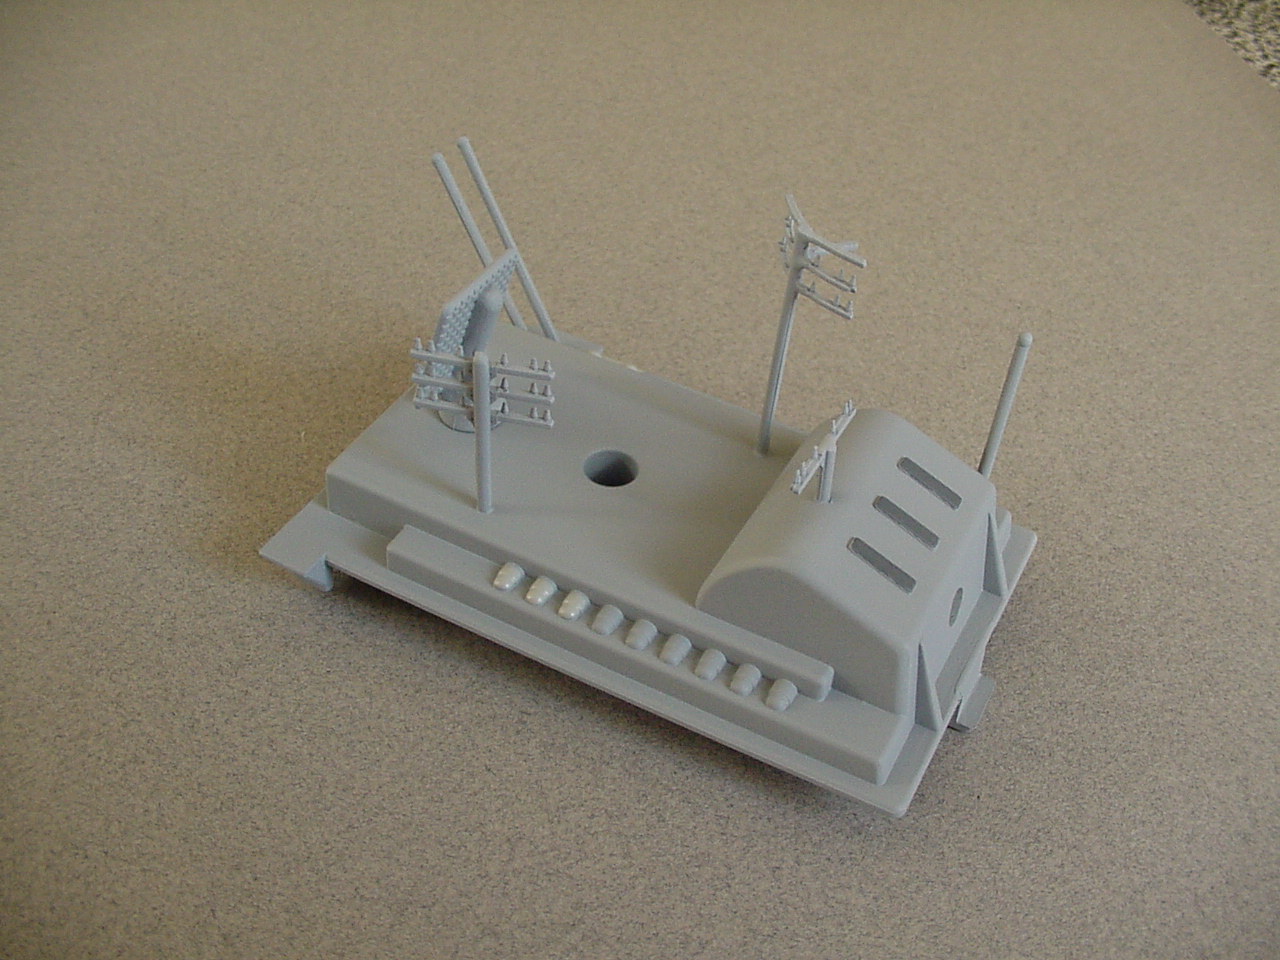
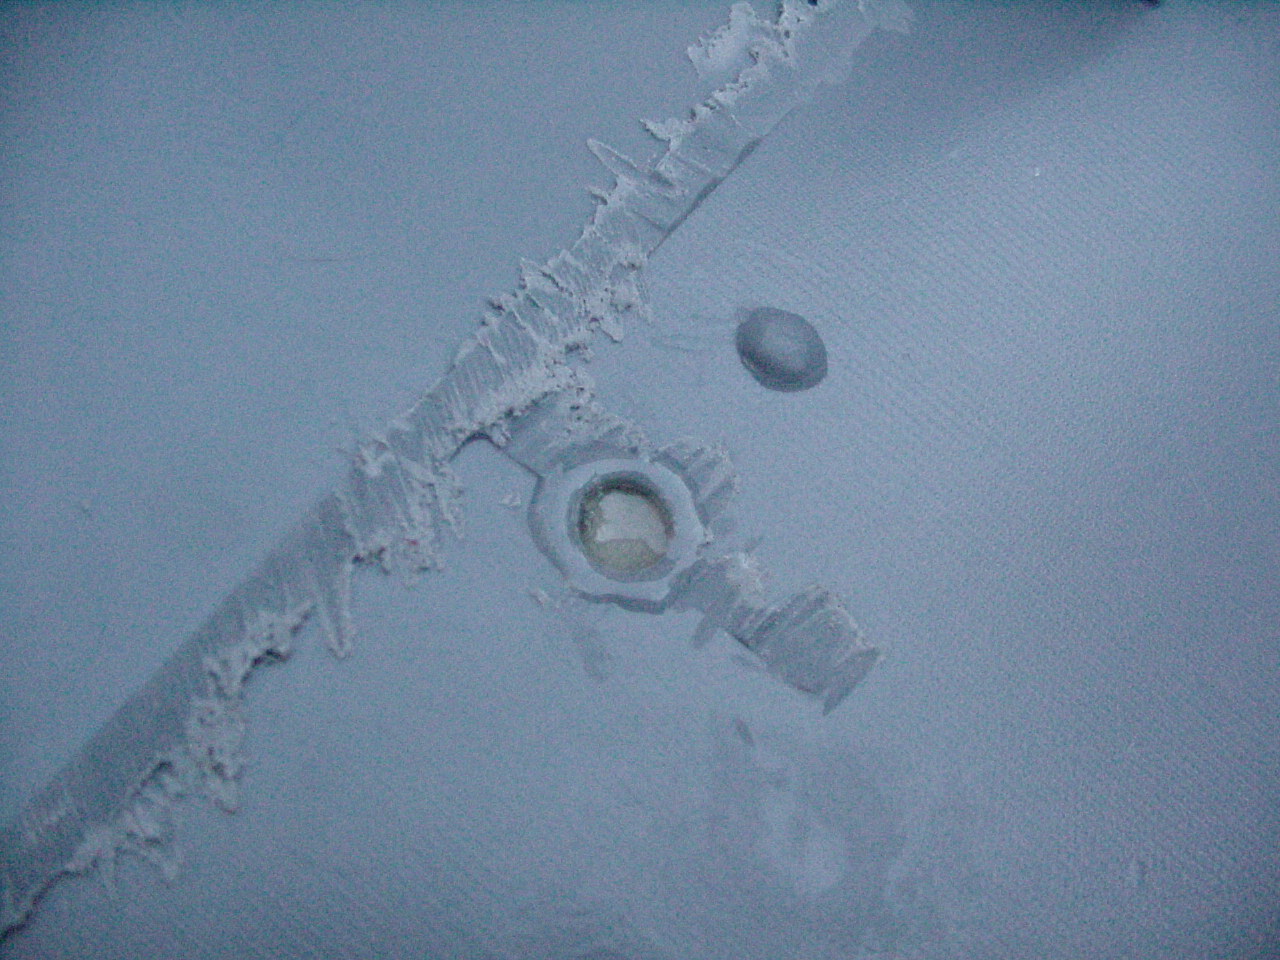
Details
|
Here are some miscellaneous pictures of pieces I thought were interesting. All
the extra antennas on top of the control tower are actually telephone pole
from a model railroad set (twisted, bent, cut, & painted). The air intake
and exhaust for the mod were actually plastic panels on the toy that were
already separate plastic pieces for some reason. I simply cut appropriate
holes in them, attached a mesh screen to the intake and attached two laptop
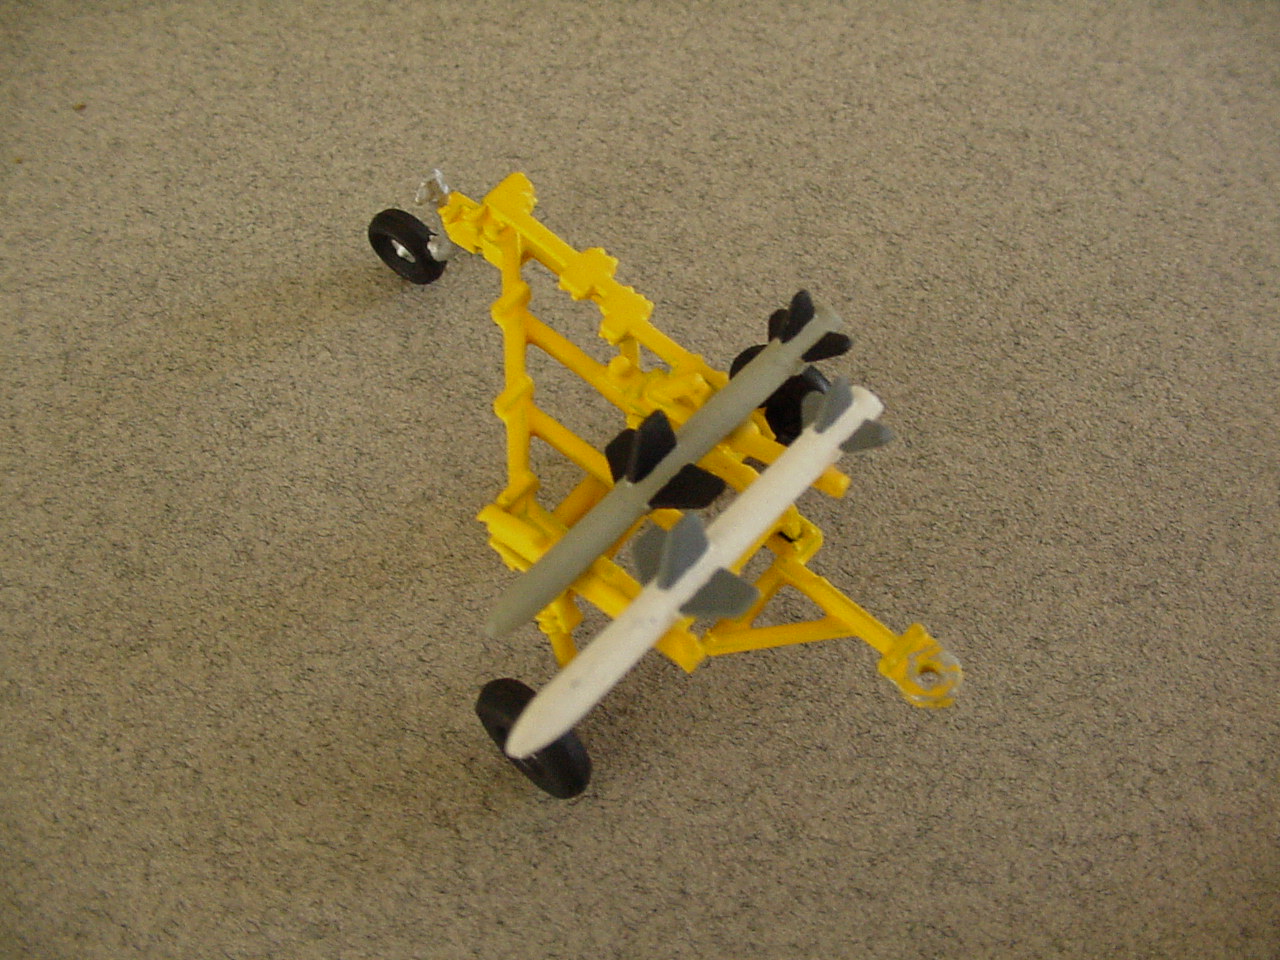
fans to the other. Lastly, the vehicles on the deck are also model railroad
accessories. Simply cut off a few tractor blades, add some missiles and some
paint.
|
 |
 |
 |
 |
Assembly
|
The final assembly was actually one of the easier tasks. By this point, I had
already measured every cable and every element of the case. I simply placed
everything in it's proper position and either glued / taped / screwed the items
together as they should be.
|
 |
 |
 |
 |
 |
 |
 |
 |
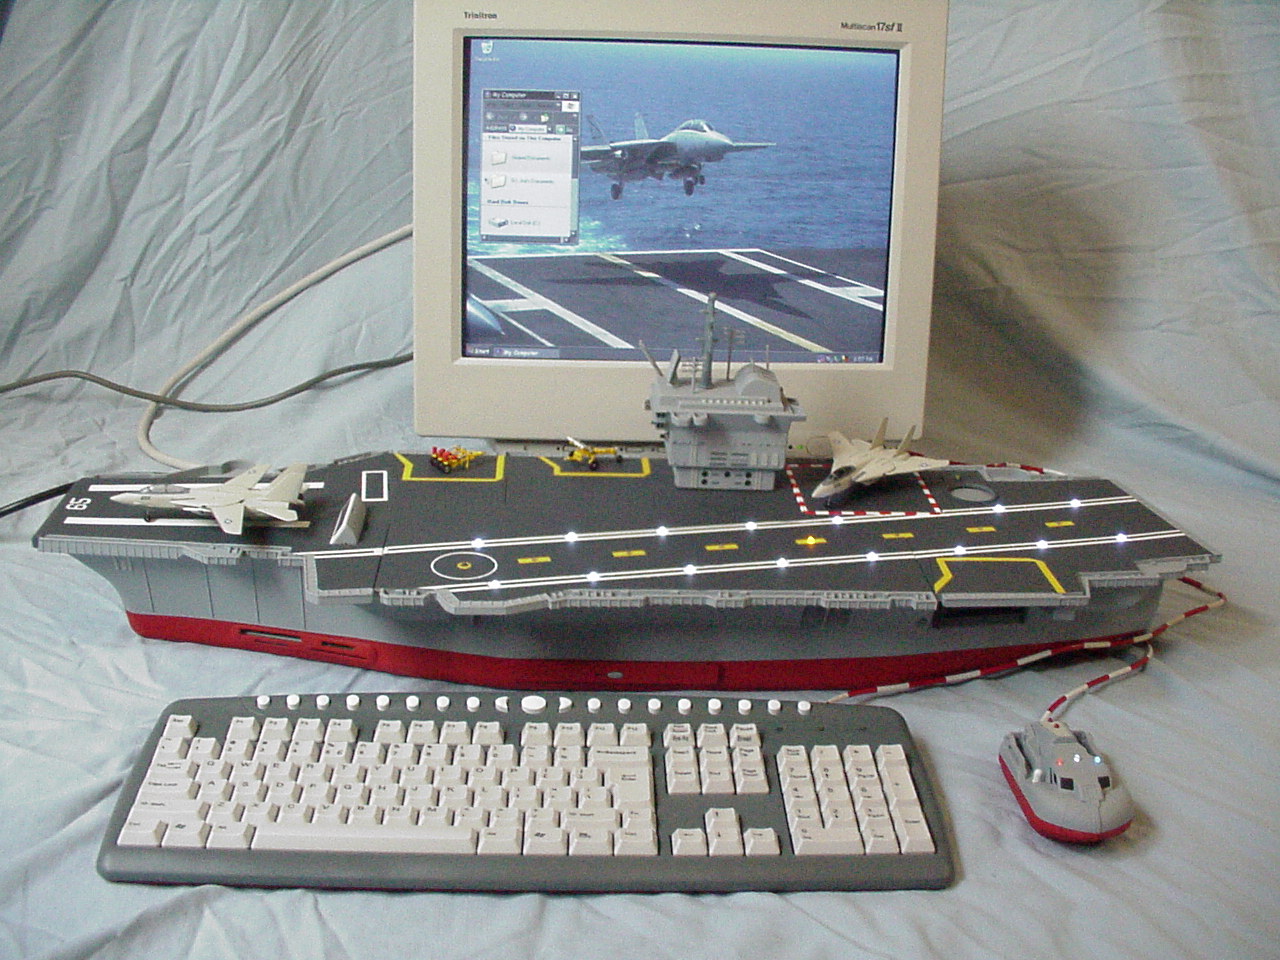
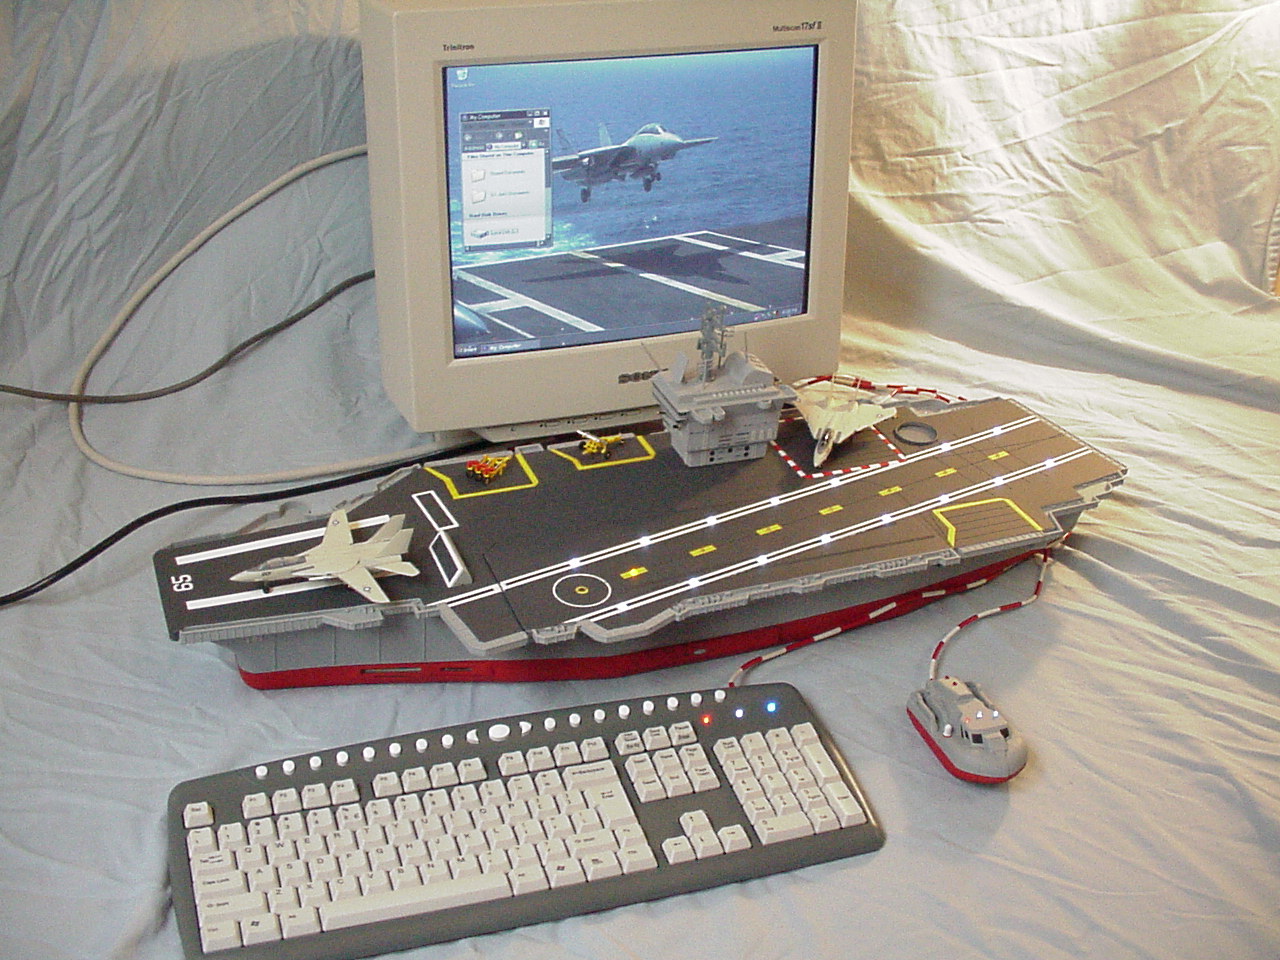
Final Result
|
 |
 |
 |
 |
 |
 |
 |
 |
 |
 |
|
The motherboard for this mod was provided by the great folks at VIA.
VIA has provided support for some of the best mods around the world
and that speaks volumes about their dedication to the community.
I'd
like the personally thank both Fiona Gatt and Ken Davies at VIA for their
support in getting this equipment.
dedication to the community.
|
Thanks!
Do not use or reproduce without permission
Last updated: 9-22-2007